
You can export a Framer site, keep the static files, and host them somewhere you control. If you need a plain HTML/CSS/JS copy of a Framer project, ExFlow is built for that job.
This guide shows the basics: what to export, what to check before you publish, and how to avoid the common mistakes that leave files missing or pages broken.
1. Decide What You Need From The Export
Start with the real goal. If you only need a static copy for hosting, you usually want the full site export, not a partial download.
Use ExFlow when you want to:
- Download a Framer site by URL.
- Export HTML pages with CSS, JavaScript, images, and media.
- Remove the “Made with Framer” badge.
- Add custom
script.jsorstyle.cssfiles. - Sync the result to Git, S3, or FTP.
If your site depends on a specific animation, interactive block, or asset, check that it is still present after export. Static export is only useful if the output matches the parts of the site you care about.
2. Enter The Framer URL In ExFlow
Open ExFlow.site and paste the Framer site URL into the URL field. Keep the address exact. If the site has a custom domain, use the live public URL you want to export.
When the export is ready, you should see files for the site pages and assets instead of a single page snapshot. That is the point where the export becomes reusable on another host.
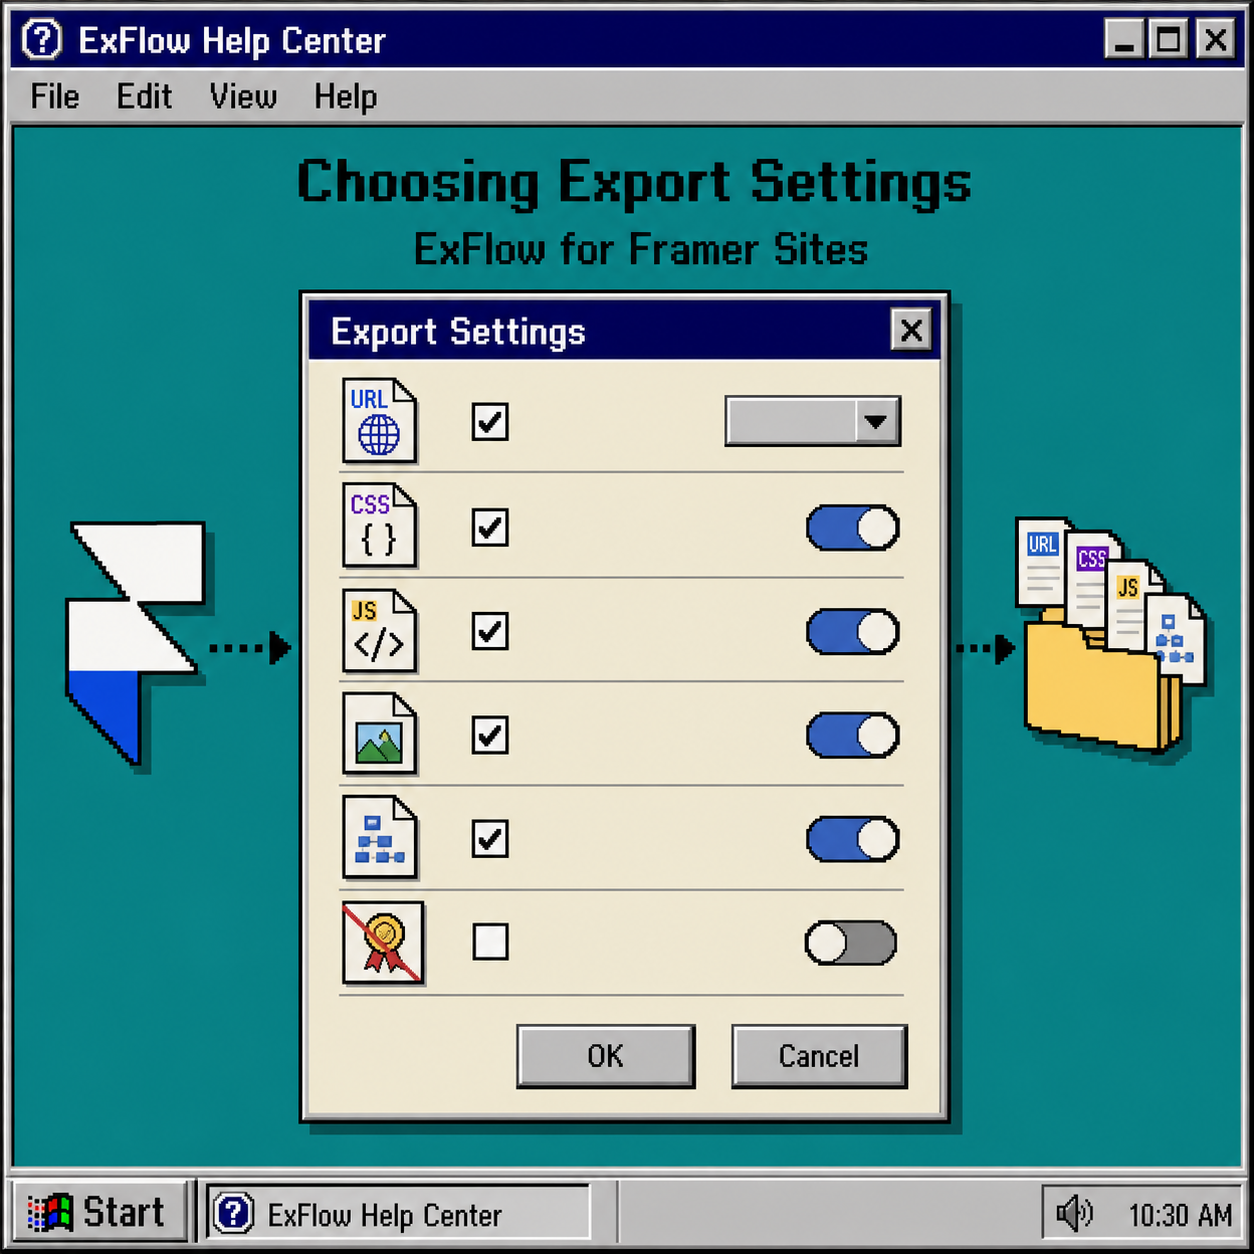
3. Choose The Export Settings Carefully
For most Framer exports, the safest setup is the one that keeps the site complete and easy to serve later.
Check these settings first:
- Export CSS files.
- Export JS files.
- Export images and media files.
- Export all pages.
- Keep the
.htmlextension on exported pages. - Remove the Framer badge if you need a cleaner public copy.
If you plan to make small edits after export, add your own style.css or script.js files before you host the site. That keeps custom changes separate from the generated files.
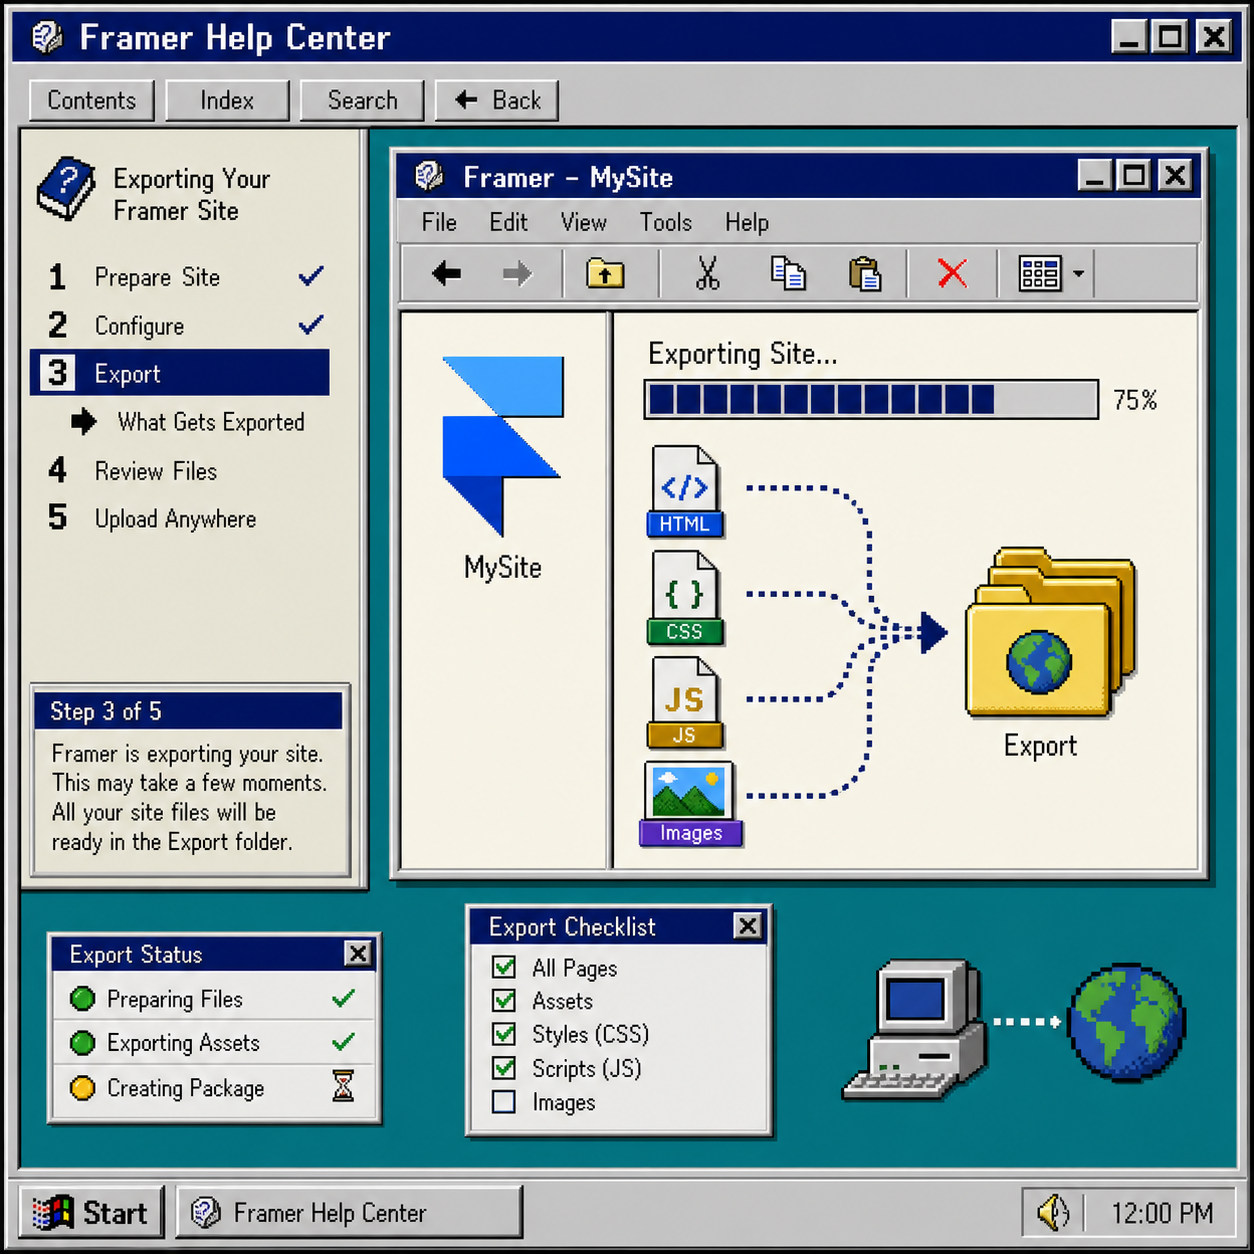
4. Export The Site And Check The Output
Run the export and inspect the result before you publish anything.
Look for these things:
- Each page has the correct name and extension.
- Images and media files are present in the output.
- CSS and JS files are included where expected.
- The homepage opens correctly from the exported folder.
- Internal links still point to the right pages.
If the site is large, treat the first export as a verification pass. You want to catch missing assets before you connect the folder to GitLab Pages or another host.
5. Host The Static Files Somewhere You Control
Once the export is clean, move the files to your host of choice. ExFlow supports Git, S3, FTP, and hosting on its own servers, so you can match the workflow to the way you already deploy sites.
A simple GitLab Pages path looks like this:
- Sync the exported files to a Git repository.
- Push the repo to GitLab.
- Configure the Pages job or static site setup.
- Confirm the published URL loads the exported homepage.
If you are replacing a Framer-hosted site, this is the point where you verify your custom domain, navigation, and asset paths one more time. Static hosting is simple, but only if the export is complete.
Troubleshooting
If the export looks wrong, start here:
- Missing images usually mean the asset export settings were too narrow.
- Broken links usually mean a page was not included in the export.
- Missing styles usually mean CSS files were not exported or were moved after the fact.
- A blank or partial page usually means the browser is loading the wrong file path.
- A custom script that worked in Framer may need to be adjusted after export.
When in doubt, compare the exported folder to the live site page by page. That is faster than guessing which setting caused the problem.
Related Guides
If you are comparing Framer to other export workflows, these ExFlow guides are useful:
- How to Download a Webflow Site and Host It Yourself with ExFlow
- How to Export a Webflow Site to Static HTML with ExFlow
Conclusion
A Framer export only becomes useful when the static files are complete and easy to host. ExFlow gives you a direct path from live Framer URL to downloadable site files, then to Git, S3, FTP, or hosted deployment.
If you want a self-hosted Framer copy, export the site, verify the assets, and publish the static folder next.