I used to treat every Shopify product photo the same: open the file, make it prettier, and hope it sold better.
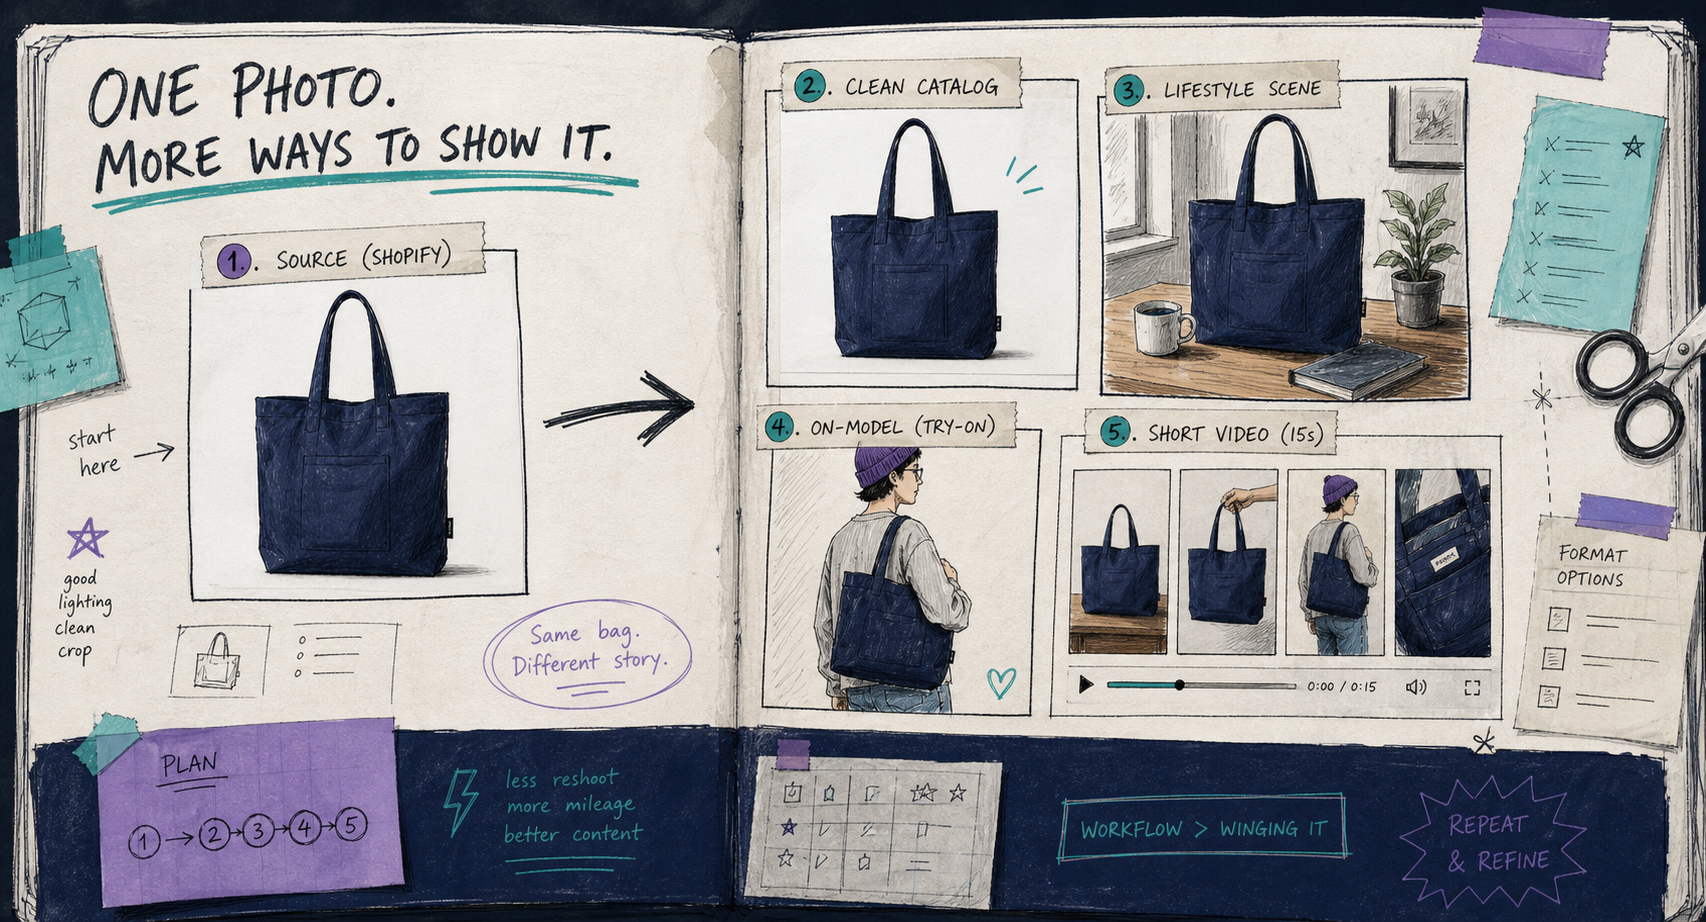
That was the wrong order. The useful question is not “what edit looks coolest?” It is “what job does this image need to do?” Once I started thinking that way, Supra AI Photo Studio became a lot more practical. It gives me one place to decide whether a photo needs cleanup, object placement, an AI try-on, or a short video instead of a full retouching chain.
If you want the app first, start with the Supra AI Photo Studio landing page or the Shopify App Store listing. The feature set is broad enough to cover fashion, accessories, home decor, cosmetics, and a lot of the boring catalog work in between.
Start With The Job, Not The Effect
My rule is simple: if the edit does not change how the product can be understood, compared, or purchased, I usually do less.
Here is the decision I make before I touch anything:
| What the photo needs to solve | Best first move | Why I reach for it |
|---|---|---|
| The image is soft, messy, or inconsistent | Background removal, upscale, auto-enhance | Makes the base photo usable without changing the product story |
| The product needs context in a room or setting | Object placement | Gives the item a believable environment without a full shoot |
| The product is apparel, jewelry, or accessories | AI try-on | Helps shoppers understand fit, scale, and styling faster |
| The ad needs motion, not just a still | UGC or B-roll video | Gives me a testable creative asset for social and paid ads |
That is also why I keep the broader no-shoot thinking close by. If you want the same idea from a workflow angle, How to Build a No-Shoot Shopify Photo Workflow That Still Looks Premium is the companion piece I would read next. For a system-level view, How I Build a Shopify Visual System From One Product Photo shows how the pieces fit together over time.
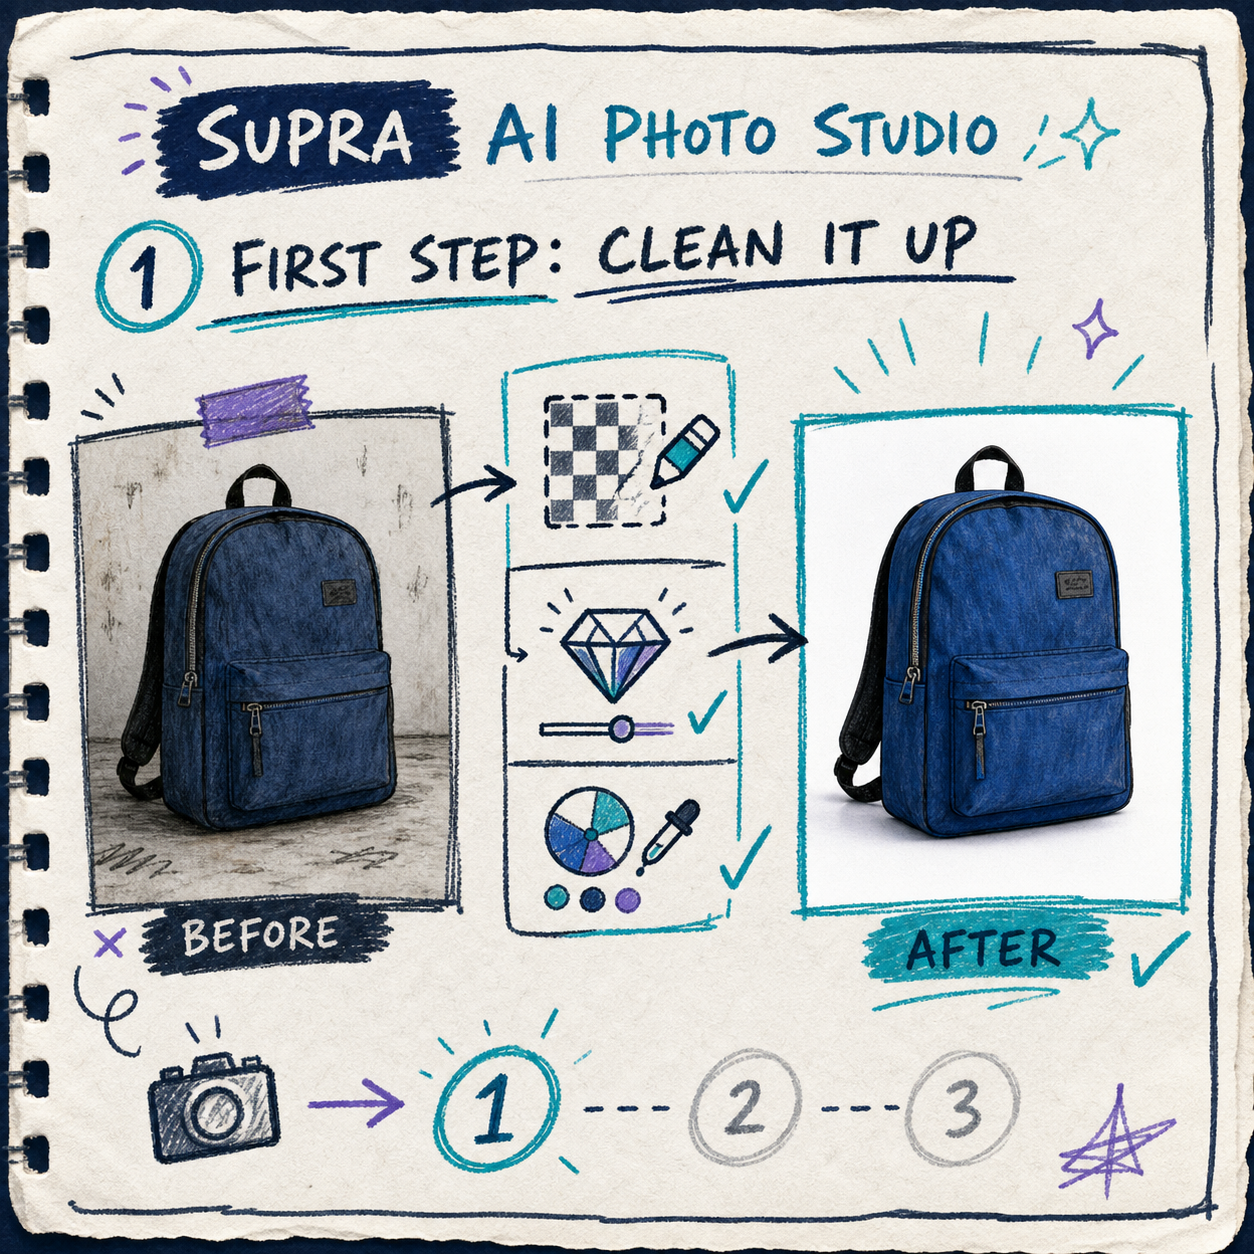
Clean Up First When The Source Is Weak
If the source photo is bad, I fix the source before I try to make it aspirational.
That means background removal, sharpening, color cleanup, and basic exposure correction come first. I do not want to build a lifestyle scene on top of a photo that is already fighting me. The point is not to make the image more dramatic. The point is to make it reliable at thumbnail size and believable when zoomed in.
This is the stage where Supra AI Photo Studio feels most like an operator tool instead of a novelty. It lets me keep the photo honest while still making it look finished. If the product page only needs a cleaner catalog image, I stop here. If the ad needs a stronger visual hook, I move on.
Use Context Only When It Helps The Sale
Object placement is the move I reach for when the product needs a setting to make sense.
A mug works better on a desk. A tote works better in a lifestyle scene. A skincare bottle often reads better on a bathroom counter than against a blank wall. The background should answer a question the shopper already has, not add noise.
That is why I like the decision-tree view of the workflow. It keeps me from forcing every SKU into the same treatment.

If you want more examples of turning one source image into multiple outputs, How I Turn Plain Product Photos Into Studio Shots, Try-Ons, and Ads and How to Turn One Product Photo Into Listings, Lifestyle Shots, and Ads both follow the same logic from slightly different angles.
Try-Ons Are For Fit, Not Decoration
I only use a try-on when the product really benefits from body context.
For apparel and accessories, the question is rarely “Can this look pretty?” The better question is “Will this help the buyer understand how it sits, drapes, or scales?” Try-ons are useful because they turn an abstract product shot into something closer to a purchase decision.
That does not mean every item should be on a model. If the product is not about fit, I usually leave it alone and spend the effort elsewhere.
In practice, I try to keep the try-on clean and direct:
- Pick a model that matches the product category and the store’s tone
- Keep the pose simple enough that the item still stays readable
- Watch the silhouette, not just the background
- Check whether the product still feels like the same SKU
The same caution applies when I compare a try-on to a catalog image or a lifestyle shot. The best output is the one that helps the shopper make a decision fastest, not the one that shows off the most AI tricks.
Save Motion For Ads That Need It
I treat video as a separate decision, not the automatic next step.
If I need a still for the product page, a still is enough. If I need a paid social test or a short scroll-stopping asset, then UGC or B-roll starts to make sense. That is where the app’s video options are useful: they let me build motion from the same source image instead of starting from a new creative brief.
The nice part is that the workflow stays in the same place. I can make the still, decide whether the still is enough, and only then branch into motion if the channel asks for it.
The idea is similar to the way I think about other photo workflows: How to Keep Shopify Product Photos Consistent Across Your Catalog is basically the control problem, while How I Build a Shopify Visual System From One Product Photo is the repeatability problem.
Keep The Review Step Short And Boring
The review step is where the process either stays useful or becomes a time sink.
My checklist is short:
- Does the product still look like the same product?
- Is the background helping or distracting?
- Does the color still feel like the brand?
- Would I publish this to the storefront without explaining it?
- If this image were a tiny thumbnail, would it still read?
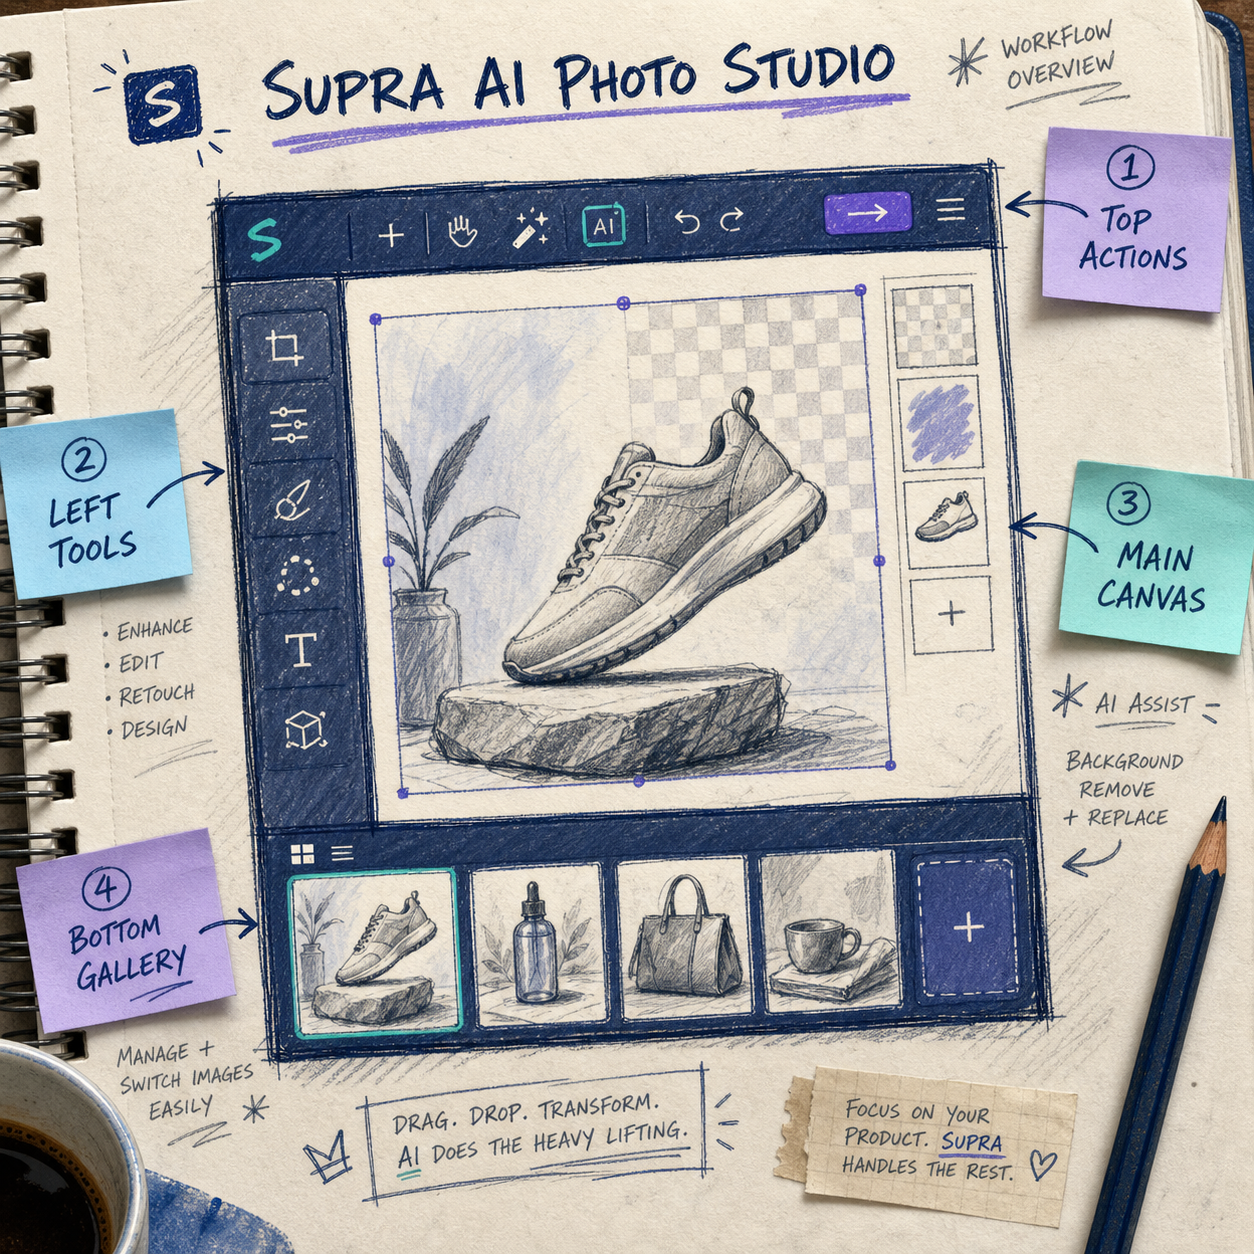
That is where I care most about the editor layout itself. The point is to keep the source image, the tools, the canvas, and the gallery close enough that I can move quickly without losing track of what changed.
If you want to see the product in motion, the demo trailer is a quick way to understand the pacing of the workflow. I also like opening the app store listing before I start, because it keeps the feature set grounded in one place instead of scattered across guesses.
The Short Version
I do not start by asking which AI effect looks best. I start by asking which output solves the channel problem.
That usually means cleanup for weak source photos, object placement for context, try-ons for fit, and motion only when the ad needs it. Supra AI Photo Studio is useful because it keeps those choices inside one workflow instead of making me jump between separate tools.
If you want to try the same approach, start with one SKU, one source image, and one goal. Open the landing page, check the Shopify App Store listing, and make the next photo do one job well before you ask it to do three.