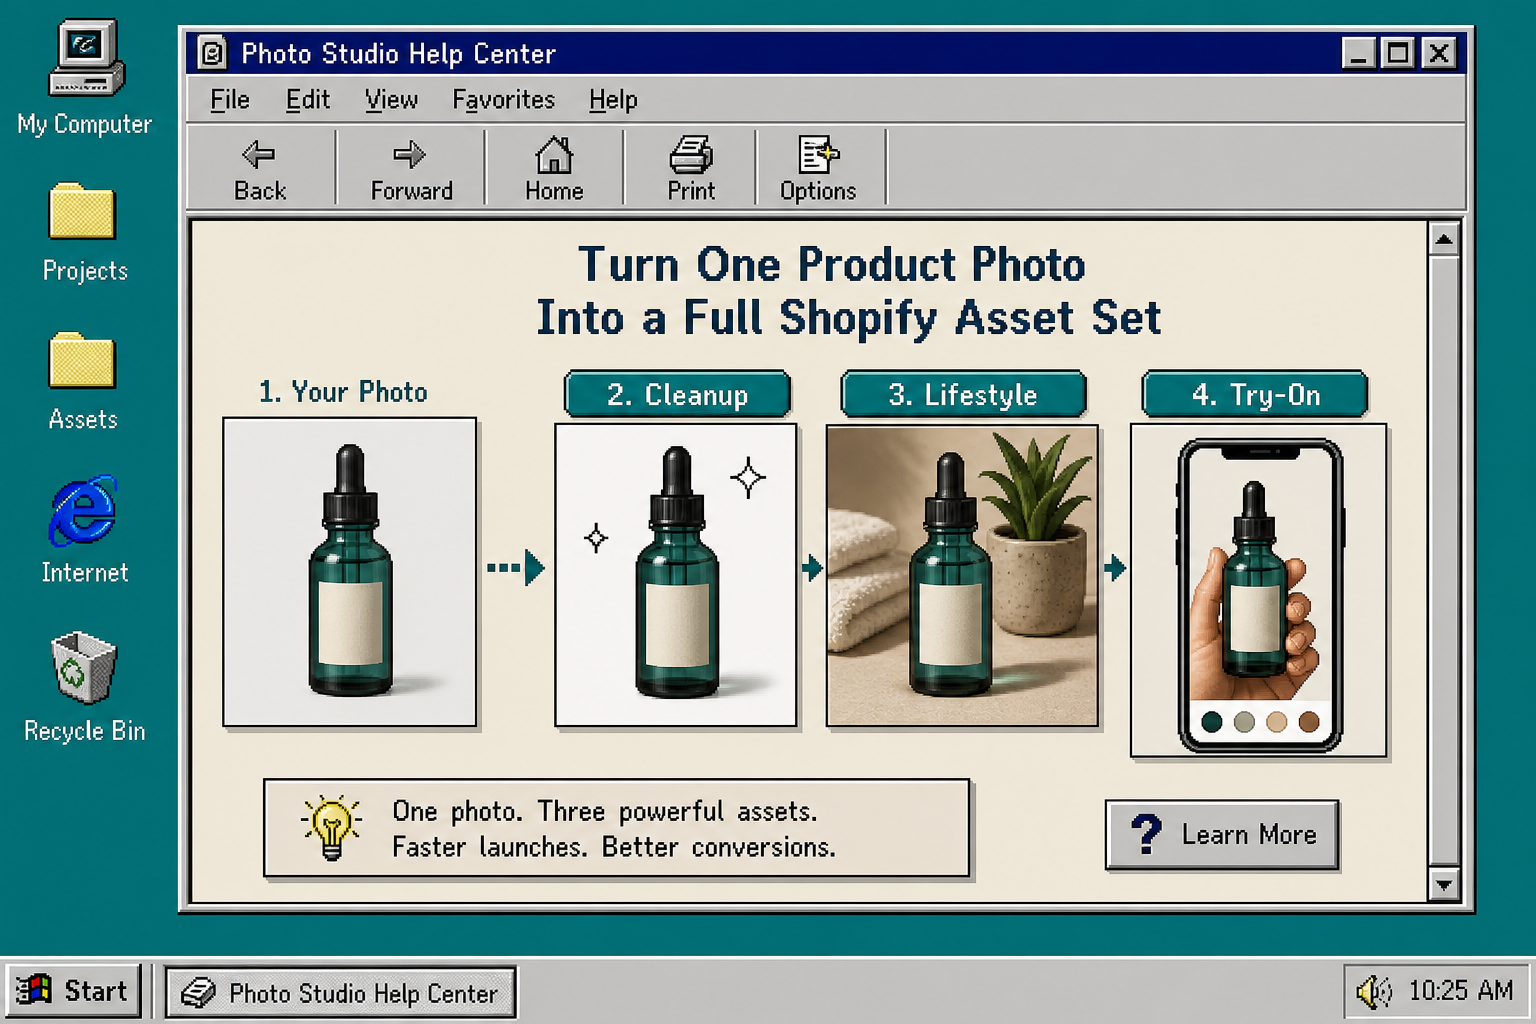
How to Turn One Product Photo Into a Full Shopify Image Set
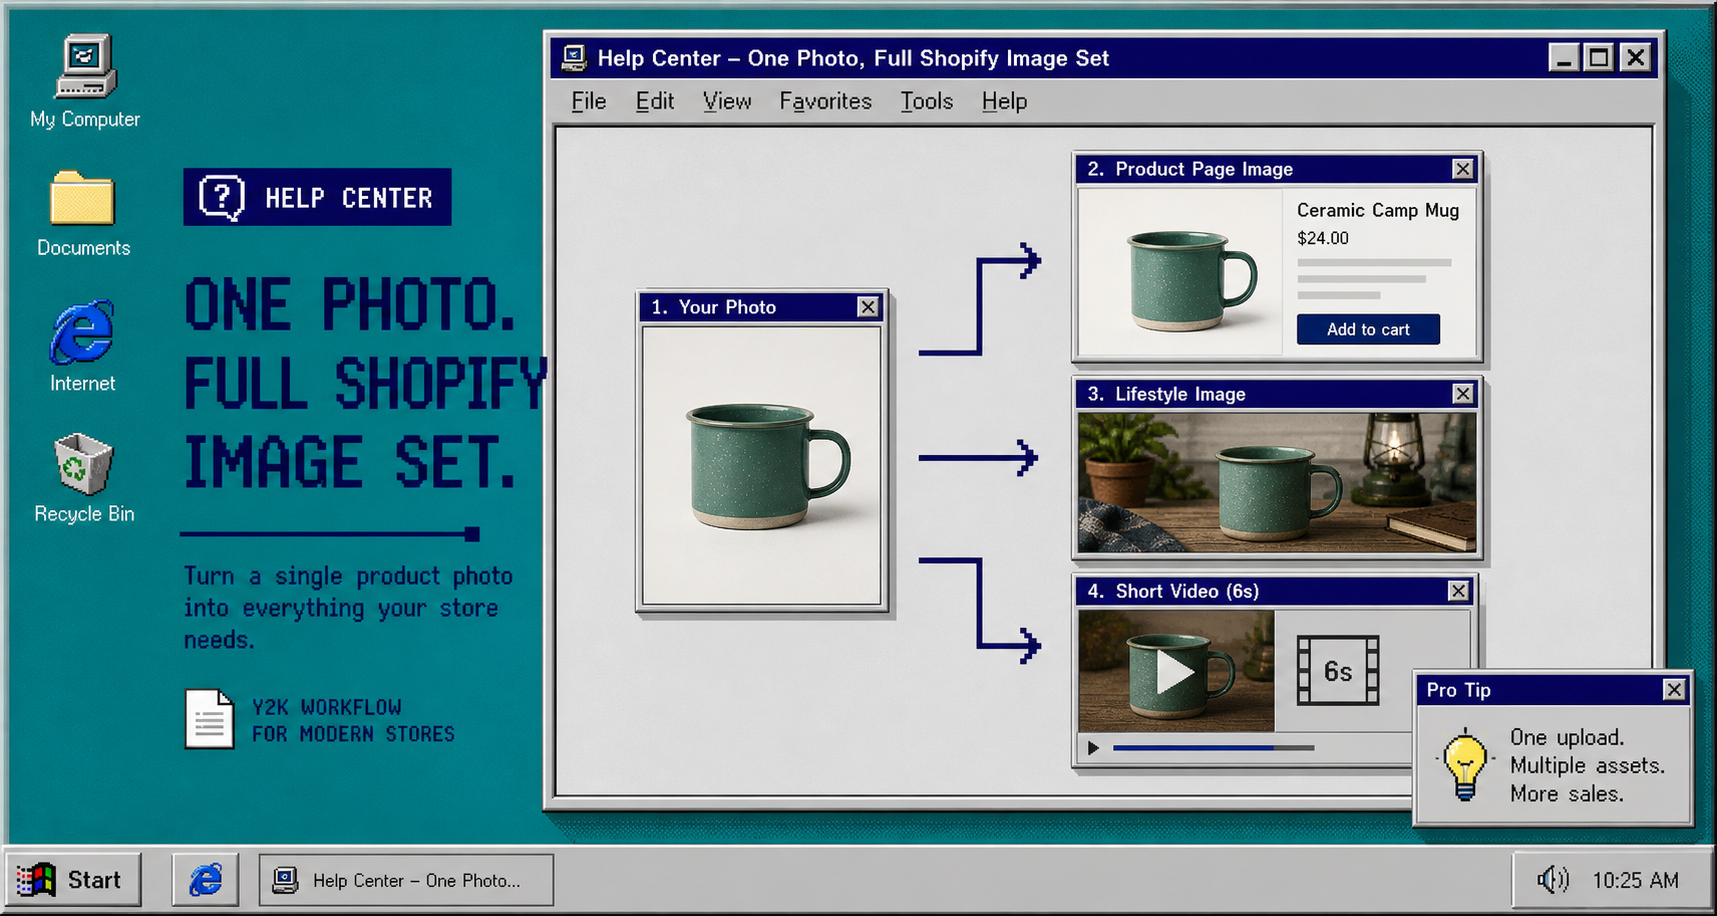
If you already have one decent product photo, you do not need a full studio shoot to get more useful Shopify assets out of it. You can turn that single image into a cleaner product-page shot, a lifestyle scene, a try-on visual, and even a short product video.
That is exactly the kind of workflow Supra AI Photo Studio is built for. Its landing page shows the core tools clearly: background removal, upscaling, auto enhance, object placement, AI try-on, UGC videos, b-roll videos, and mockup embedding. The app is meant to help merchants get more mileage out of the photos they already have.
What You Need Before You Start
You only need three things:
- One source photo that already looks reasonably sharp.
- The product open in Supra AI Photo Studio inside Shopify Admin.
- A rough decision about where the image will be used: product page, collection page, ad, email, or social.
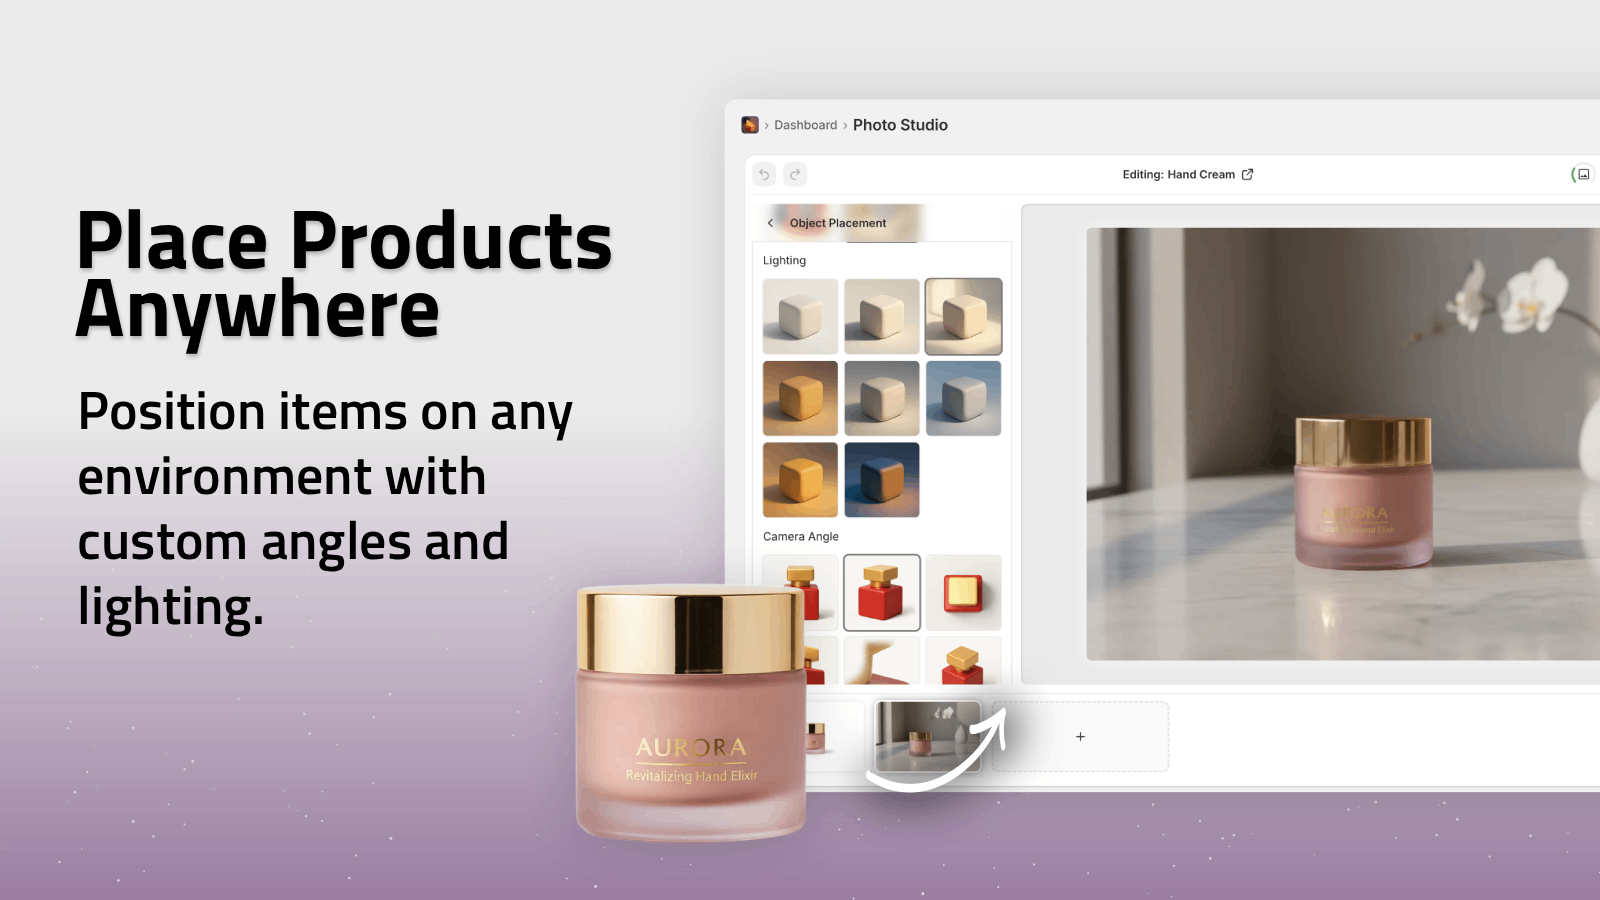
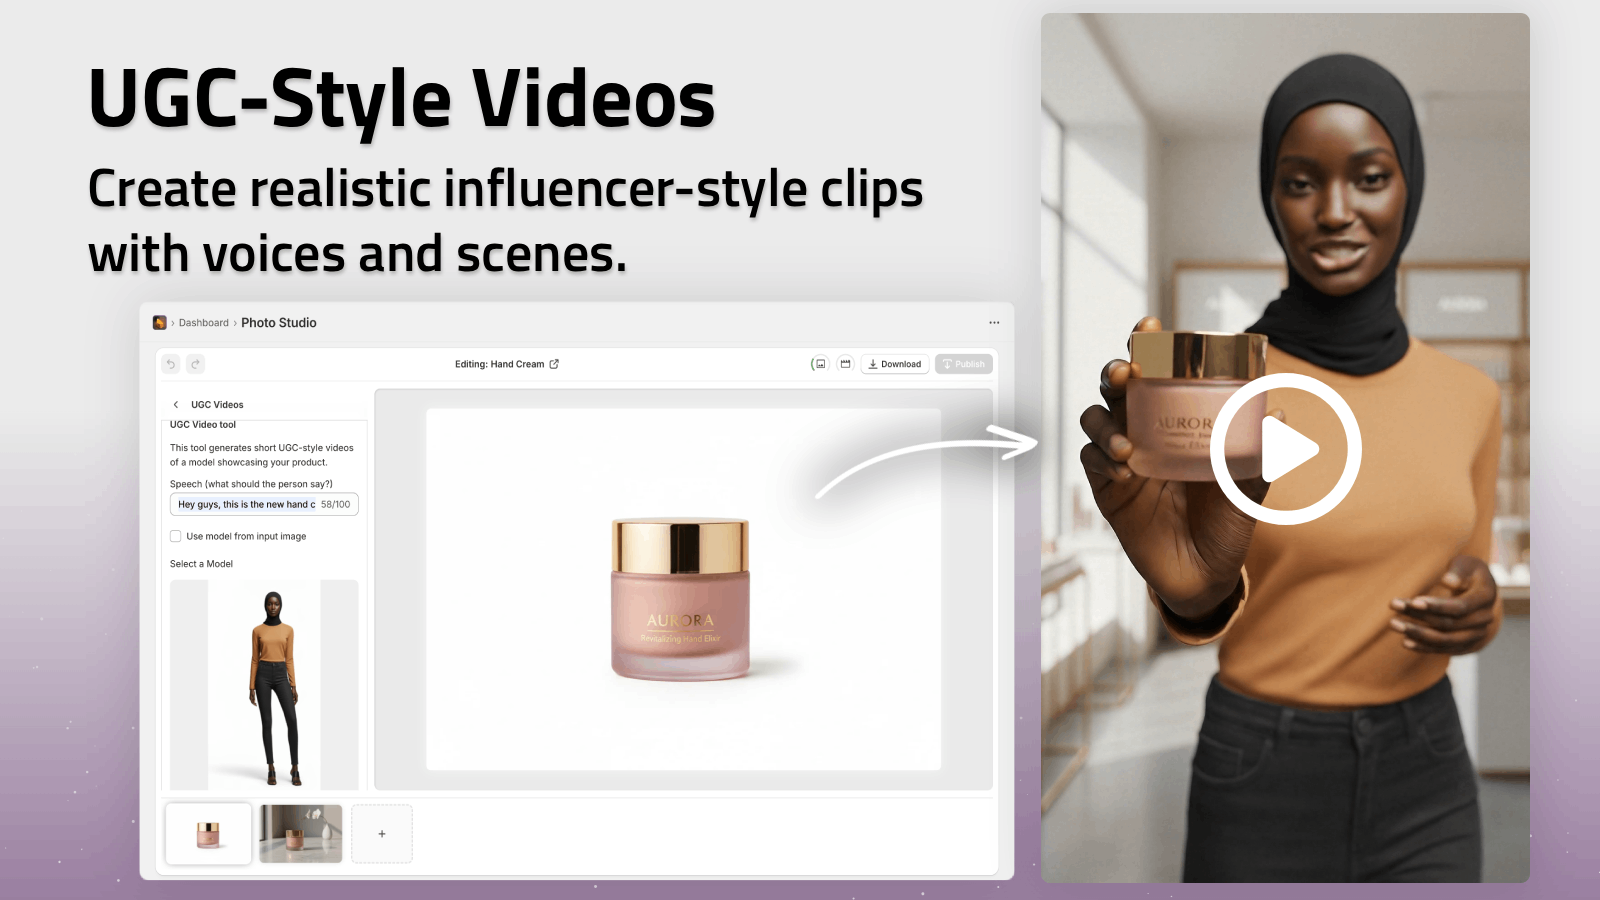
If you want a quick preview of the app’s visual outputs, the listing also shows the main directions clearly: Realistic Model Tryon, Place products anywhere, and UGC-style videos.
1. Start With The Best Source Photo
Upload the cleanest version of your product photo first. Do not try to force a weak image into a polished result. A better source shot will always make the rest of the workflow easier.
At this stage, I would use the editor to check three things:
- Is the product already centered well?
- Is the lighting good enough to preserve detail?
- Is the image sharp enough to clean up without losing edges?
If the answer is yes, you are in the right place. The app includes background removal, upscaling, and auto enhance, so you can make the source more usable before you add context.
The main point here is not perfection. It is getting to a source image that can support multiple versions without falling apart.
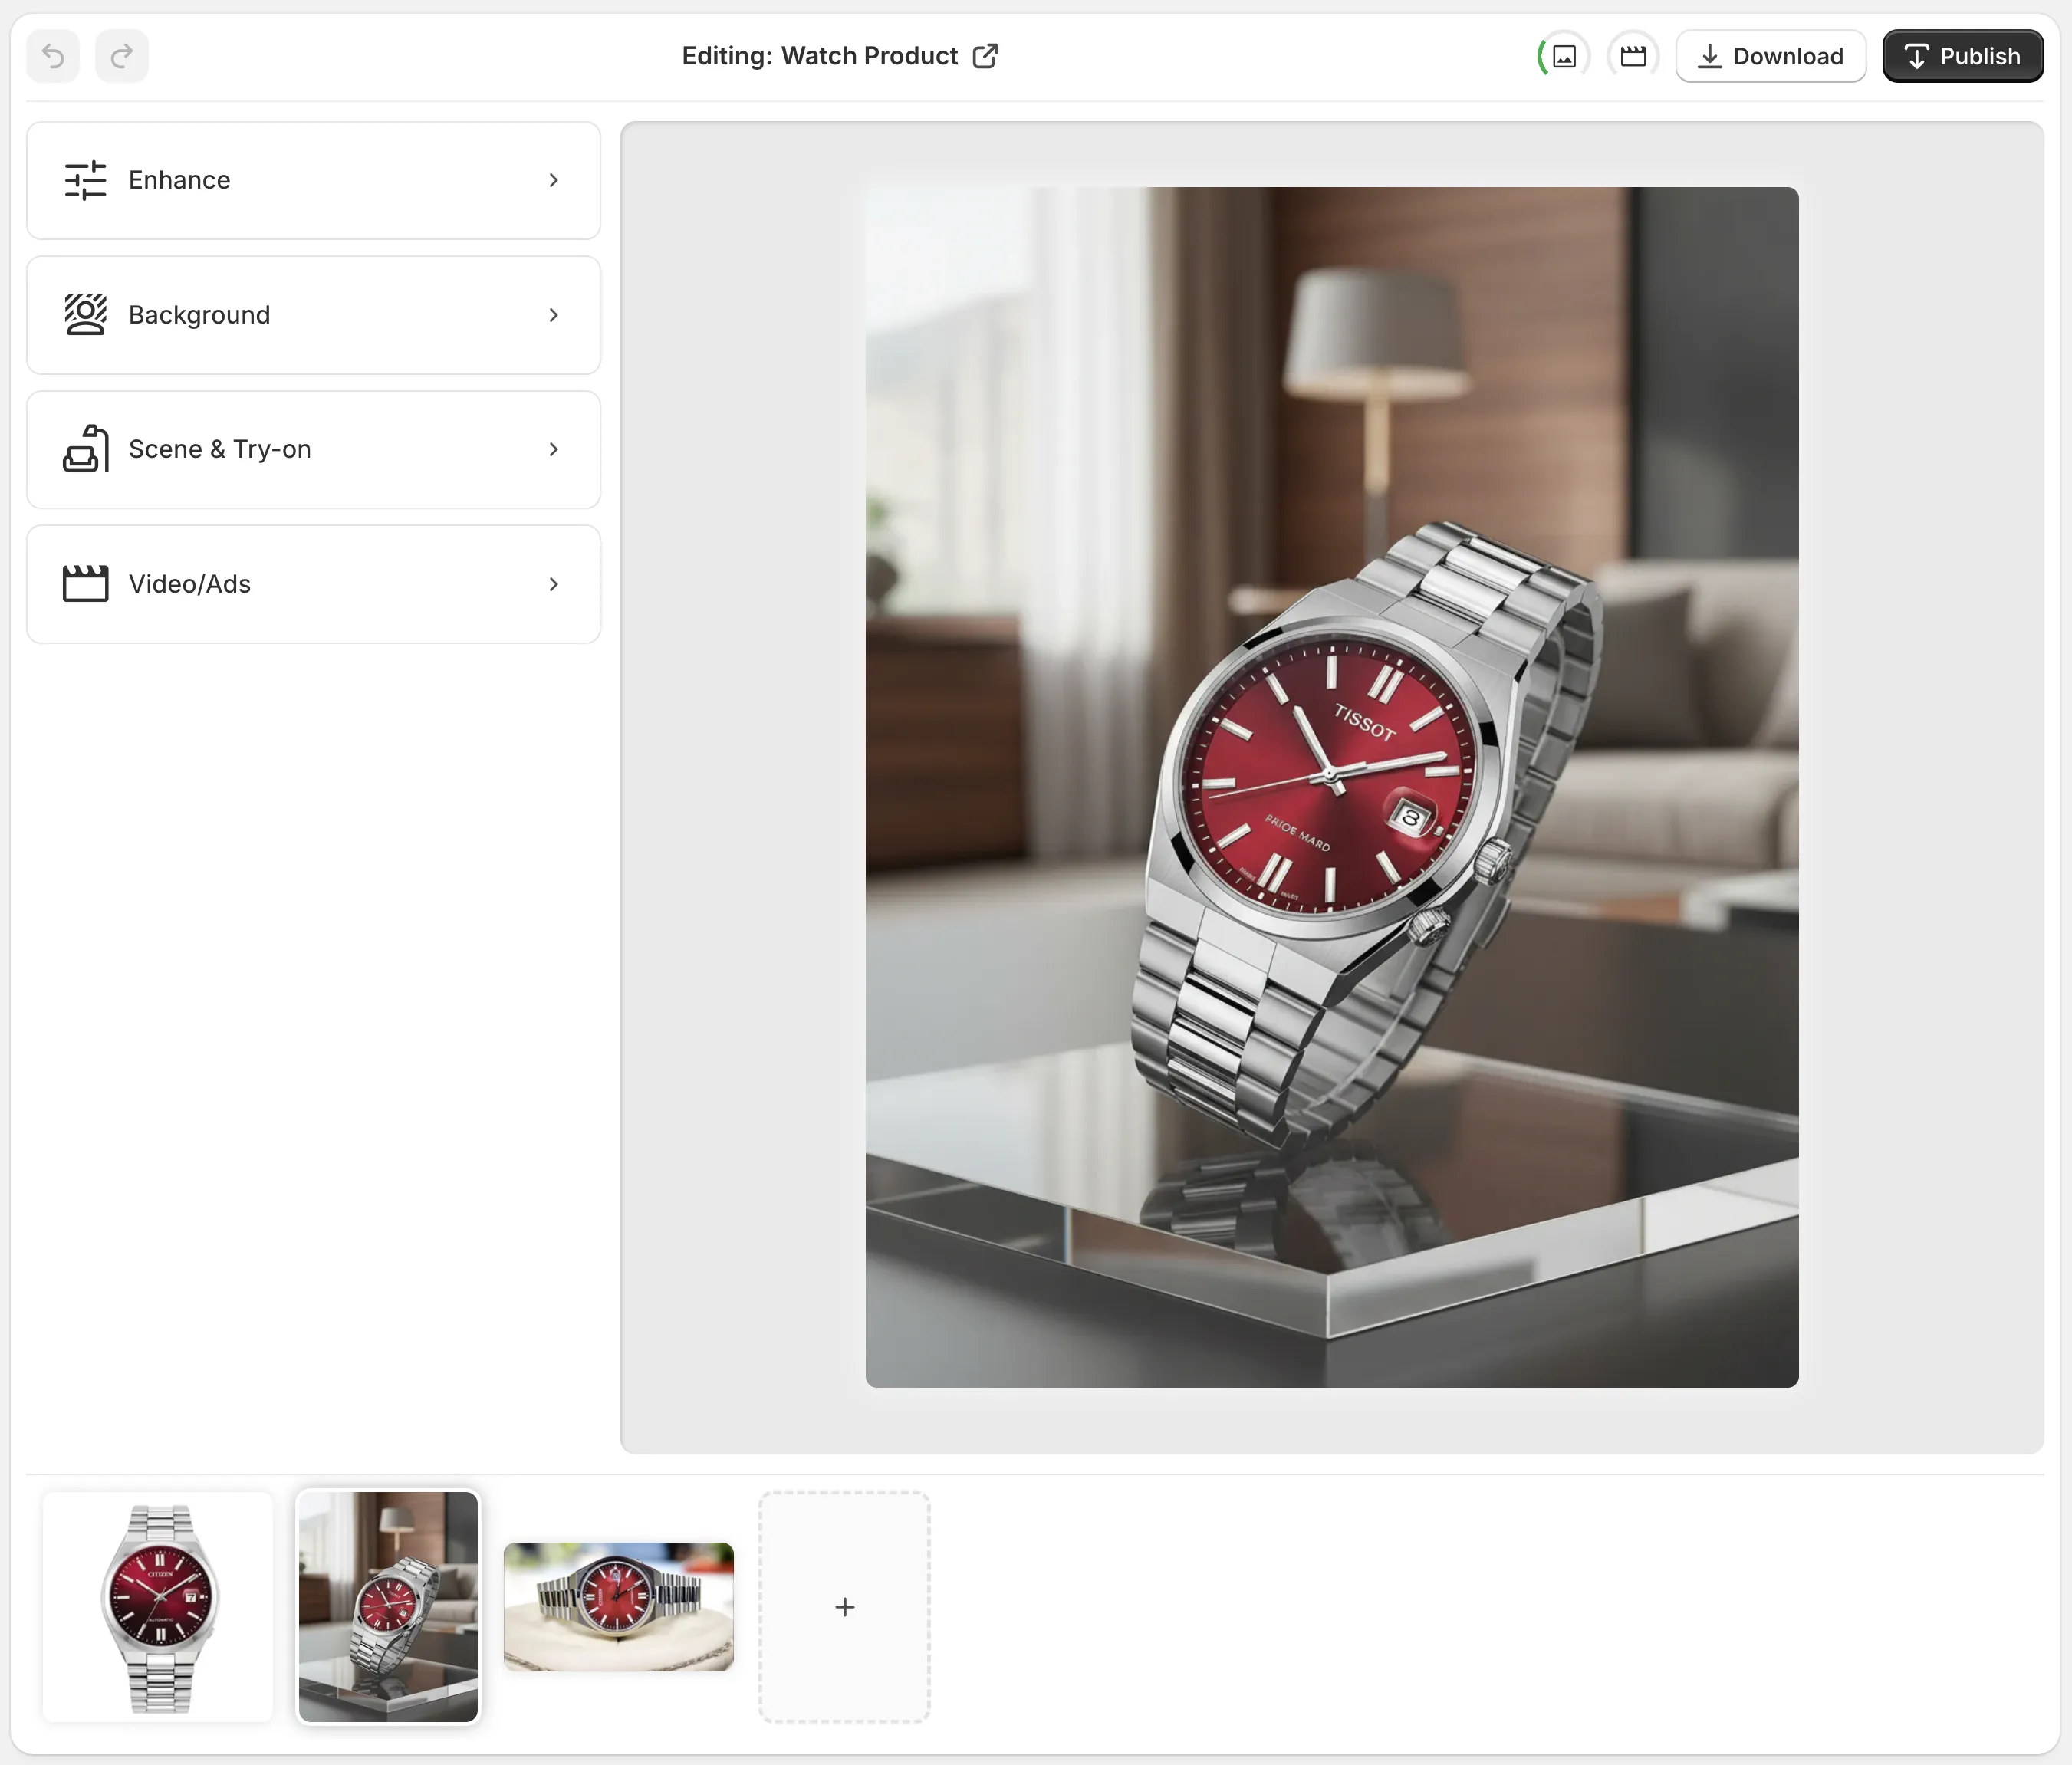
2. Clean Up The Photo Before You Add Context
The fastest way to make a product feel more premium is to remove distractions first. In practice that means background cleanup, then light enhancement, then a decision about whether the product needs more polish.
For many stores, that is enough for the product page. A cleaner image with better contrast and a more controlled background can be all you need to improve clarity without changing the product story.
Supra AI Photo Studio is useful because it gives you the boring cleanup tools and the more advanced creative tools in the same place. You do not have to jump between a background remover, a separate retoucher, and a different tool for variations.
3. Decide Whether The Product Needs Lifestyle Context Or Try-On
Once the base photo looks clean, decide what the product needs next.
Use a lifestyle scene when the buyer needs to imagine the product in a room, on a surface, or in a real setting.
Use try-on when fit, scale, or appearance on a person matters more than the isolated object.
Use object placement when you want the product to feel grounded in a specific environment without building a whole manual shoot.
The point is to match the output to the problem. A candle, mug, or decor item usually benefits from placement in a scene. Apparel, jewelry, or accessories usually benefit from try-on. A simple packaged product might only need a strong cleanup pass.
If you want a practical rule, use the lightest edit that solves the actual problem. If cleanup alone is enough, stop there. If the product needs more context, add one scene, not five.
4. Add Video Only When Motion Helps The Sale
Short motion assets are useful when they answer a real question or help a customer imagine the product in use. That is where the app’s UGC-style and b-roll video tools fit in.
I would not make video mandatory for every SKU. I would use it when the product benefits from movement, demonstration, or a more social-friendly format.
That usually means one of three cases:
- The product is easier to understand in motion.
- The product needs a more ad-friendly asset for paid traffic.
- The product benefits from a quick social clip alongside the stills.
This is also where the app’s flexibility matters. A store can keep the product page image clean, then generate a separate motion asset for ads or social without rebuilding the whole creative stack.
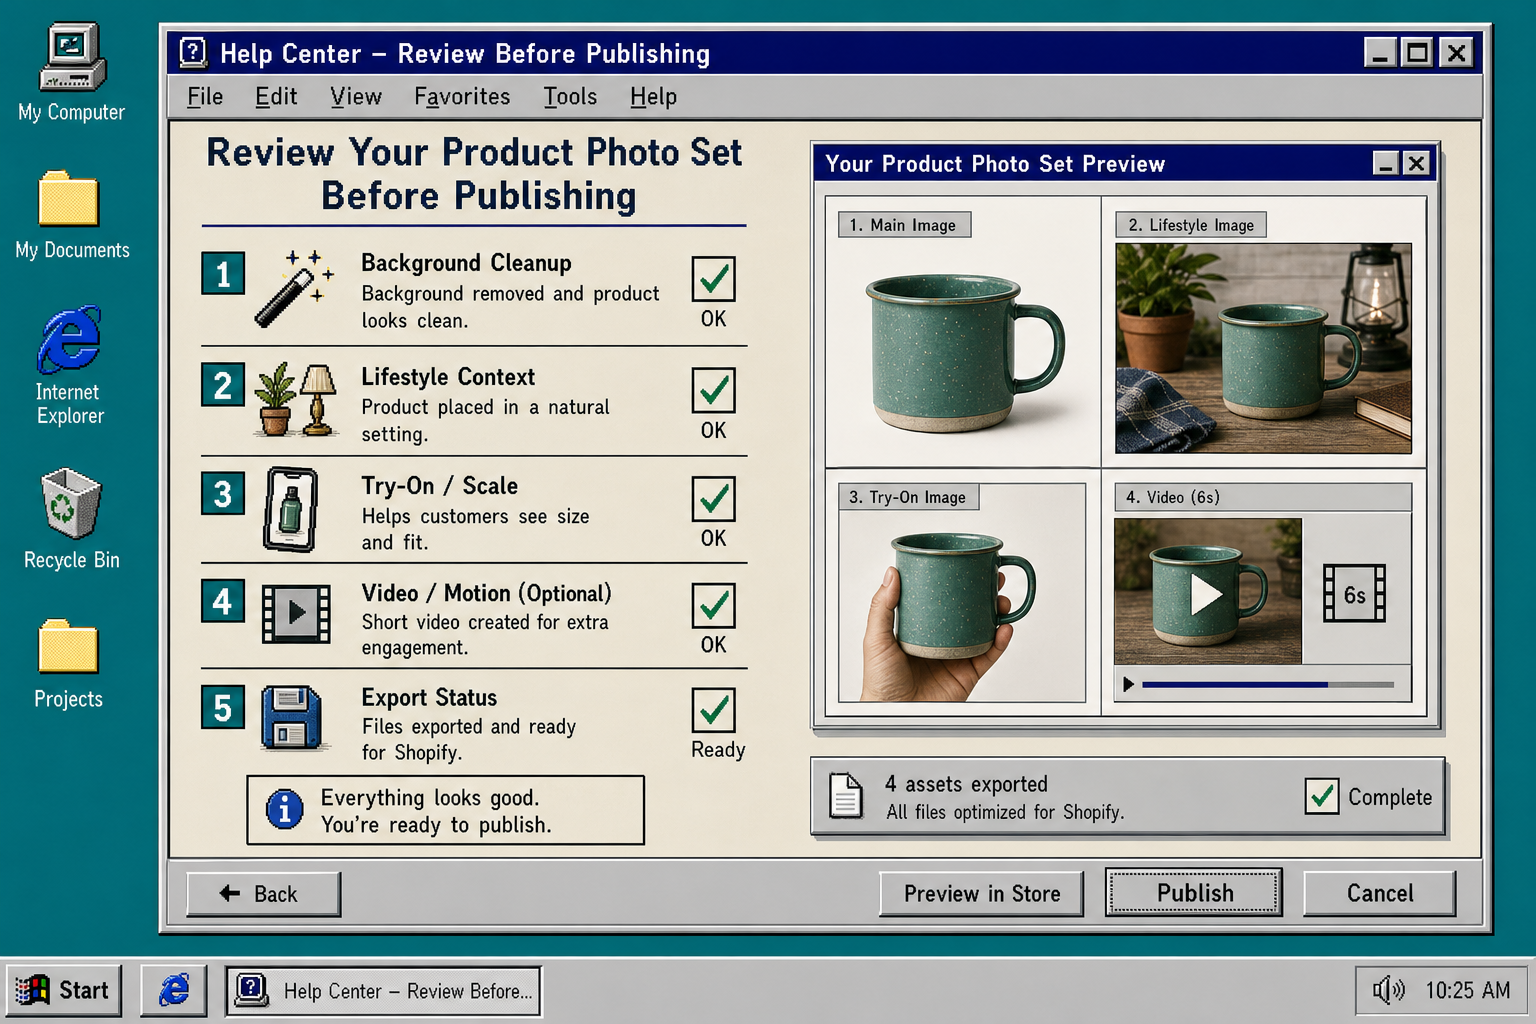
5. Review The Full Set Before You Publish
Before you ship the asset set to your store, look at the whole bundle together.
Check these five things:
- The main image is clear and cropped well.
- The lifestyle version still looks like the same product.
- The try-on or placement version does not distort the item.
- The video is short enough to be useful.
- The final set feels consistent as a group.
That review pass matters because the best workflow is not the one that produces the most files. It is the one that produces a coherent set of files your store can actually use.
If you want another angle on this same idea, these earlier posts are useful context: How I Turn One Product Photo Into a Shopify Asset Pipeline, How I Turn Plain Product Photos Into Studio-Grade Shopify Visuals, How to Build a Repeatable Shopify Image Workflow From One Product Shot, and How I Turned One Product Photo Into a Full Shopify Marketing Kit Without a Shoot.
Troubleshooting
The product looks too cut out
Go back to the cleanup stage and improve the original background removal or edge quality before you add a scene. A bad cutout becomes more obvious once you place the product in a room.
The lifestyle scene feels generic
Use a more specific surface, setting, or lighting direction. If the product is supposed to feel premium, do not hide it in a scene that looks like generic stock decor.
The try-on version does not match the product
Try-on is only worth using when the product stays recognizable on the model. If the item loses shape, scale, or color accuracy, switch back to a cleaner product shot or a placement scene.
The video does not add much
Do not force motion. If the video is not answering a question or improving the channel, keep the still image and move on.
Bottom Line
One solid product photo is often enough to build a useful Shopify image set. Start with cleanup, add context only where it helps, and generate motion only when it earns its place.
If you want to test that workflow on a real product, install Supra AI Photo Studio, open a single image, and build the smallest set of assets that can actually help the store sell.