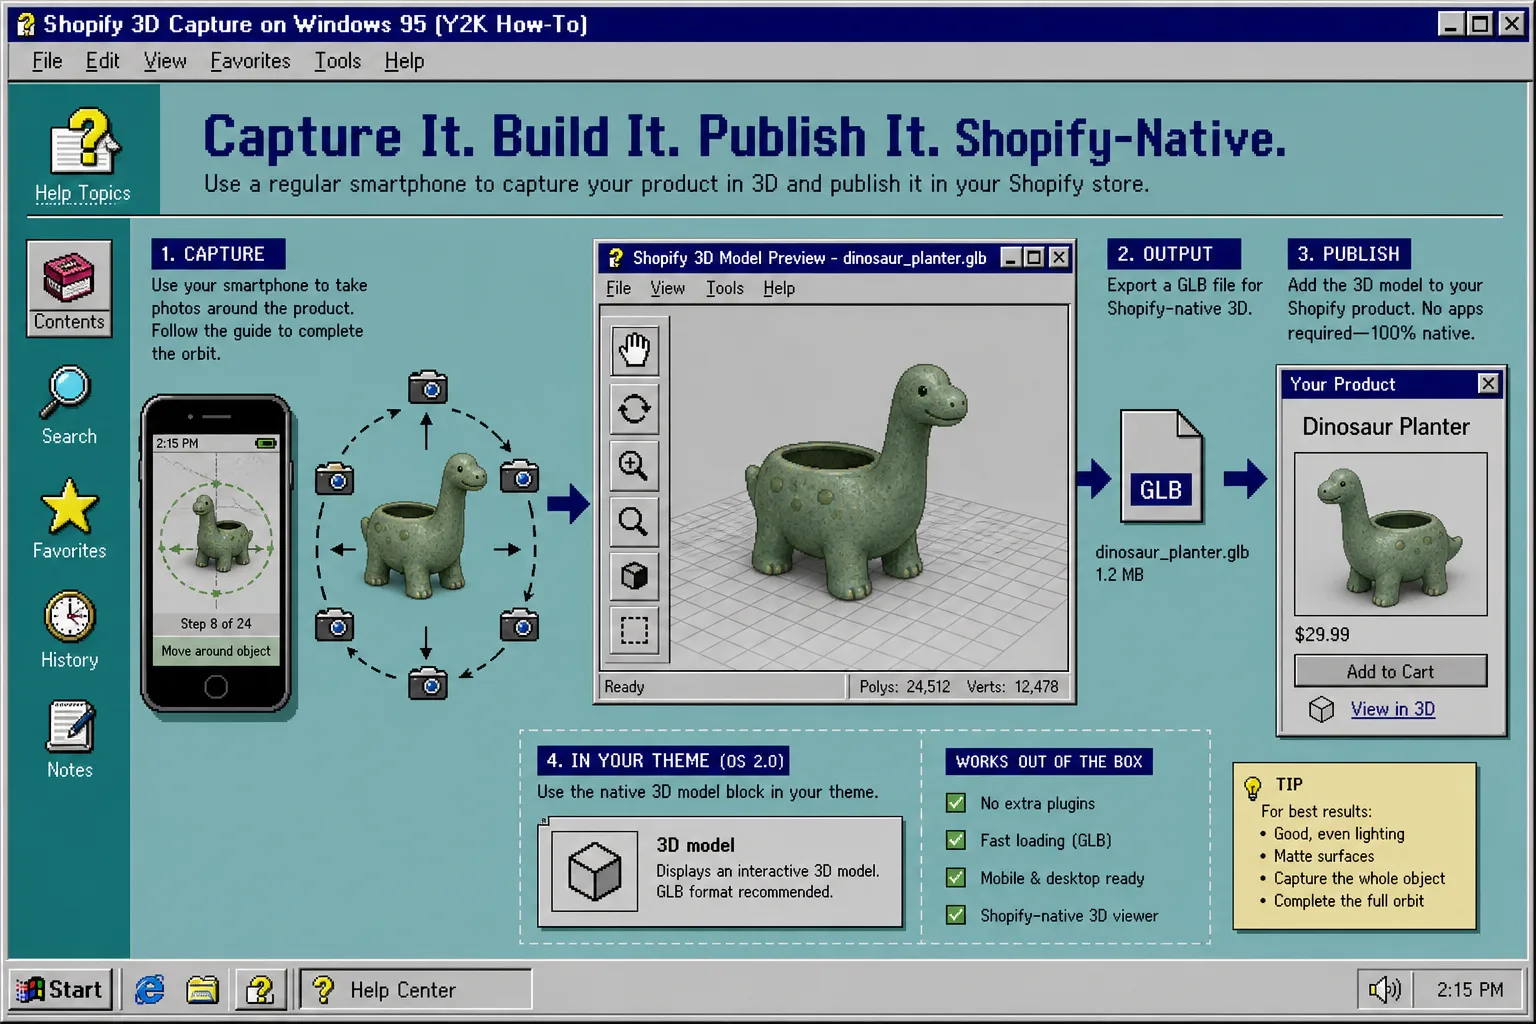
Supra 3D Capture is a Shopify app that turns a short set of phone photos into interactive 3D product models you can publish straight into Shopify. If you already know how to take product photos, the hard part is usually not the software. It is deciding what to scan, how to stage it, and when to stop retaking frames.
This checklist keeps the process practical. Use it before every capture run so you spend less time fixing avoidable problems and more time shipping a model that feels native in your store.
- Choose the right product.
Start with rigid products that hold their shape, show clear edges, and have a real reason to be explored in 3D. If you want a broader scoring frame, read How to Choose Which Shopify Products Get 3D Models First and How I Check Whether a Shopify Product Is Scan-Ready.
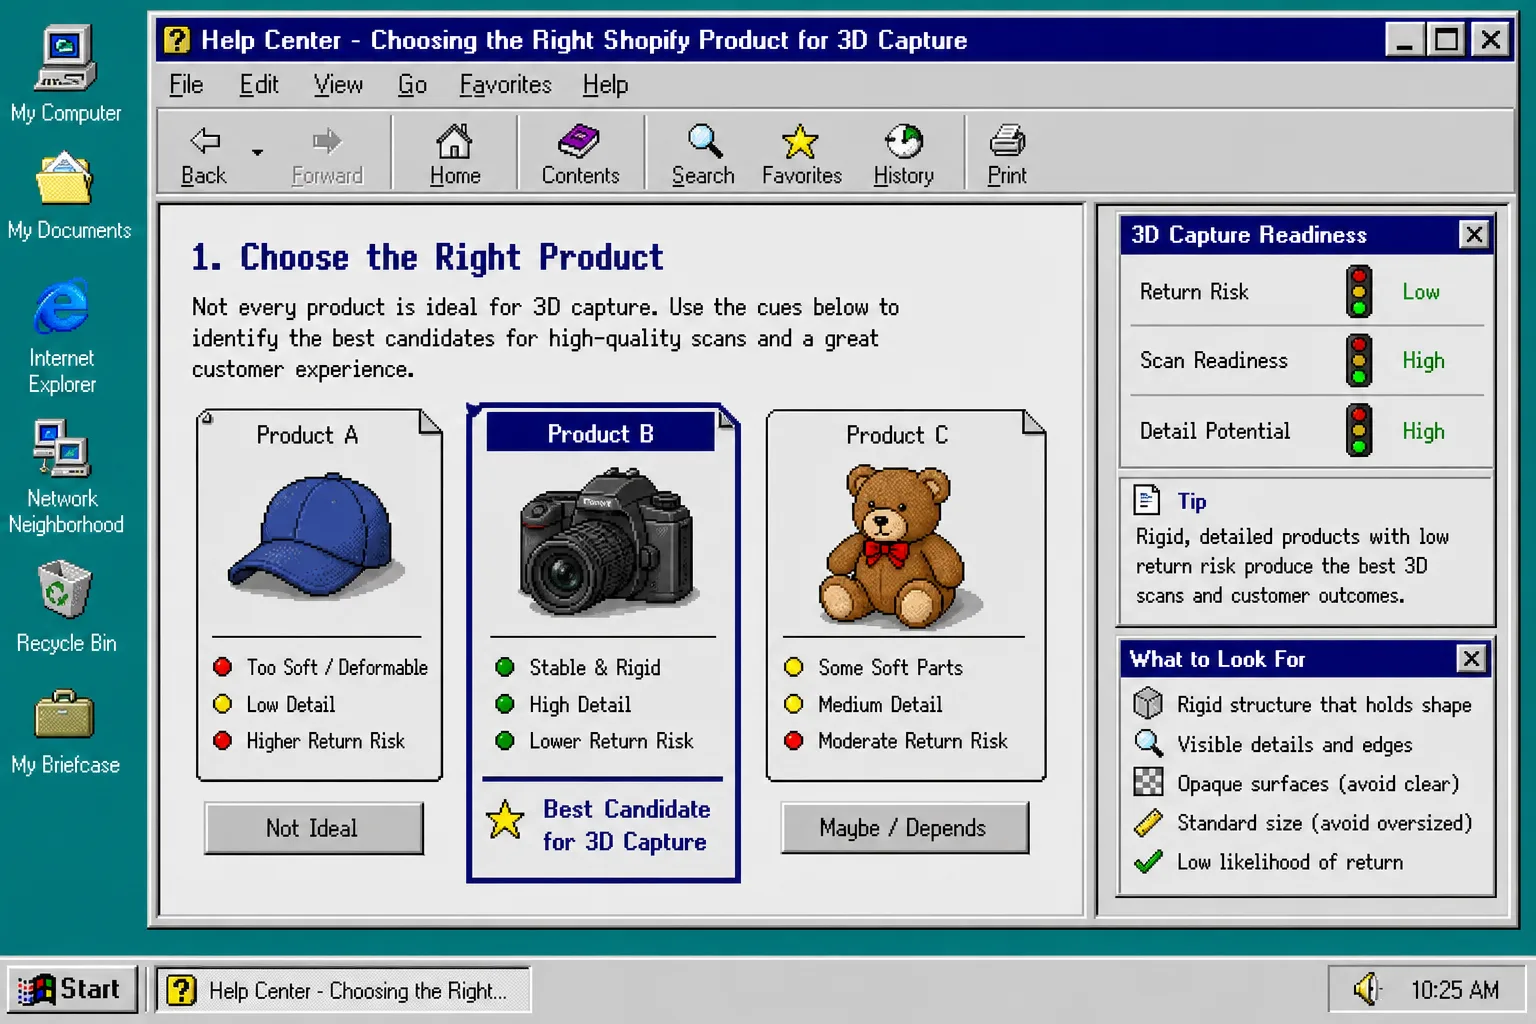
In practice, the best candidates are usually the items that already confuse shoppers when they only see flat photos. A 3D model is most useful when shape, depth, or proportion matter. If a product is soft, glossy, transparent, or constantly changing shape, it can still be scanned, but it is more likely to waste time than improve the page.
- Stage the product and the room.
Use a matte surface, two soft light sources, and a clean background. Wipe dust, remove packaging, and keep the object from sliding. For the first test batch, How to Start a Shopify 3D Capture Pilot With Three SKUs is a good companion read.
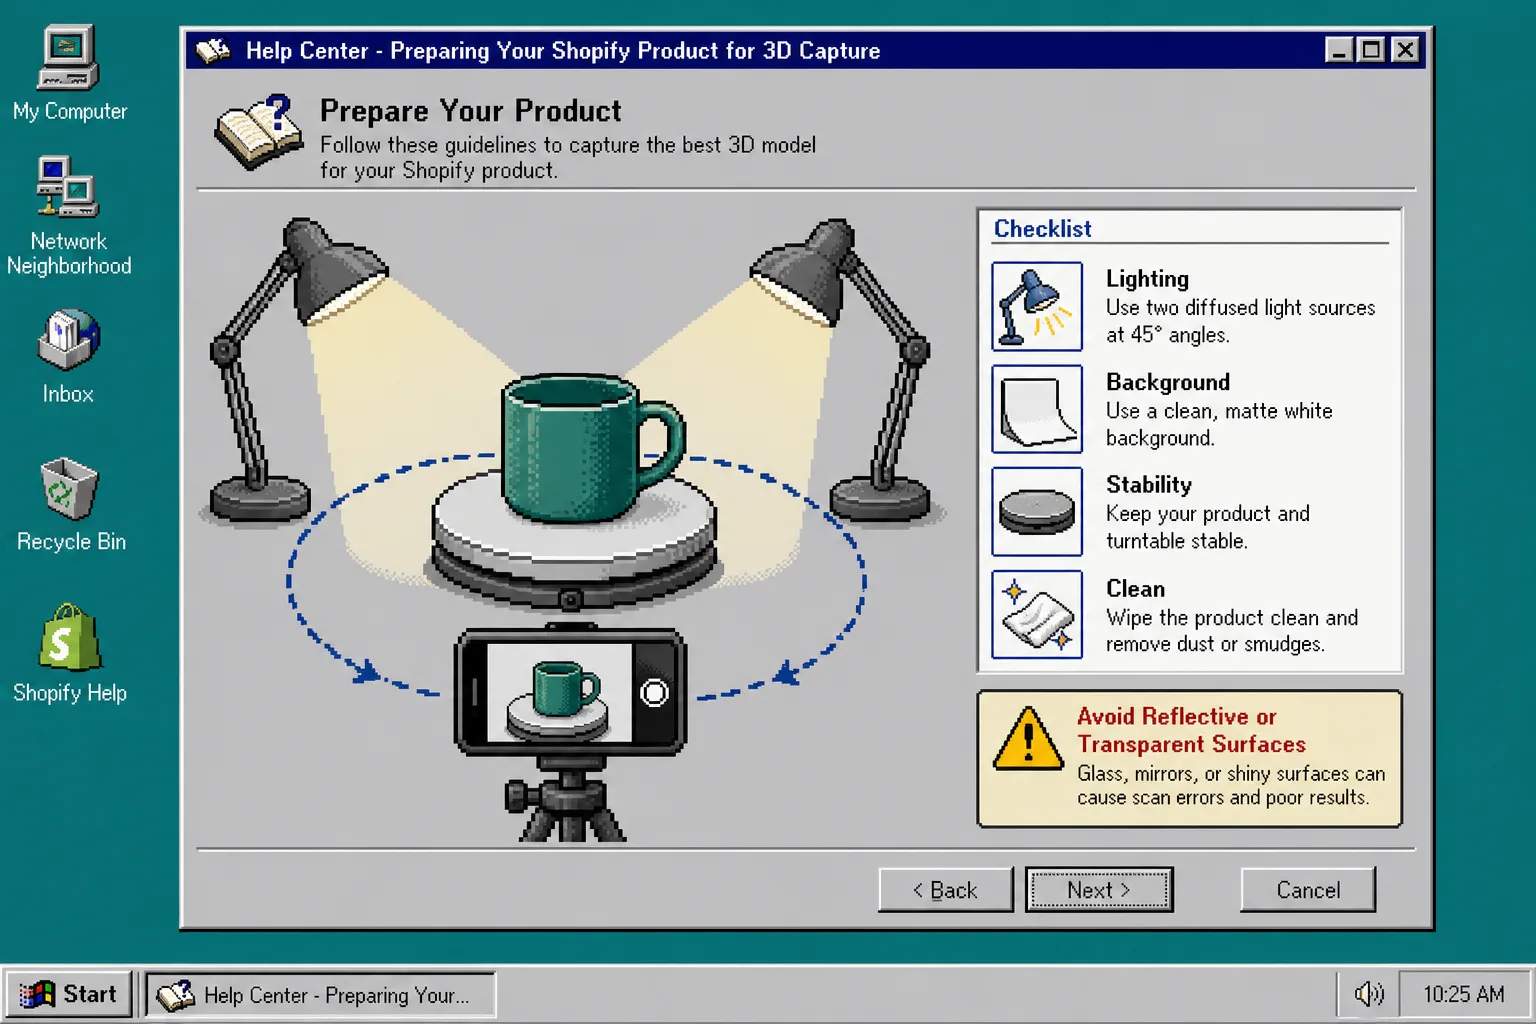
The goal here is not a photo studio setup. The goal is repeatability. If every SKU starts with the same lighting angle, the same background, and the same cleaning routine, your scans become easier to compare and easier to trust. That is also why a simple capture checklist matters more than a clever one-off setup.
- Capture one full orbit.
Follow the guided capture path and take the full set of photos in small, even increments. Keep the phone distance steady, move around the object instead of zooming in, and make sure the top, sides, and recessed areas are visible.
Supra 3D Capture is built for a regular smartphone, not a LiDAR rig or a specialist 3D workstation. That means consistency matters more than fancy hardware. If you rush, you usually create gaps in the model that only show up later when the customer starts dragging it around.
A clean orbit also makes the capture log easier to review. If a scan fails, you want to know whether the problem was lighting, movement, or the product itself. That makes the next retake faster.
- Review the scan before you publish.
Rotate the model and inspect holes, texture coverage, silhouette clarity, and overall fit for Shopify. If something looks weak, retake it before you upload it into a live product page. For a deeper decision framework, How I Decide Which Shopify Products Are Worth a 3D Scan is useful when you want to decide whether a second pass is worth it.
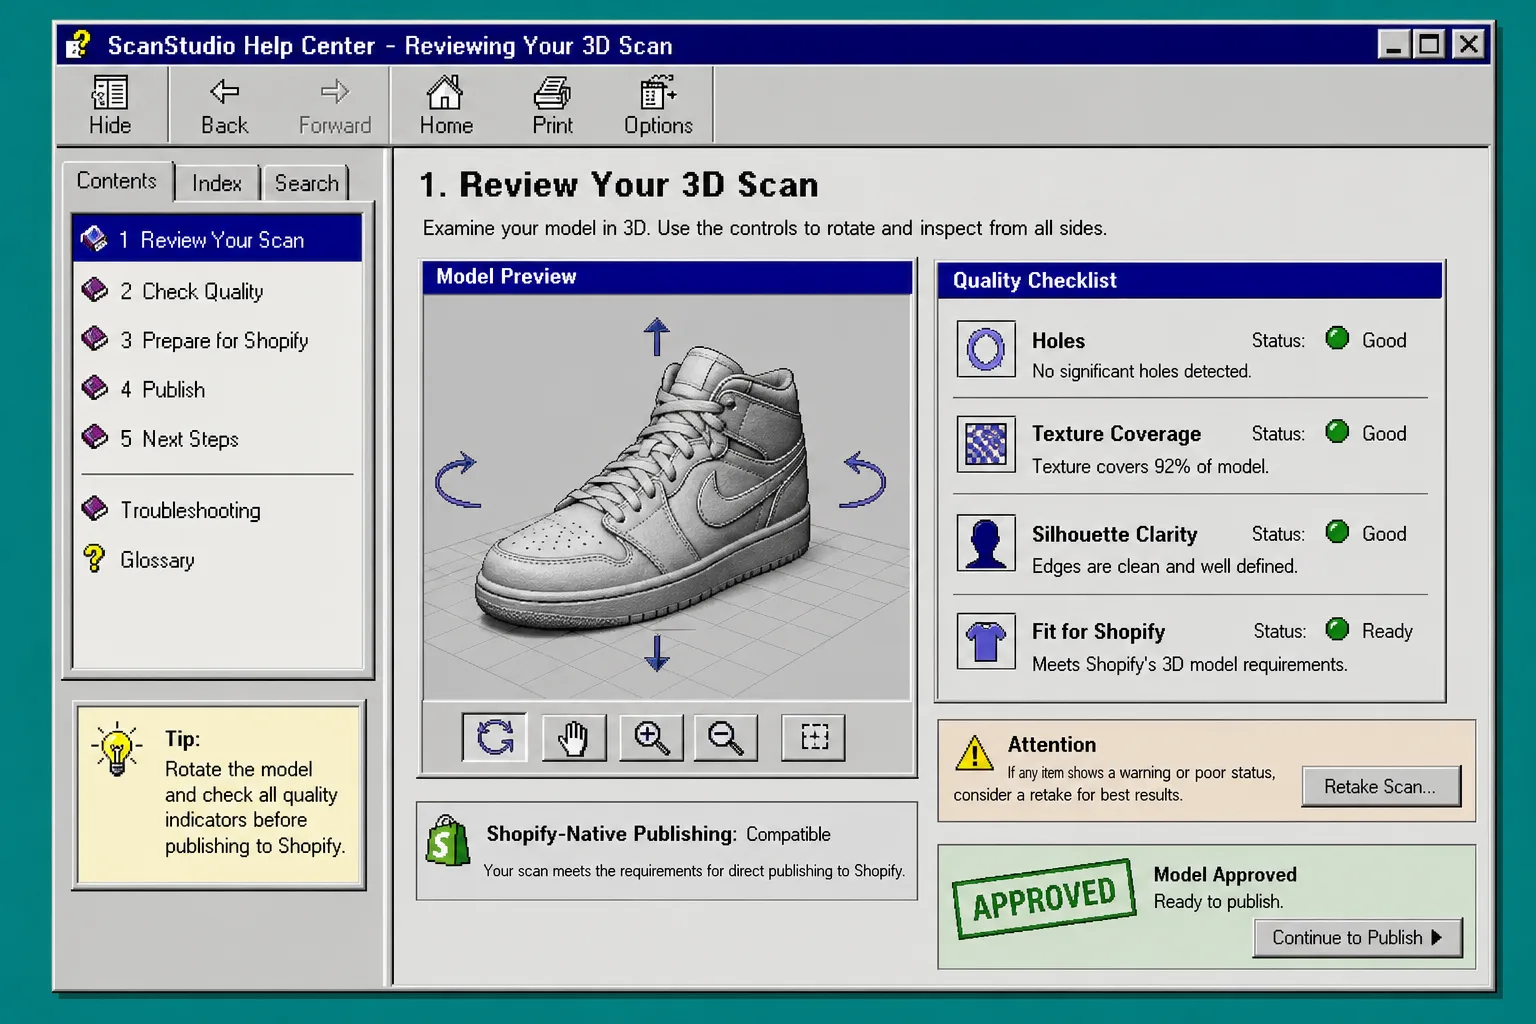
This is the step most merchants skip when they are trying to move fast. It is also the step that saves the most time later. A scan that looks acceptable in a thumbnail can still fall apart when you inspect it at full size. Check the model from multiple angles, then decide whether it is good enough to publish or worth another capture pass.
If you want a simple rule, use this: if the model does not make the product easier to understand than the photo gallery, do not publish it yet.
- Publish the GLB to Shopify.
Attach the finished model as product media, then place it with your native 3D viewer or the Online Store 2.0 theme app block. The goal is simple: a shopper should be able to rotate the model without leaving the product page.
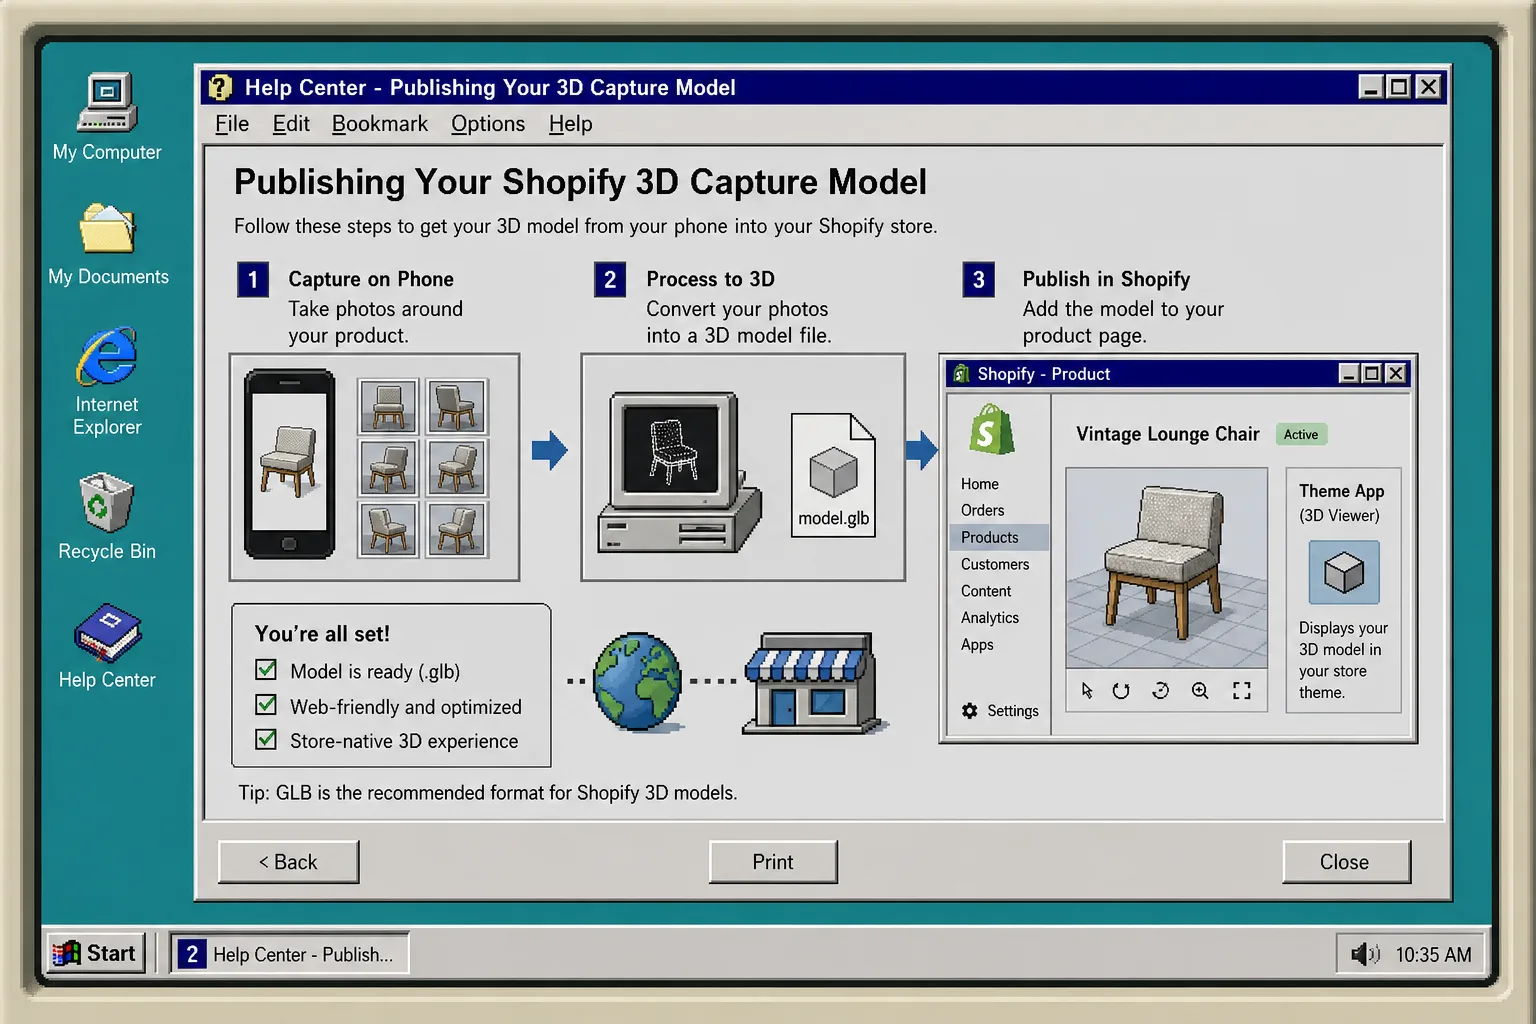
Keep the handoff boring. The less work it takes to move from scan to store, the more likely you are to use 3D on the products that actually need it. GLB is the format to aim for because it fits the Shopify-native experience the product is built around.
If you are comparing product ideas, How to Tell Which Shopify Products Are Ready for 3D Models is a useful filter before you commit to a full publishing pass.
- Repeat with notes.
Save the lighting setup, camera path, and any problem spots so the next SKU goes faster. Over time, that turns one-off captures into a repeatable queue. If you want a deeper prep reference, How to Prep Shopify Products for Clean 3D Capture is the best follow-up.
When the process is documented, the work stops feeling like a special project. It becomes a routine store operation: pick a product, stage it, capture it, review it, publish it, and move on.
Troubleshooting
If the scan comes out soft, add light before you add more photos. If the object is shiny or transparent, switch to another SKU or expect a harder session. If the product is floppy or deforms when touched, treat it as a poor candidate rather than forcing it through.
If Shopify is not showing the model the way you expect, check that the media is attached to the product and that your theme block is placed in the right section. The product page should still feel fast and familiar, just with a 3D view that gives customers more confidence.
If you want a low-risk starting point, pick three SKUs, run this checklist on each one, and publish the best result first. Then compare how the product page feels with and without the interactive model.
To try the workflow, start with Supra 3D Capture or install it from the Shopify App Store.