You can move published notes from Notion into Webflow CMS without rebuilding the page by hand. Syncflow is the simple way to write in Notion, map the fields once, and keep the Webflow collection aligned as the content changes.
If you are setting it up for the first time, start with one Notion database, one Webflow collection, and one test page. That keeps the first sync readable and makes it obvious when a field mapping needs work.
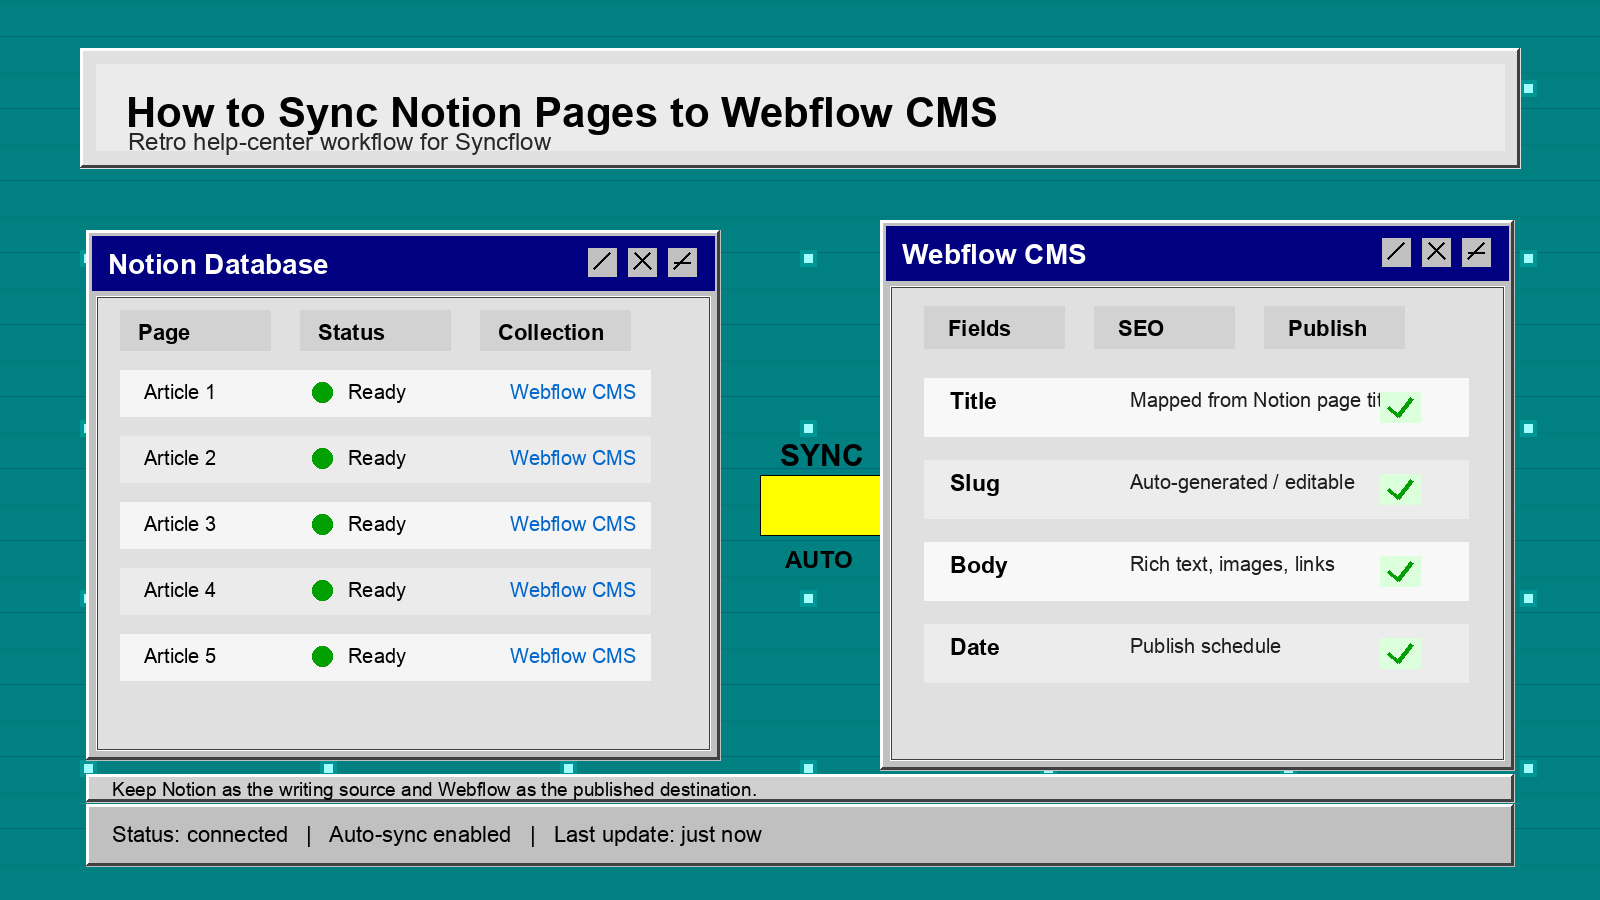
1. Connect Notion And Webflow
Open Syncflow, connect both accounts, and choose the Notion database and Webflow collection that should stay in sync. Use a single article for the first test instead of importing a whole content backlog.
You should see the app confirm that both sides are connected before you move on.
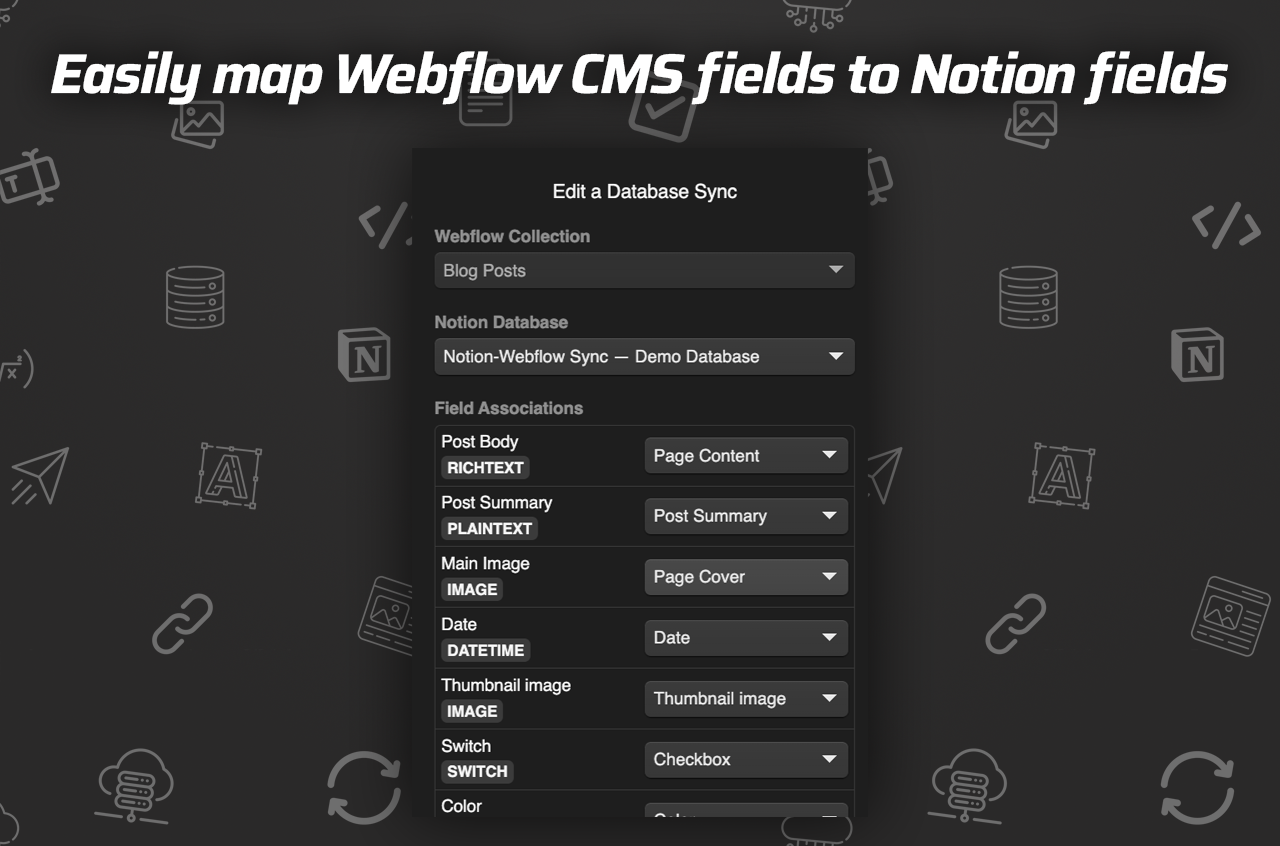
2. Map Each Field Before You Sync Anything
Match the source and destination fields one by one. The useful pairs are usually obvious:
- Title to name or heading.
- Summary to excerpt.
- Hero image to cover image.
- Category to collection tag or reference field.
- Published date to the live date field.
Do not guess at a field just because it sounds close. If the source and destination mean different things, the sync will technically work and still produce a bad page.
You should see a clean field map with no ambiguous leftovers before you save.
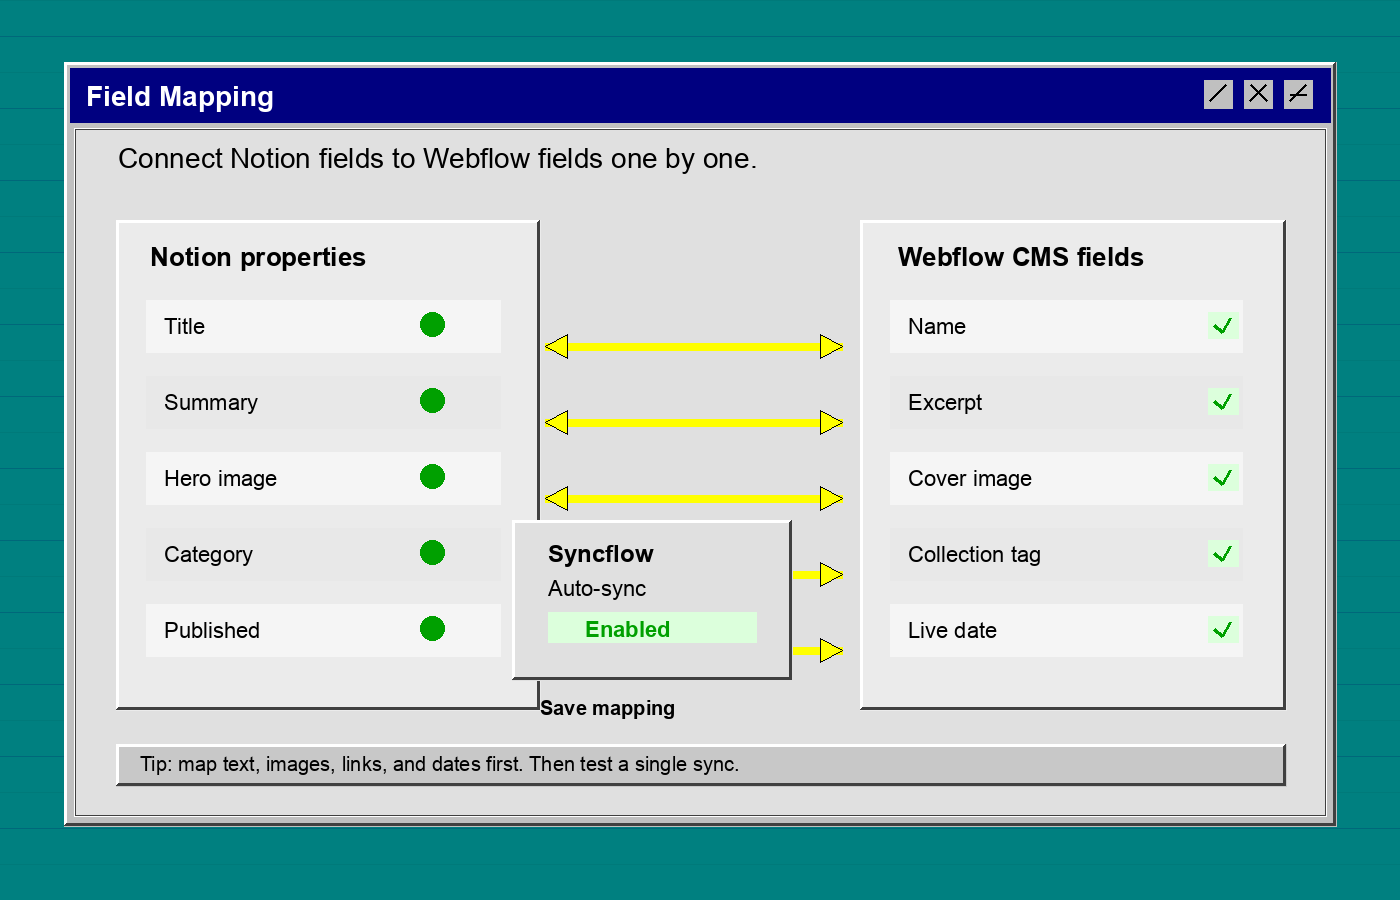
3. Pick Auto-Sync Or Manual Sync
If you publish often, turn on auto-sync so new or edited Notion pages flow into Webflow without another round of copy-paste. If the article needs approval, keep the sync manual or leave the item as a draft first.
The product brief supports either approach, which is the practical part. You can use Syncflow for a one-off import or build a recurring workflow around it.
You should see the sync mode clearly labeled before the first live update.
4. Verify The Imported Page In Webflow
Run one test sync and inspect the CMS item inside Webflow. Check the body text, headings, links, and any images or nested content blocks. If the page is meant to match a Notion article closely, the destination template should preserve the structure you care about.
This is the step that catches most problems early. A missing field here is easier to fix before the article becomes part of a live content system.
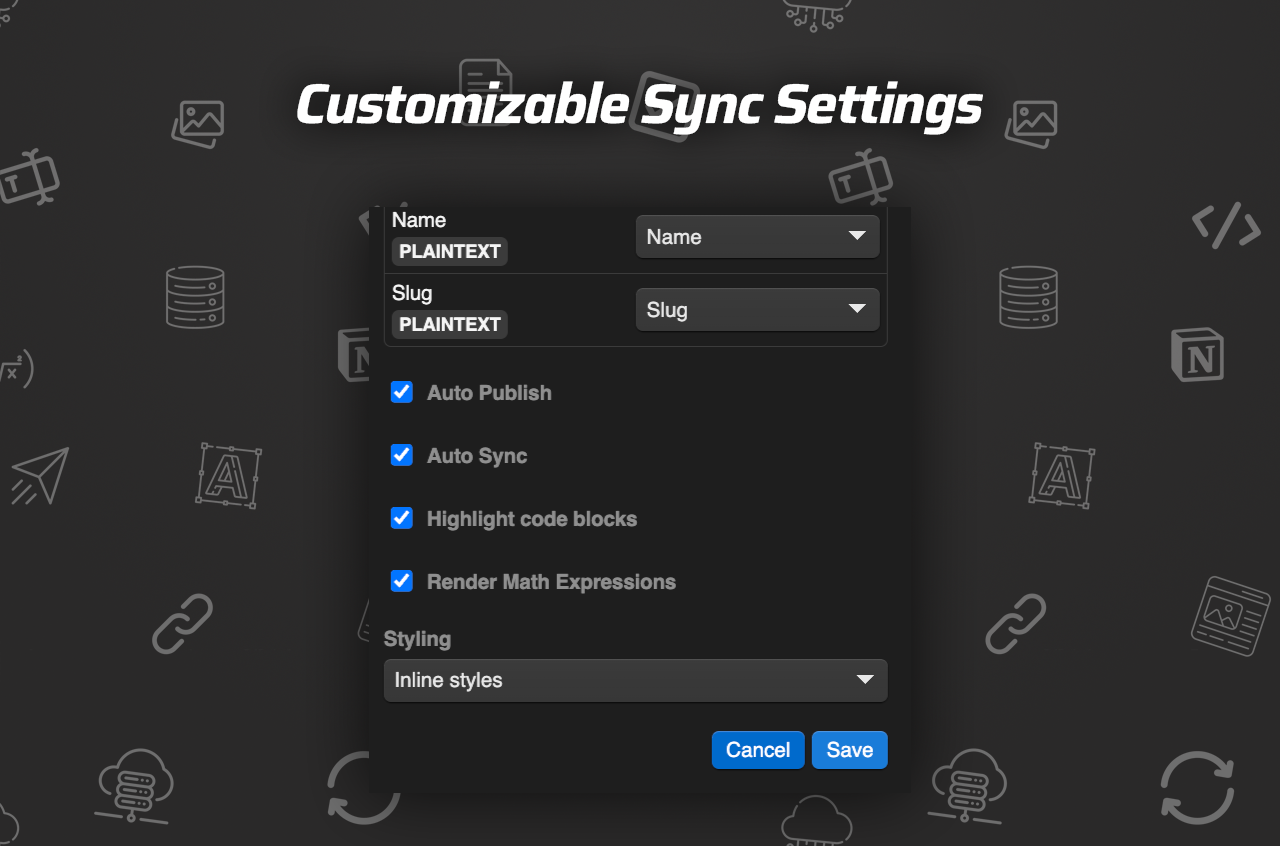
5. Decide When To Publish Automatically
Once the first sync looks right, choose whether the Webflow item should publish immediately or sit in draft state for review. Draft review is the safer default for brand-sensitive pages, seasonal content, and anything with product claims.
If you are building a larger content pipeline, keep the first version boring and predictable. Get one article syncing cleanly, then expand to the rest of the database after you know the mapping is stable.
Troubleshooting
If a sync looks wrong, start with the field map.
- Missing text usually means the Notion property was not connected to the right Webflow field.
- Missing images usually mean the image field was not mapped or the source asset is not available the way Webflow expects.
- Broken links usually mean the destination field is not set up for rich text or URL content.
- Duplicate content usually means the same page was synced more than once without a clear unique key.
- Layout drift usually means the Webflow template is not shaped to match the imported blocks.
If the setup still feels off, test one page at a time until the mapping is boringly reliable.
Related Reads
If you are comparing adjacent Webflow workflows, these recent posts are useful:
- How to Export a Webflow Site to Static HTML with ExFlow
- How to Download a Webflow Site and Host It Yourself with ExFlow
- How to Export a Framer Site and Host It Yourself with ExFlow
- How to Keep a Shopify Blog Publishing Without Generic AI Drafts
Conclusion
If you already write in Notion and publish in Webflow, Syncflow gives you a cleaner path from draft to CMS item. Set the fields once, test one article, and keep the rest of the collection in sync from there.
If you want a simpler content pipeline, start with the Syncflow landing page at https://syncflow.ybouane.com/ and run one controlled test import before you automate the rest of the database.