
If you want to keep the design work in Framer but own the files yourself, ExFlow gives you a clean export path to static HTML, CSS, JS, and media. That means you can host the site on ExFlow, Git, S3, or FTP instead of leaving the whole build tied to one hosted setup.
If you are choosing a destination first, the same Framer export pattern shows up in How to Export a Framer Site to GitHub Pages Without Rebuilding It and How to Self-Host a Framer Site After Exporting It to HTML. For the broader export logic, I keep the Webflow versions of the workflow nearby too: How to Export a Webflow Site to Static HTML with ExFlow and How to Download a Webflow Site and Host It Yourself with ExFlow.
What you need
- The live Framer site URL you want to export.
- Access to the hosting target or sync destination.
- A quick review pass after export.
- A decision on whether you want ExFlow hosting, Git sync, S3 sync, or FTP sync.
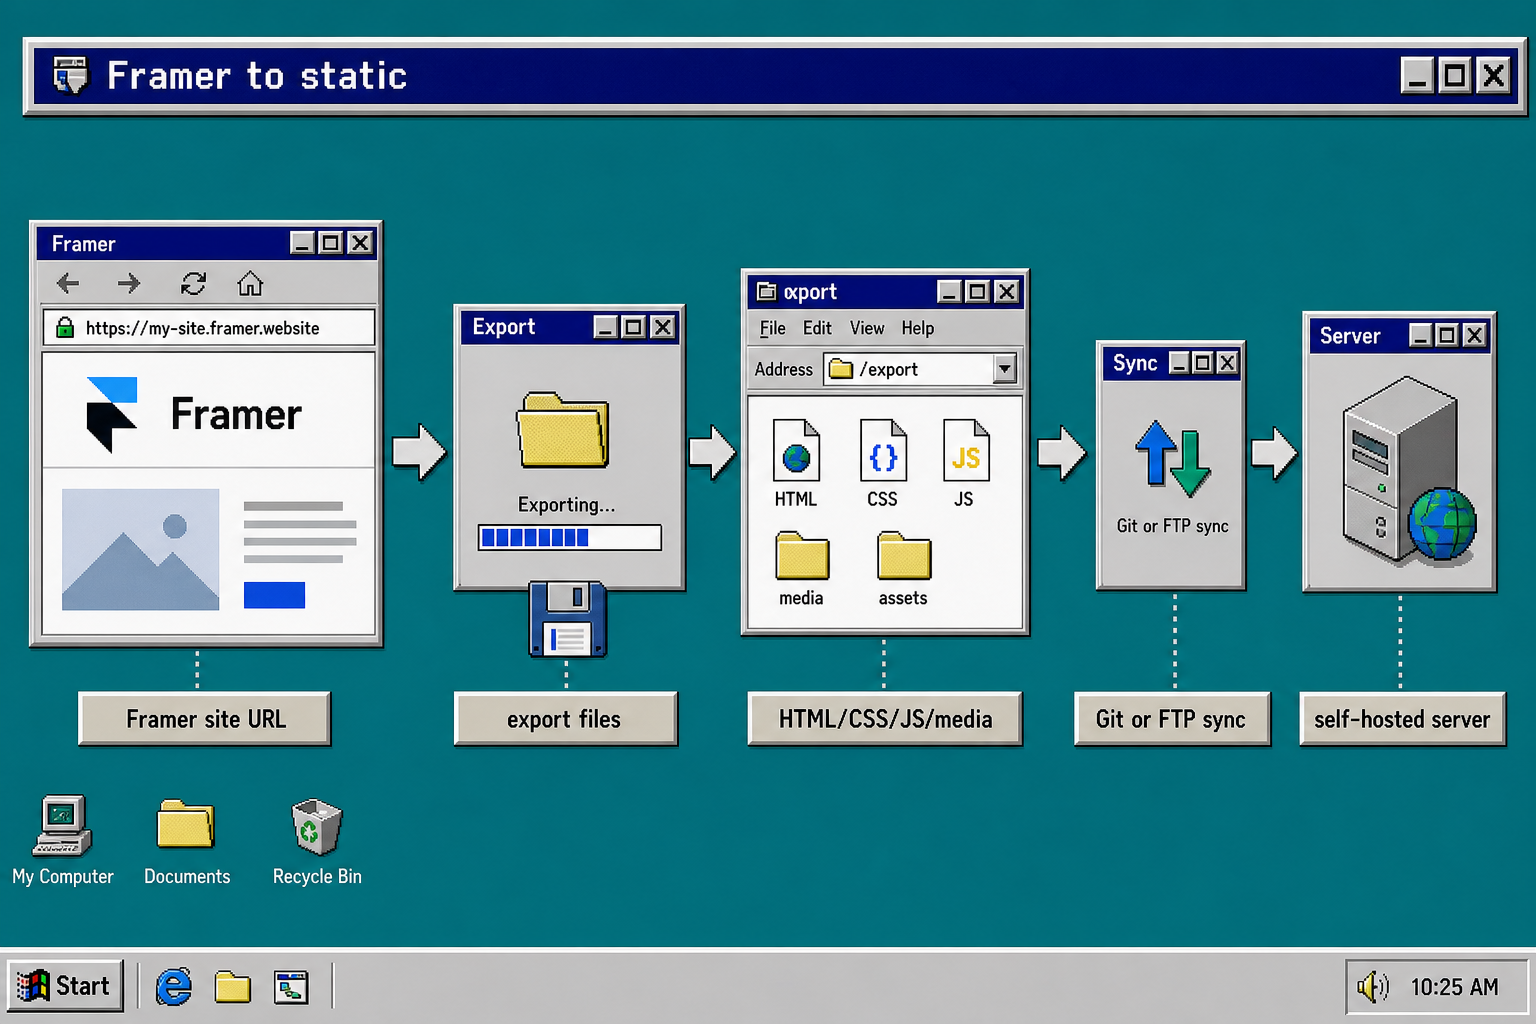
I usually treat the export like a small migration, not a button click. The goal is to make sure the site comes out with the same structure and assets it had inside Framer.
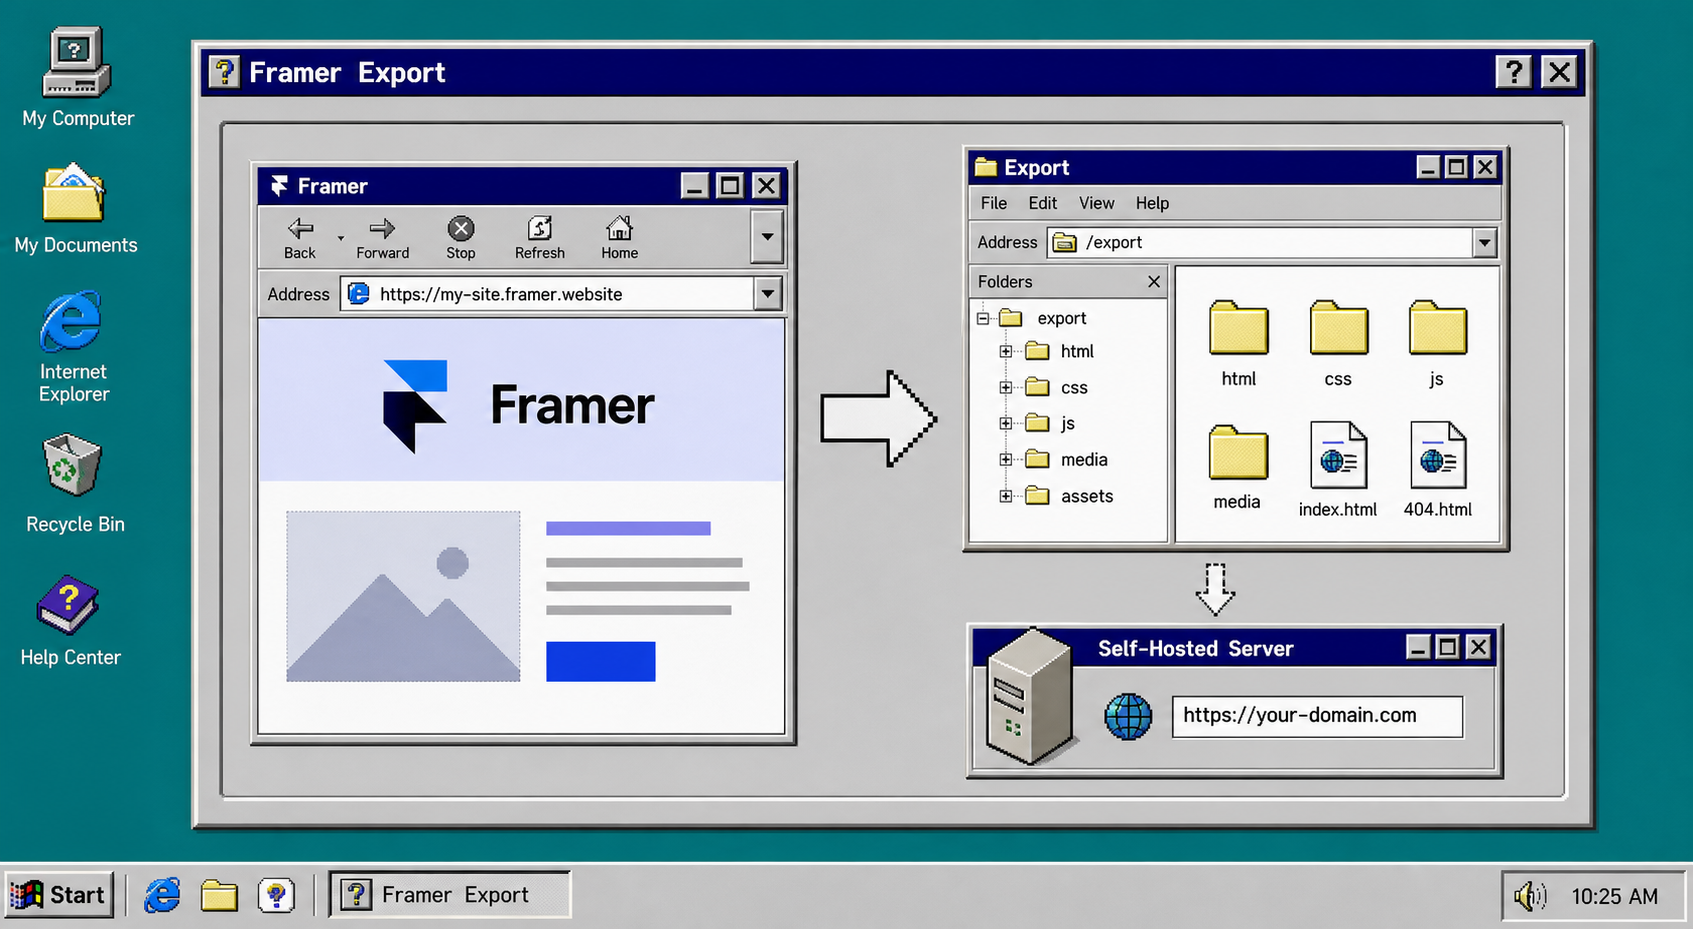
1. Enter the Framer URL
- Open ExFlow.site and paste the live Framer address.
- Start from the exact site you want to export, not a placeholder or staging address unless that is the site you intend to keep.
- What you should see: the site preview and the export controls ready to use.
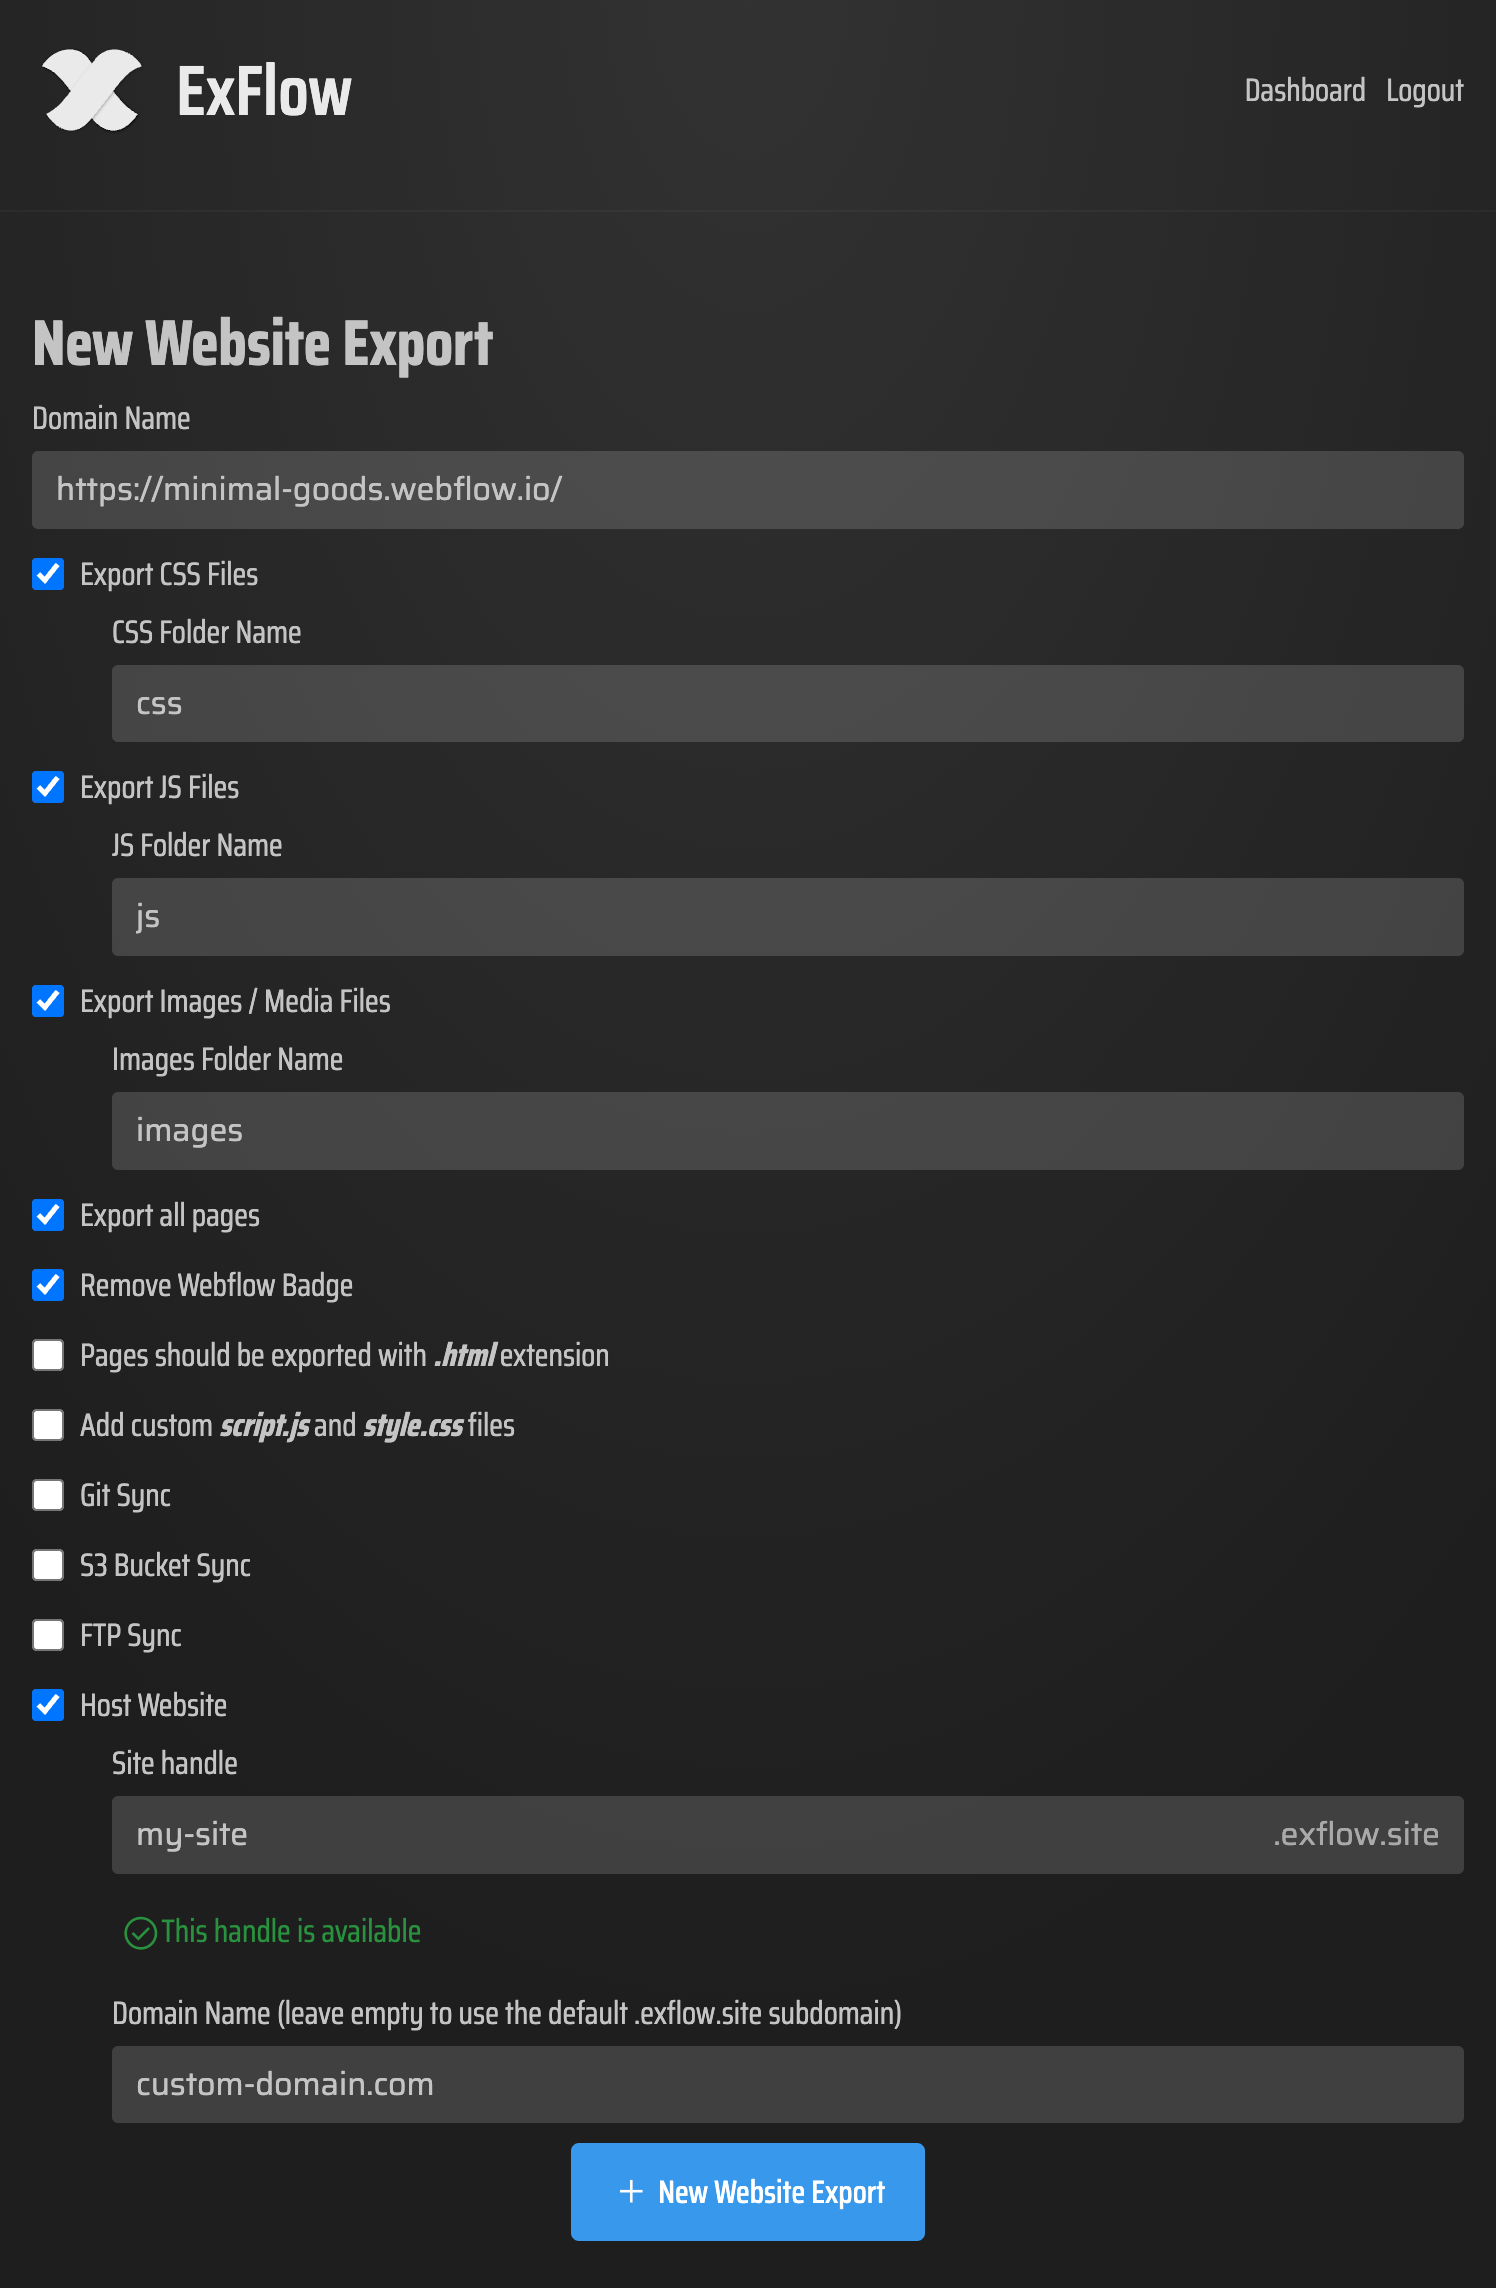
2. Choose the export settings that preserve the site
- Turn on CSS, JS, images/media, and all pages.
- Keep the export focused on static output, not just the homepage.
- Remove the Made with Framer badge if you do not want it on the exported copy.
- Add
script.jsandstyle.cssif you need custom behavior or styling. - What you should see: a settings panel with the file-type switches and sync options ready.
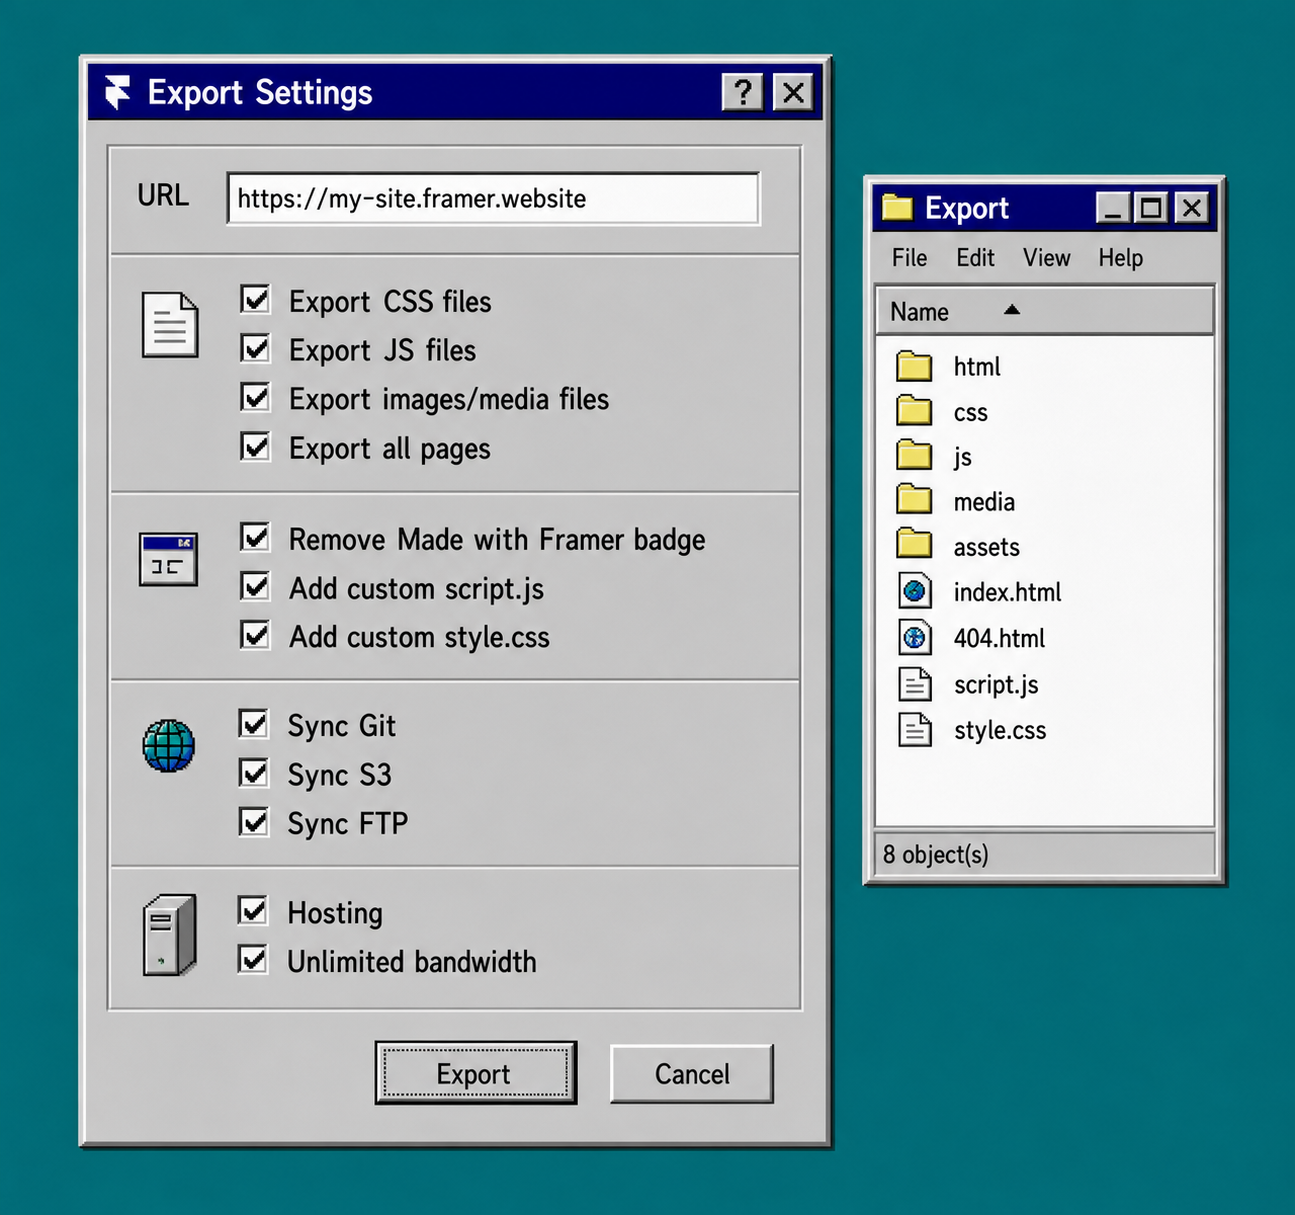
3. Export all pages and check the file set
- Make sure every page is included, not only the homepage.
- Confirm that each exported page keeps the
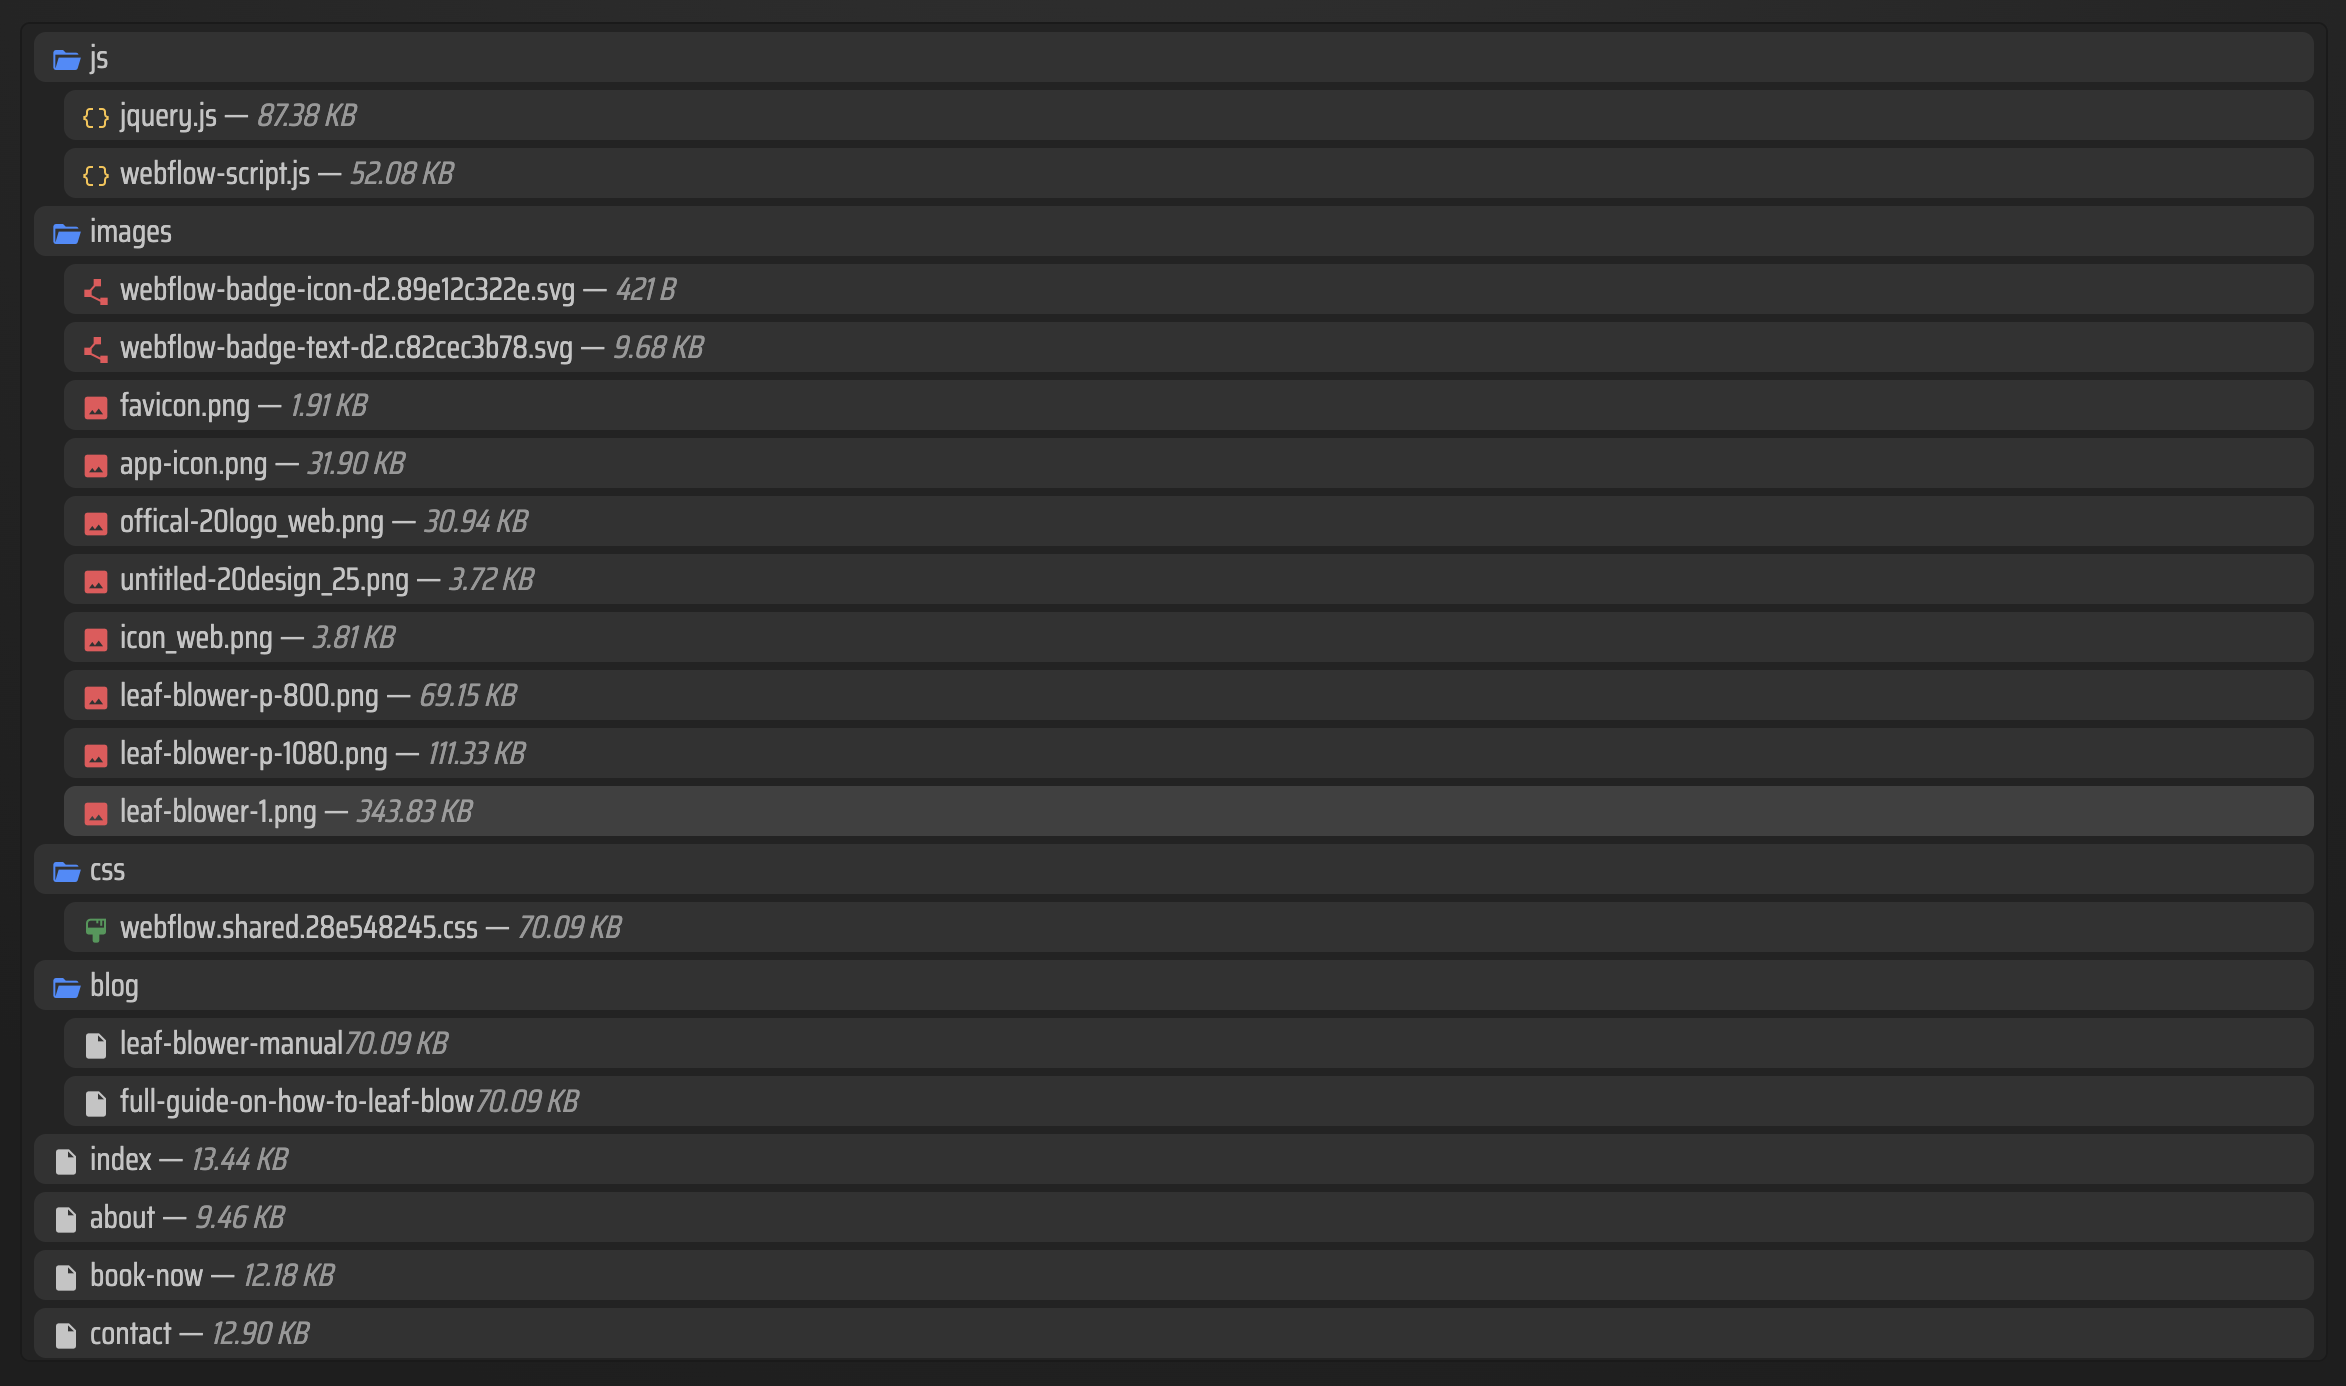
.htmlextension. - Look for the expected folder layout:
html,css,js,media, and any other asset folders ExFlow creates for your site. - What you should see: a complete export bundle with page files and media assets, not a partial download.
4. Pick the host or sync path that fits your workflow
- Use ExFlow hosting if you want the simplest path.
- Use Git sync if you want versioned deployments.
- Use S3 sync if you want cheap static hosting.
- Use FTP sync if the target server already expects uploads that way.
- What you should see: the exported files move cleanly into the destination you chose, with the same paths preserved.
If you are comparing deployment targets, the same decision pattern also helps in How to Export a Framer Site to GitHub Pages Without Rebuilding It, How to Self-Host a Framer Site After Exporting It to HTML, and the two Webflow export guides linked above. The important part is not the host name. It is whether the exported files keep the same structure from export to deployment.
5. Verify the site before you switch traffic
- Open the exported site in a browser.
- Click through a few internal pages.
- Check that images load, scripts run, and links do not point back to a local machine.
- If something looks off, rerun the export with the missing asset types enabled instead of trying to patch the bundle by hand.
- What you should see: the exported site behaves like the original Framer site, just served from static files.
Troubleshooting
- Missing pages: Export all pages was probably off.
- Broken images or blank sections: Export images/media again and verify the asset folder uploaded.
- Missing interactivity: Make sure JS export is enabled.
- Unexpected badge or footer text: Remove the Made with Framer badge before exporting.
- Custom code not loading: Put the code into
script.jsorstyle.cssrather than scattering it across random files. - Sync failed: Recheck the Git, S3, or FTP credentials before you rerun the sync.
The short version
If your goal is to own the files, the safest workflow is simple: paste the Framer URL into ExFlow, export the site as static files, verify the pages and assets, then host the bundle where you actually want it. ExFlow gives you that path without forcing you to rebuild the site from scratch.
Start at ExFlow.site and export one Framer page first. Once that works, move the full site onto the hosting target that fits your stack best.