When I open a messy Shopify catalog, I do not start by editing every product photo. I start by asking which images are actually doing sales work.
That is the whole trick with Supra AI Photo Studio: the app is most useful when you use it to solve the right problem on the right image. Sometimes that means cleaning up a flat shot. Sometimes it means placing the product into a lifestyle scene. Sometimes it means putting apparel on a realistic model. And sometimes it means leaving a photo alone because it already does its job.
Supra AI Photo Studio’s landing page and Shopify App Store listing show the core toolbox clearly: background removal, upscaling, auto enhancement, object placement, AI try-ons, mockups, and short AI videos.
If you want the fast version, this is the order I use:
- Fix the images that are seen first.
- Enhance photos that are already good but weak in clarity.
- Add context only when the product needs scale or emotion.
- Save the fancy treatments for products that can earn the extra work.
I use the same basic decision rule every time: the lighter the edit, the better, unless the original photo is actually blocking the sale.
Start With the Photos That Carry the Most Weight
If I only have time for a handful of edits, I start with the images that show up earliest in the shopping journey:
- Hero images on product pages.
- Collection thumbnails.
- Paid social creatives.
- New arrivals and bestsellers.
- Any image that looks inconsistent next to the rest of the catalog.
Those are the photos customers see before they ever care about my editing process. If a hero shot is dull, blurry, or oddly lit, I fix that first. If the product is already clear, I usually do not add more layers just because I can.
That is also why I like the way How to Choose the Right AI Edit for Each Shopify Product Photo breaks the decision down: the goal is not to make every image look dramatic, but to make each image do one job well.
What I Look For Before Editing
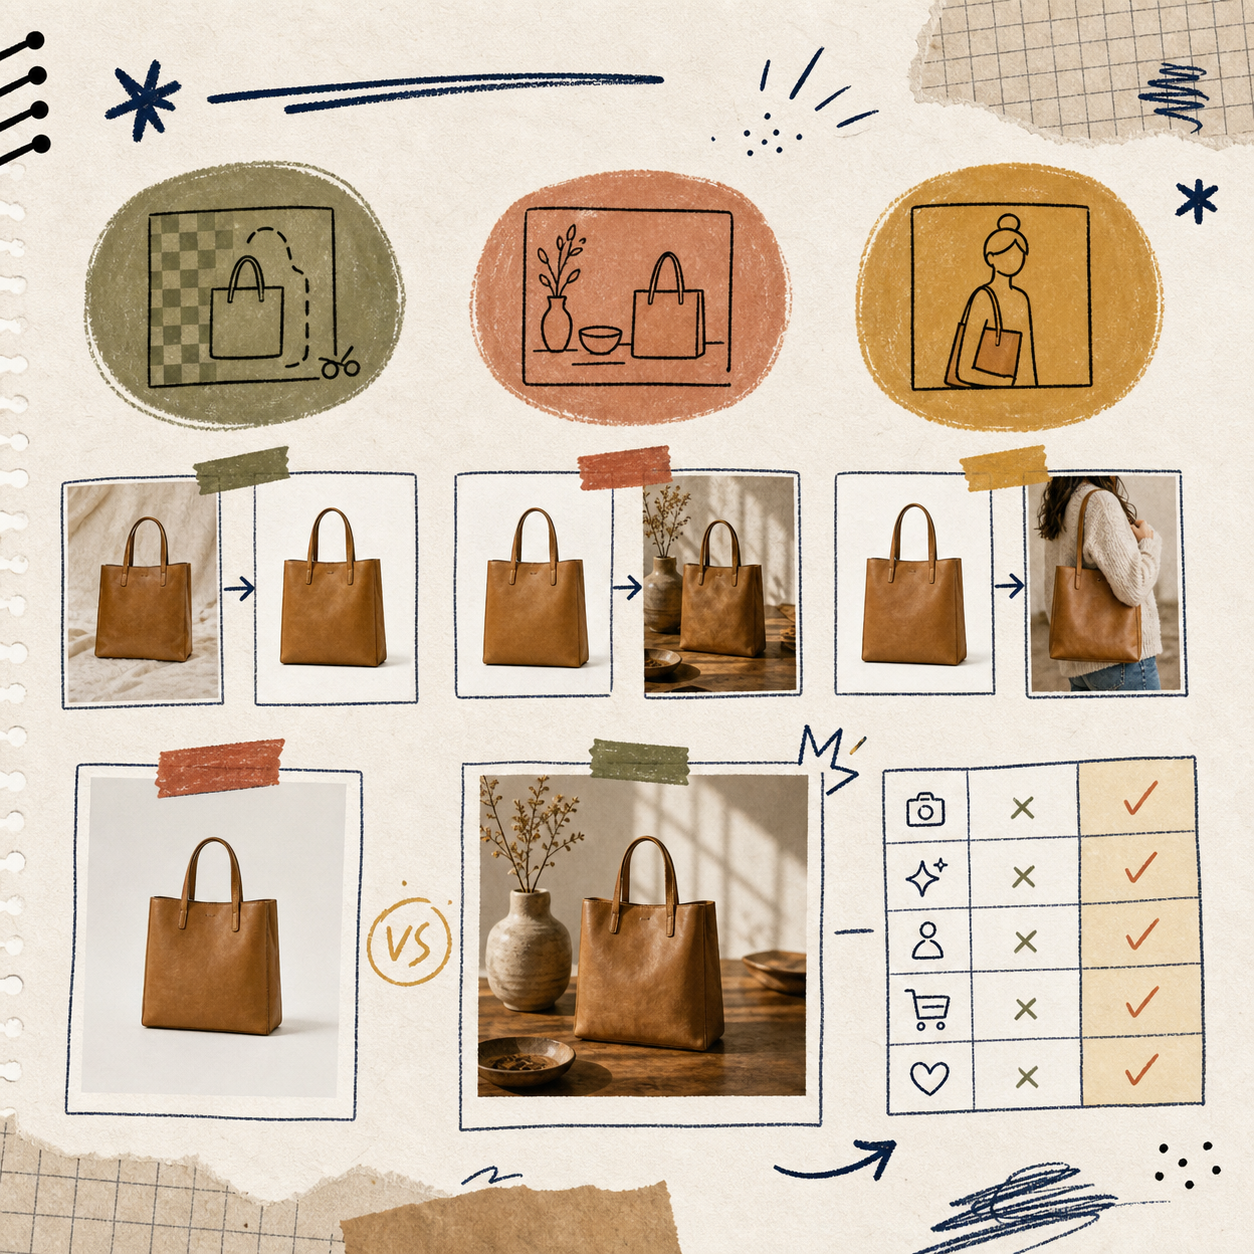
I sort product photos into four buckets.
| Bucket | What I use it for | Tooling I reach for first |
|---|---|---|
| Cleanup | The image is usable but looks flat, noisy, or slightly off | Background removal, auto enhance, upscaling |
| Context | The product needs a room, surface, or environment to make sense | Object placement |
| Fit | Apparel or accessories need a realistic on-body view | AI try-on |
| Marketing extras | The image needs ad or social variants | Mockups, UGC videos, b-roll |
This is where the app matters. The editor keeps the work in one place, with a top bar, tools panel, canvas, and image gallery, so I can choose a source image, edit it, and move on without bouncing between separate tools.
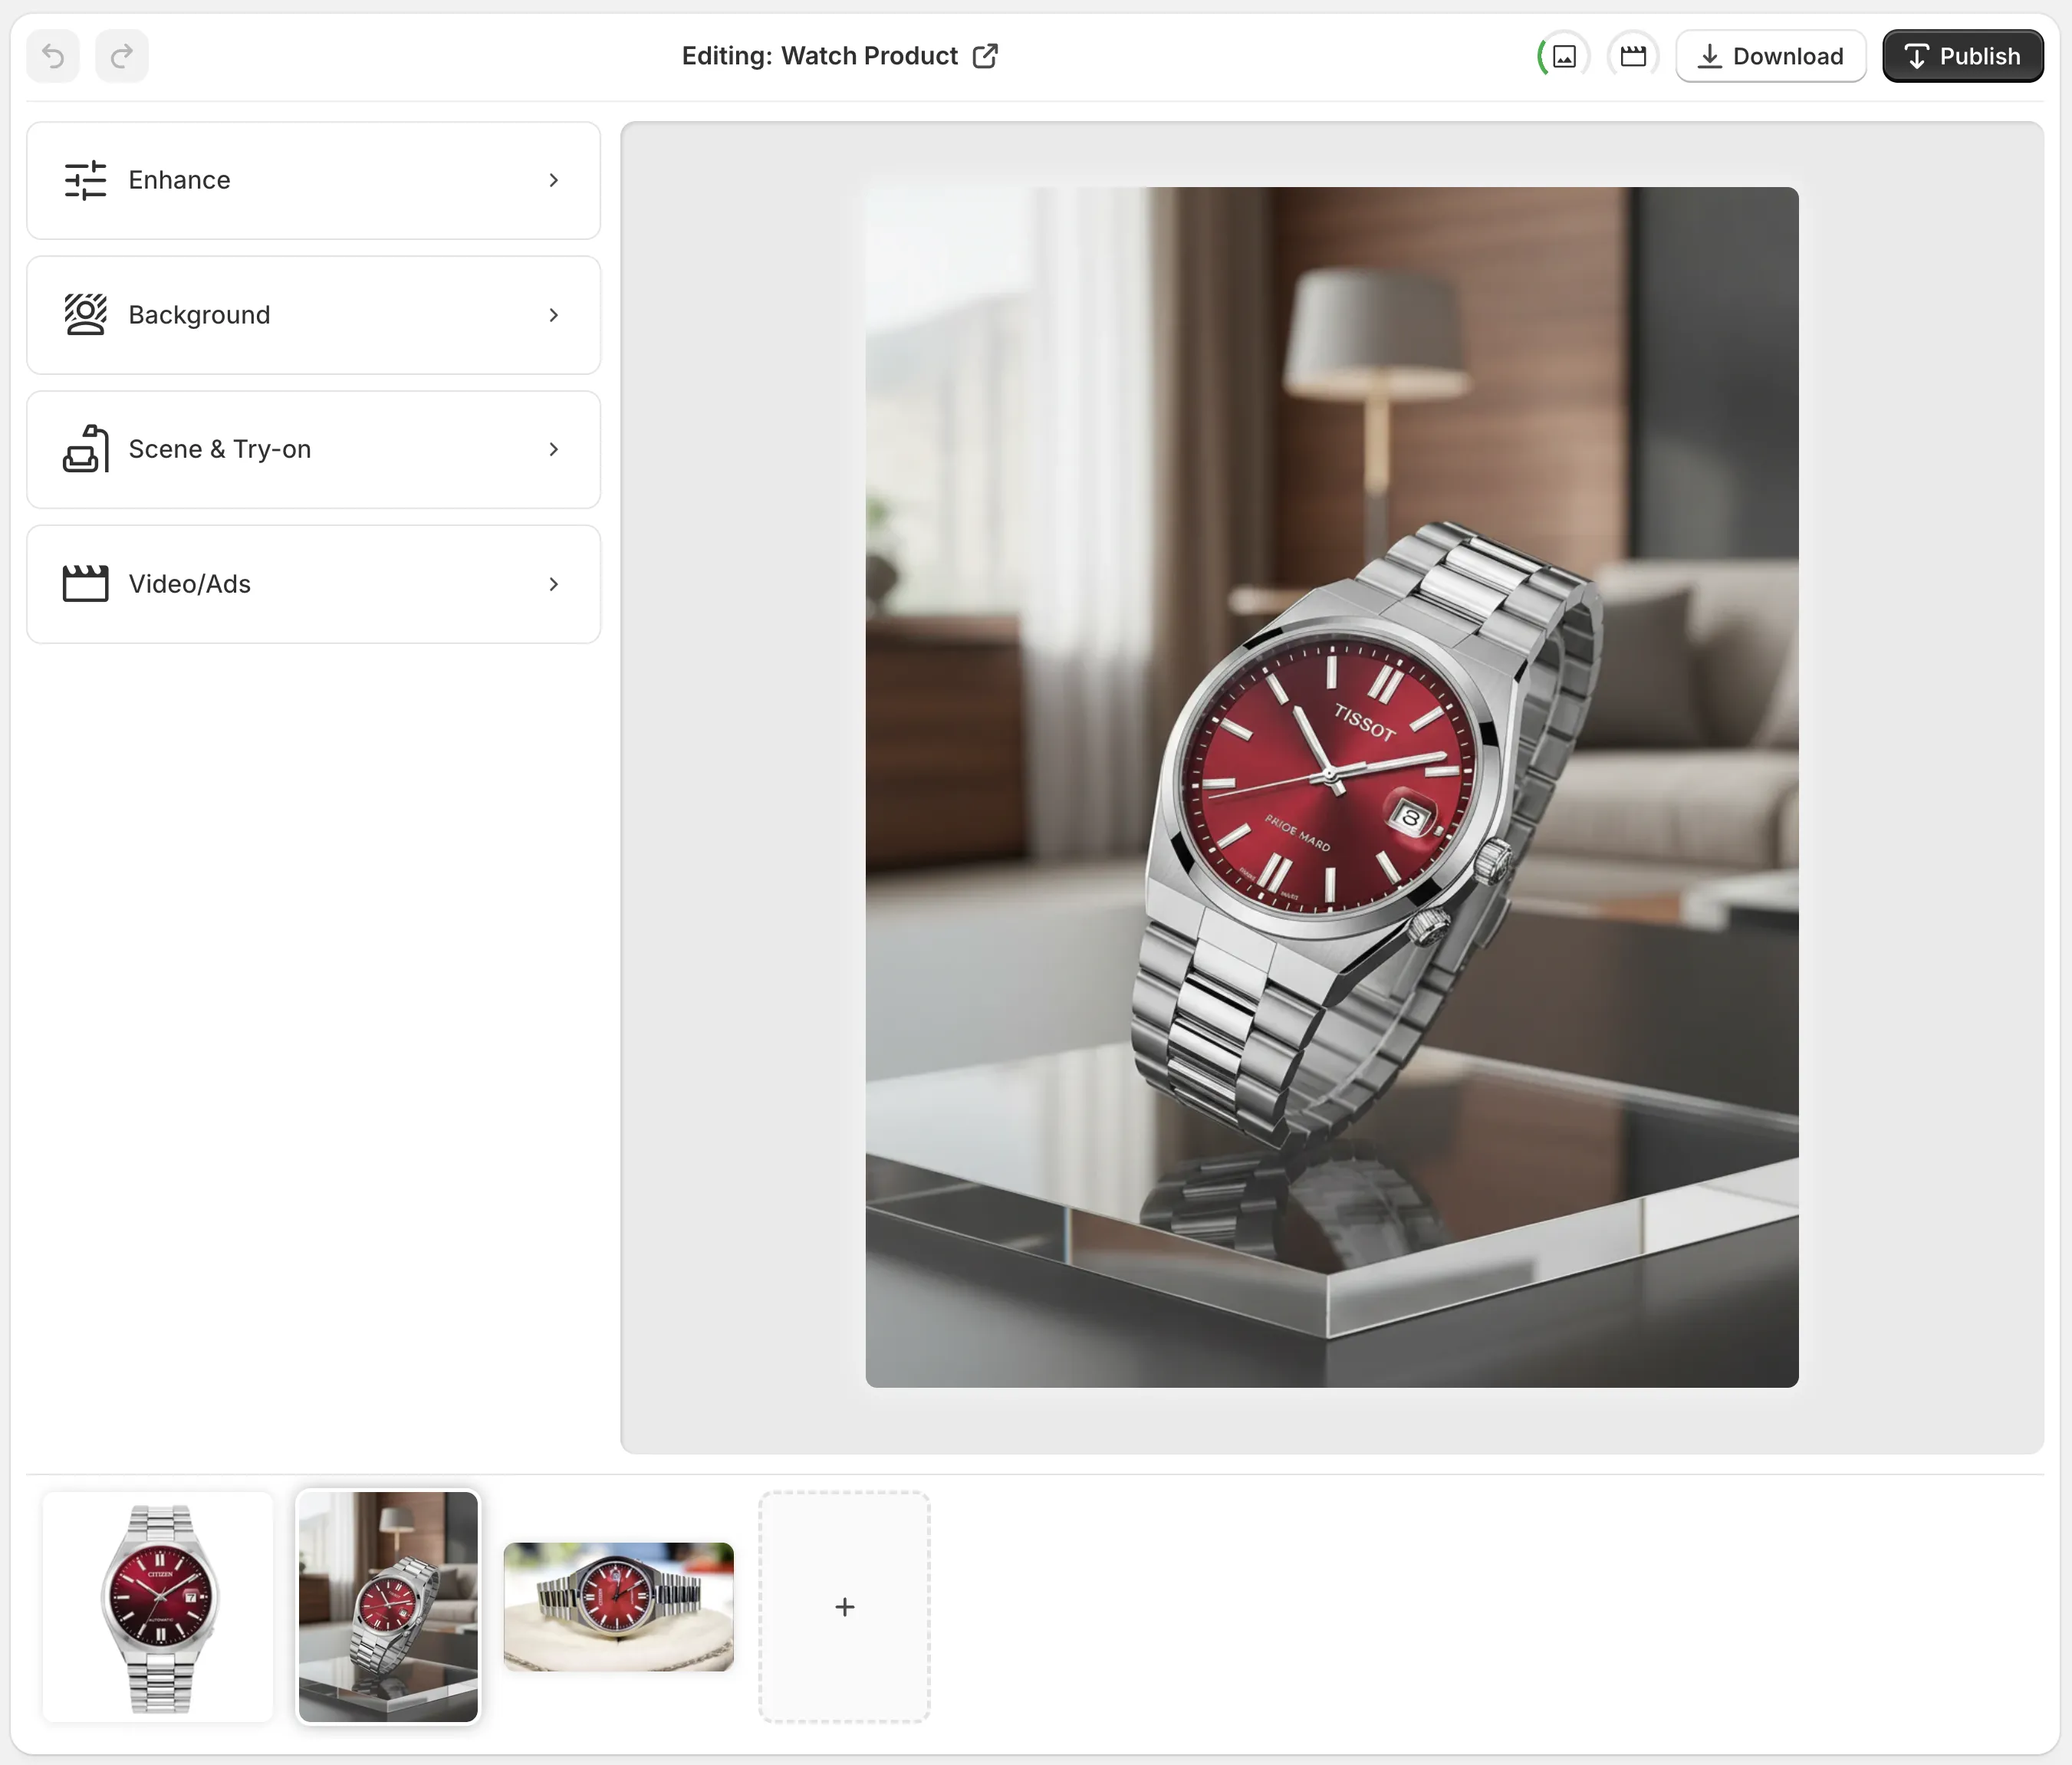
The best part is that the workflow stays visible. I can see the source, the active edit, and the rest of the image set without losing context.
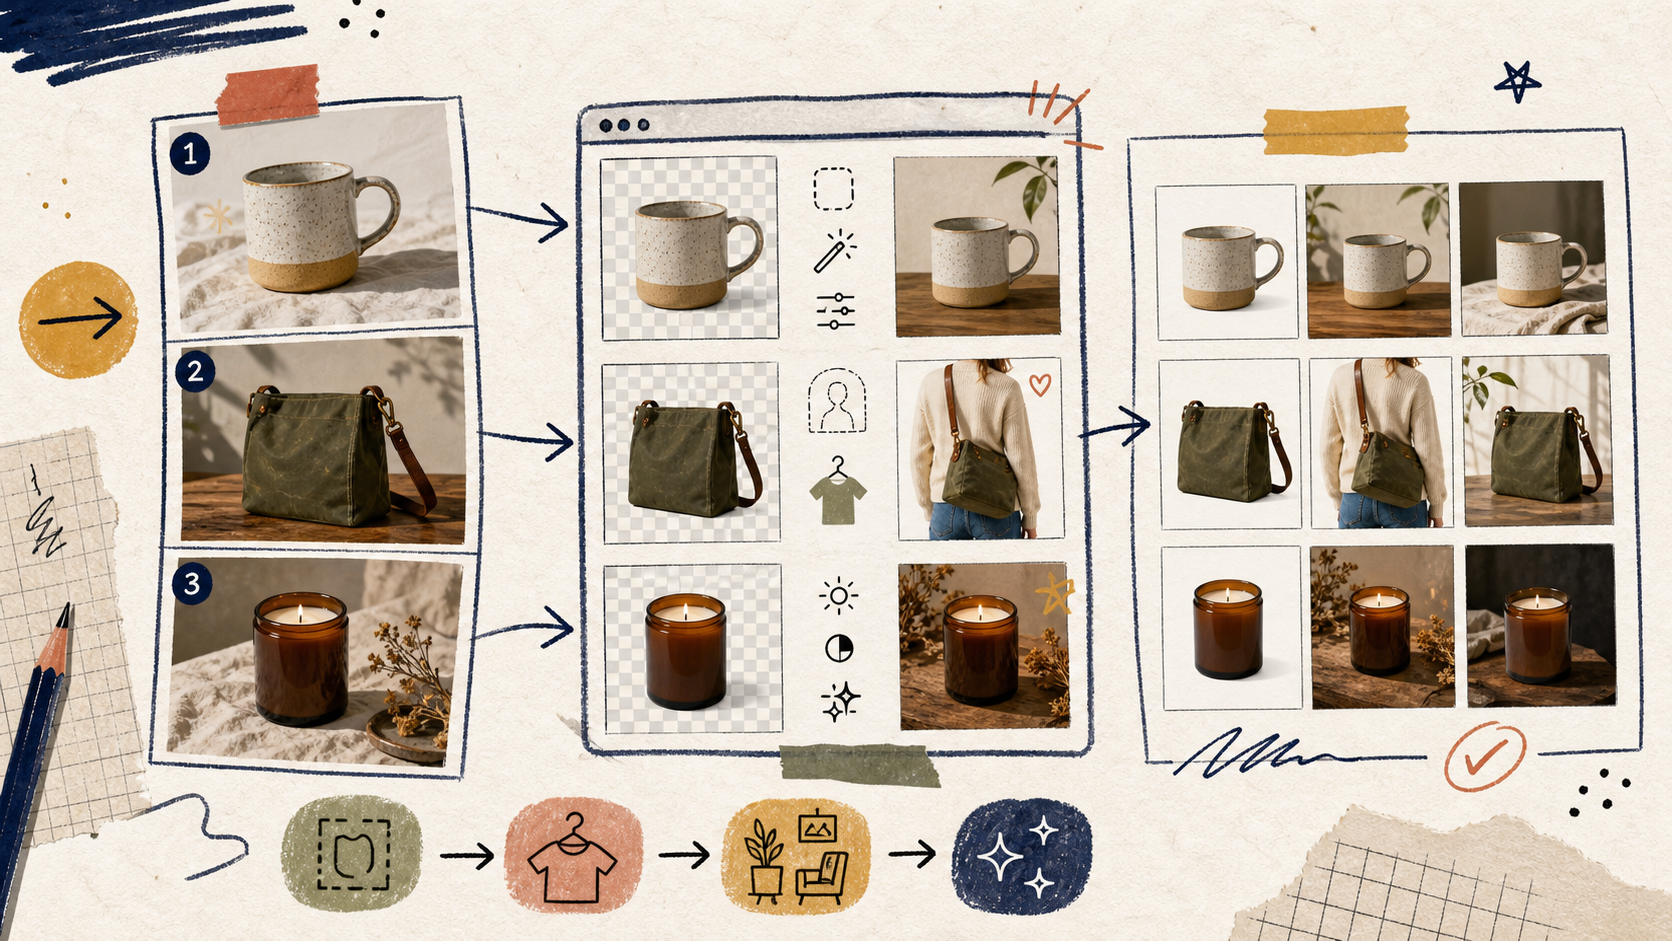
The Lightest Edit That Solves the Problem
My default order is simple:
- Remove distractions first.
- Fix lighting and sharpness second.
- Add a lifestyle scene only if the product benefits from it.
- Use try-on when the customer needs fit or body context.
- Generate extra marketing assets only after the product page image is solid.
That sequence keeps me from over-editing. A lot of product photos do not need a dramatic transformation. They just need better edges, better light, or a cleaner background.
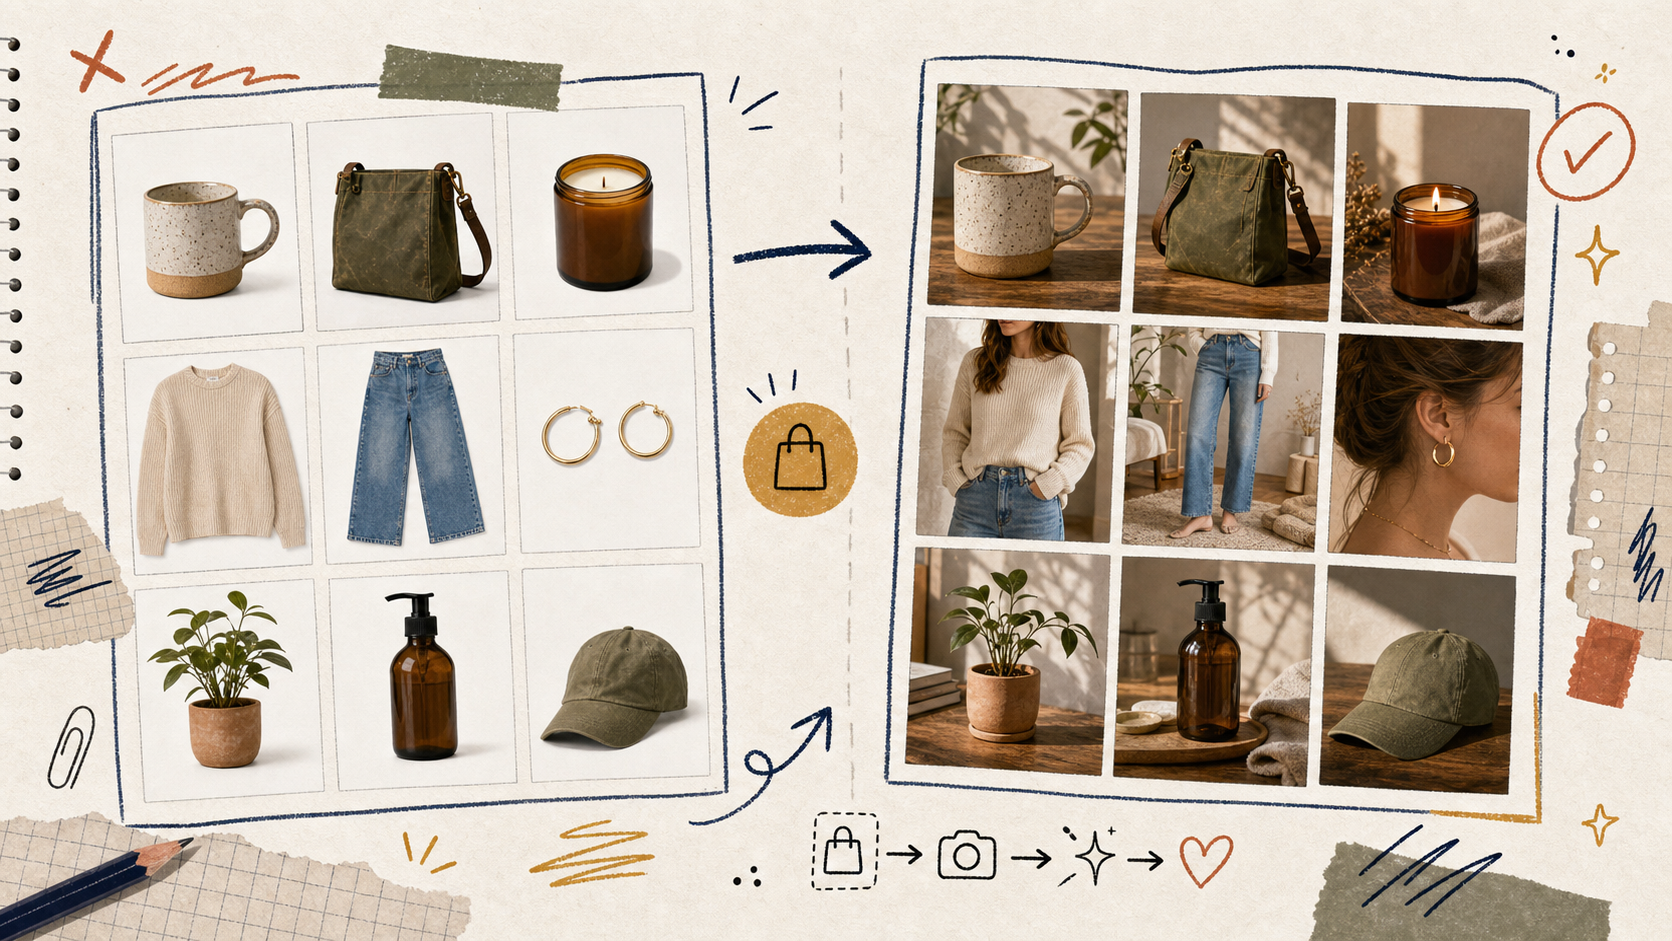
If I am working from a single source image and want the whole thing to stay repeatable, I think in terms of a small production line. How to Build a Repeatable Shopify Image Workflow From One Product Shot and How to Turn One Product Photo Into a Full Shopify Image Set both point in that direction. You are not trying to invent a new creative idea for every image. You are turning one photo into a set of useful outputs.
What I Leave Alone
I skip the edit when the original photo already does its job.
That sounds obvious, but it is the easiest rule to violate when a tool is available. If the product is already crisp, balanced, and easy to understand, I do not force a mockup or a lifestyle scene just to make the image feel more produced.
The same goes for try-on images. They are excellent when fit, drape, or styling matters. They are unnecessary when the buying decision is mostly about the object itself.
That is why I like reading How I Built a Shopify Photo Workflow That Replaces Manual Retouching alongside this approach. It keeps the focus on taste, not volume. Better output usually comes from fewer, sharper decisions.
If you want the broader workflow version of the same idea, How to Build a Repeatable Shopify Image Workflow From One Product Shot and How to Turn One Product Photo Into a Full Shopify Image Set are the two companion posts I would keep open. They show the same decision rule at a slightly different scale.
A Simple Weekly Workflow
If I were setting this up for a store that publishes regularly, I would do it like this:
- Pick one collection or product line.
- Sort the photos into cleanup, context, fit, and marketing buckets.
- Fix the first three to five images that matter most.
- Save the stronger versions back into the product image set.
- Create one extra asset for ads or social only if the page images are already strong.
That keeps the work bounded. It also gives you a repeatable standard you can use on the next batch instead of starting from zero.
Supra AI Photo Studio is a good fit for that kind of workflow because it covers the whole sequence inside Shopify: cleanup, placement, try-on, mockups, and even short AI video assets when you need them.
Bottom Line
Do not start by editing everything. Start by editing the images that are most likely to change the customer’s decision.
If you want to try the workflow yourself, open the Supra AI Photo Studio landing page, install it from the Shopify App Store, and run one collection through the four-bucket triage first. The free plan is enough to see whether the process feels faster than manual retouching.