Plain product photos are enough to list an item, but they usually are not enough to sell the story. If you want a blog post, a collection page, or an ad to feel more useful, you need the product in a scene that gives context fast.
Supra AI Photo Studio is a Shopify app built for that job. It can clean up the source image, place the product into a lifestyle scene, create try-on visuals, and even generate short product videos. The trick is to start with the right input and choose the right output for the product, instead of asking the tool to do everything at once.
If you want a quick reference while you work, the app listing is here: Supra AI Photo Studio on the Shopify App Store. There is also a product landing page and a demo trailer if you want to see the workflow before you install it: landing page and demo trailer.
1. Start With The Cleanest Source Photo
Pick the strongest original photo you have. A good source is sharp, centered, and lit well enough that the product edges are easy to read. If the photo is already blurry or badly cropped, fix that before you try to build a lifestyle scene on top of it.
That is the same rule I use when sorting inputs for How I Prioritize Shopify Product Photos for AI Editing: if the source is weak, every downstream output gets weaker too.
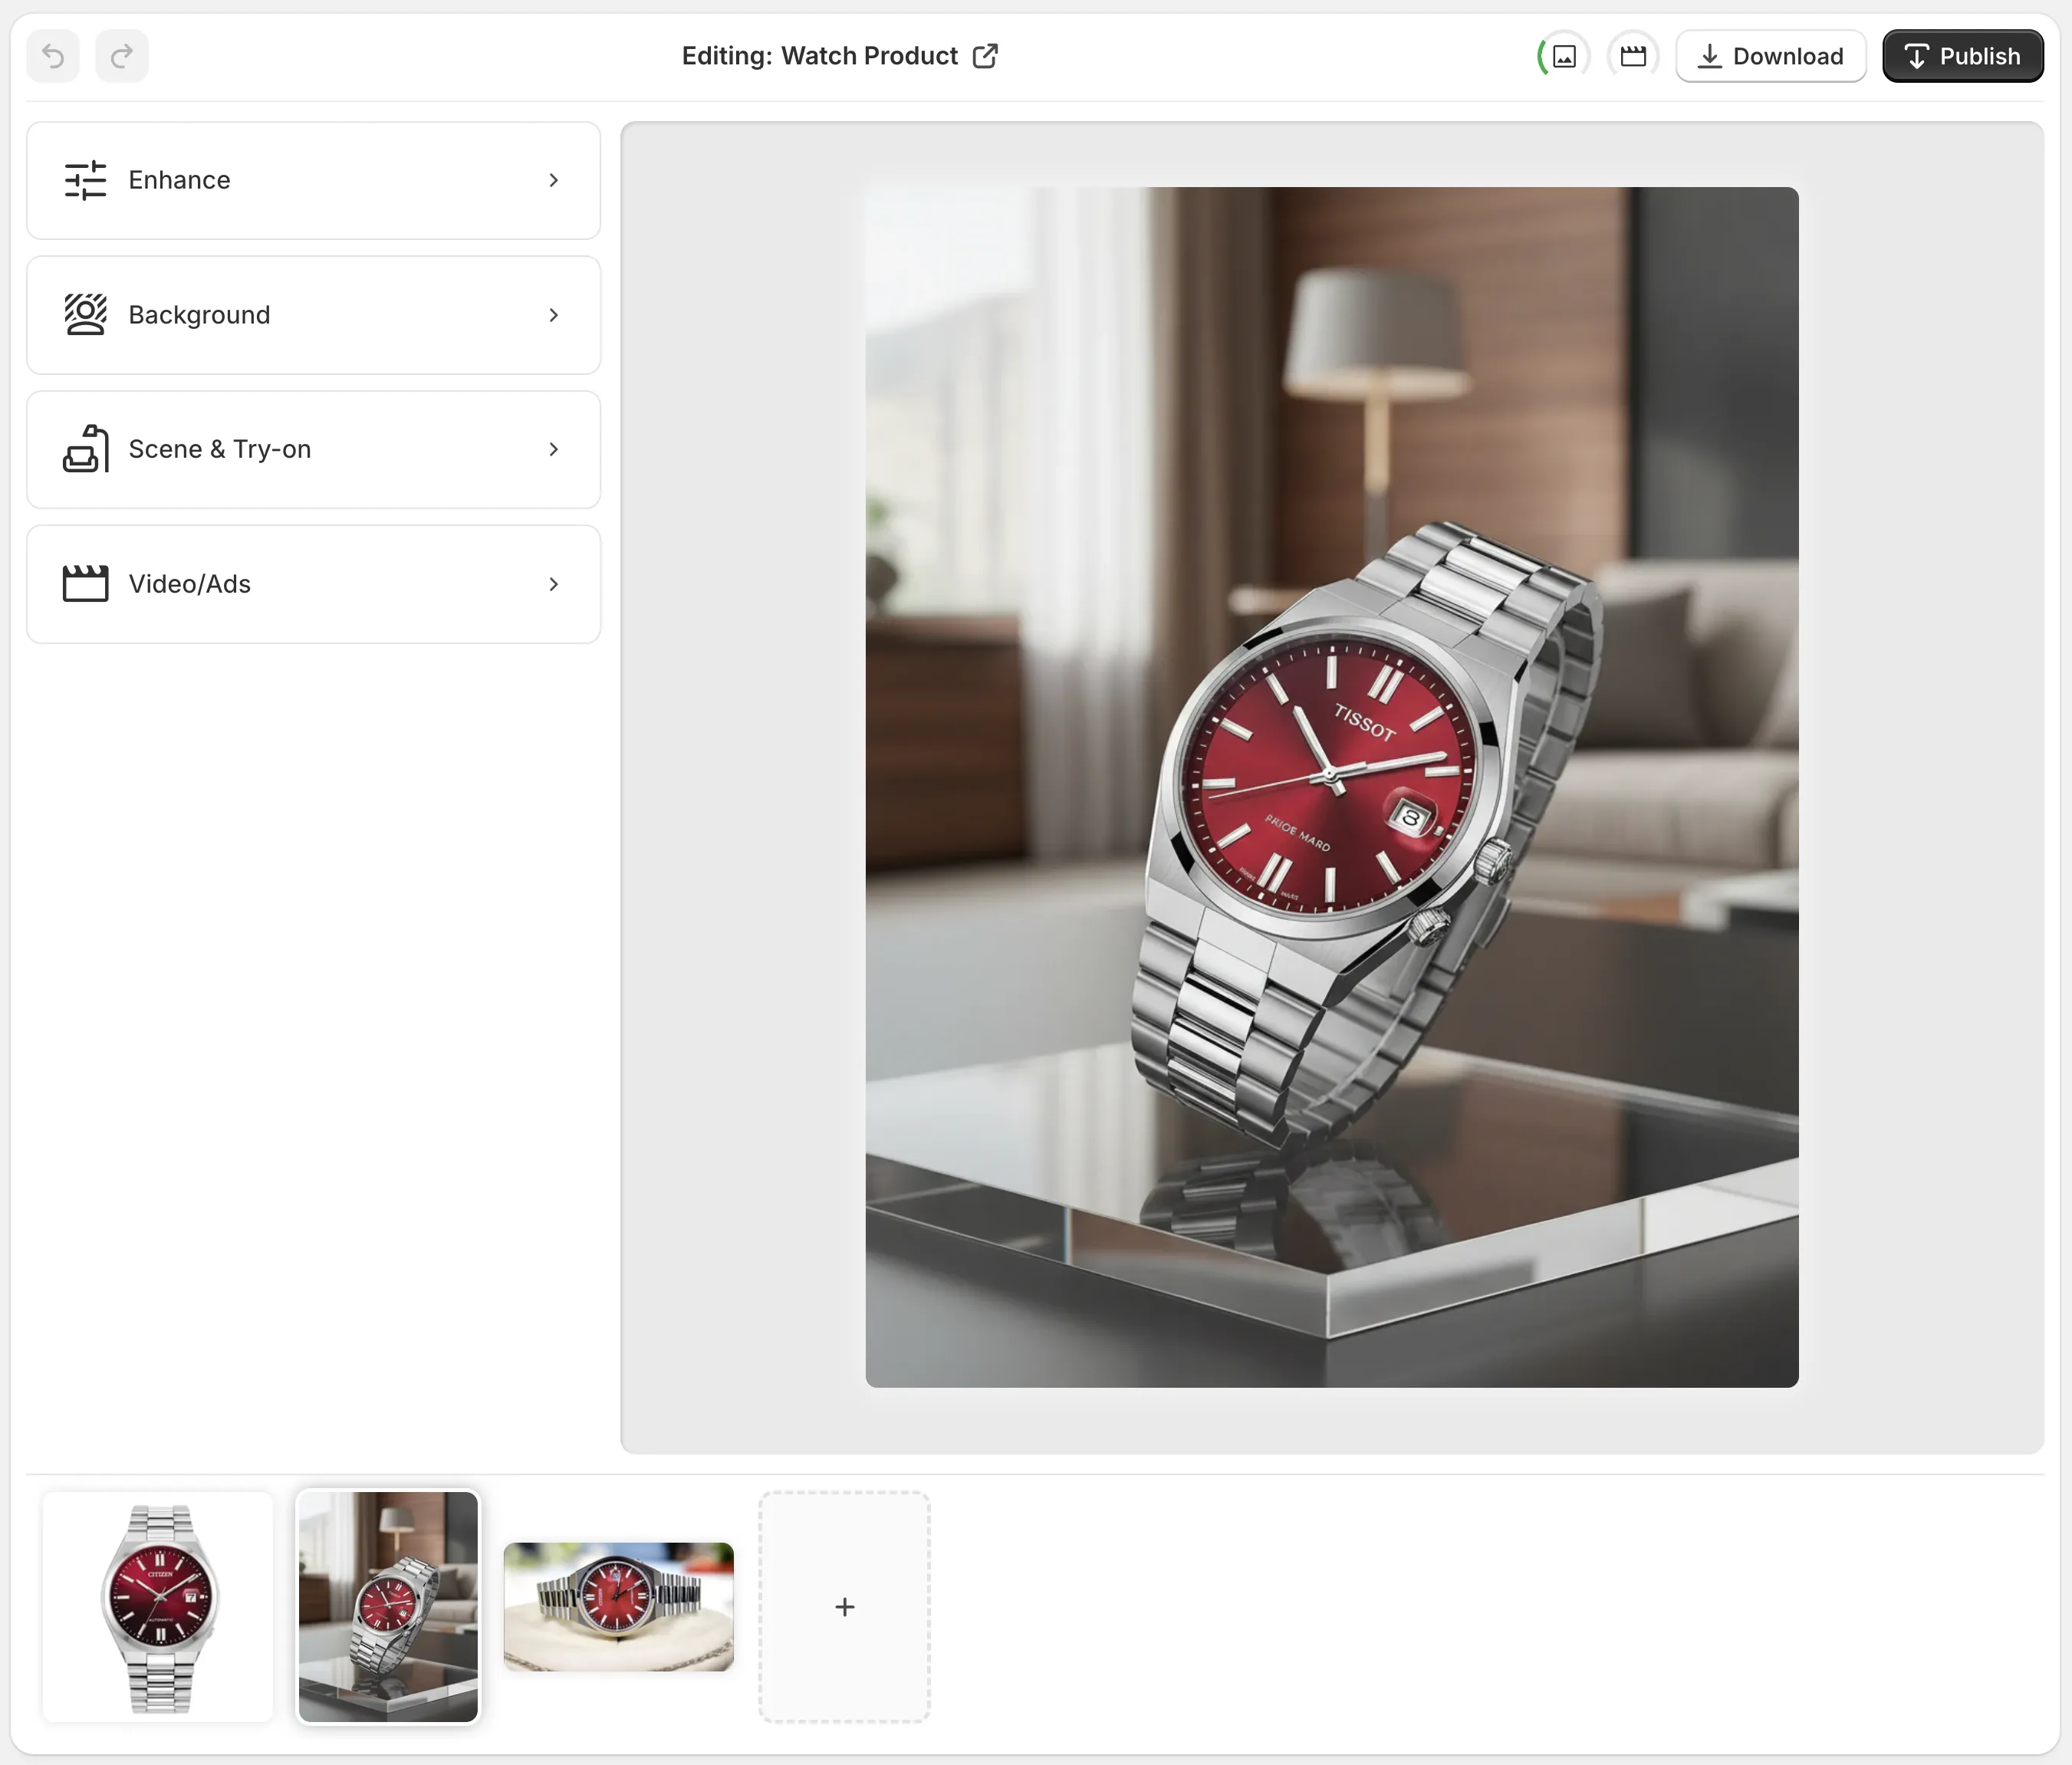
Use the app’s enhancement tools first if the image needs cleanup. Background removal, deblurring, denoising, and color correction are more useful than scene generation when the source is still messy.
The point of this step is not to make the image fancy. It is to make the product easy for the model to understand so the final result still looks like the same item.
2. Remove Distractions Before You Add Context
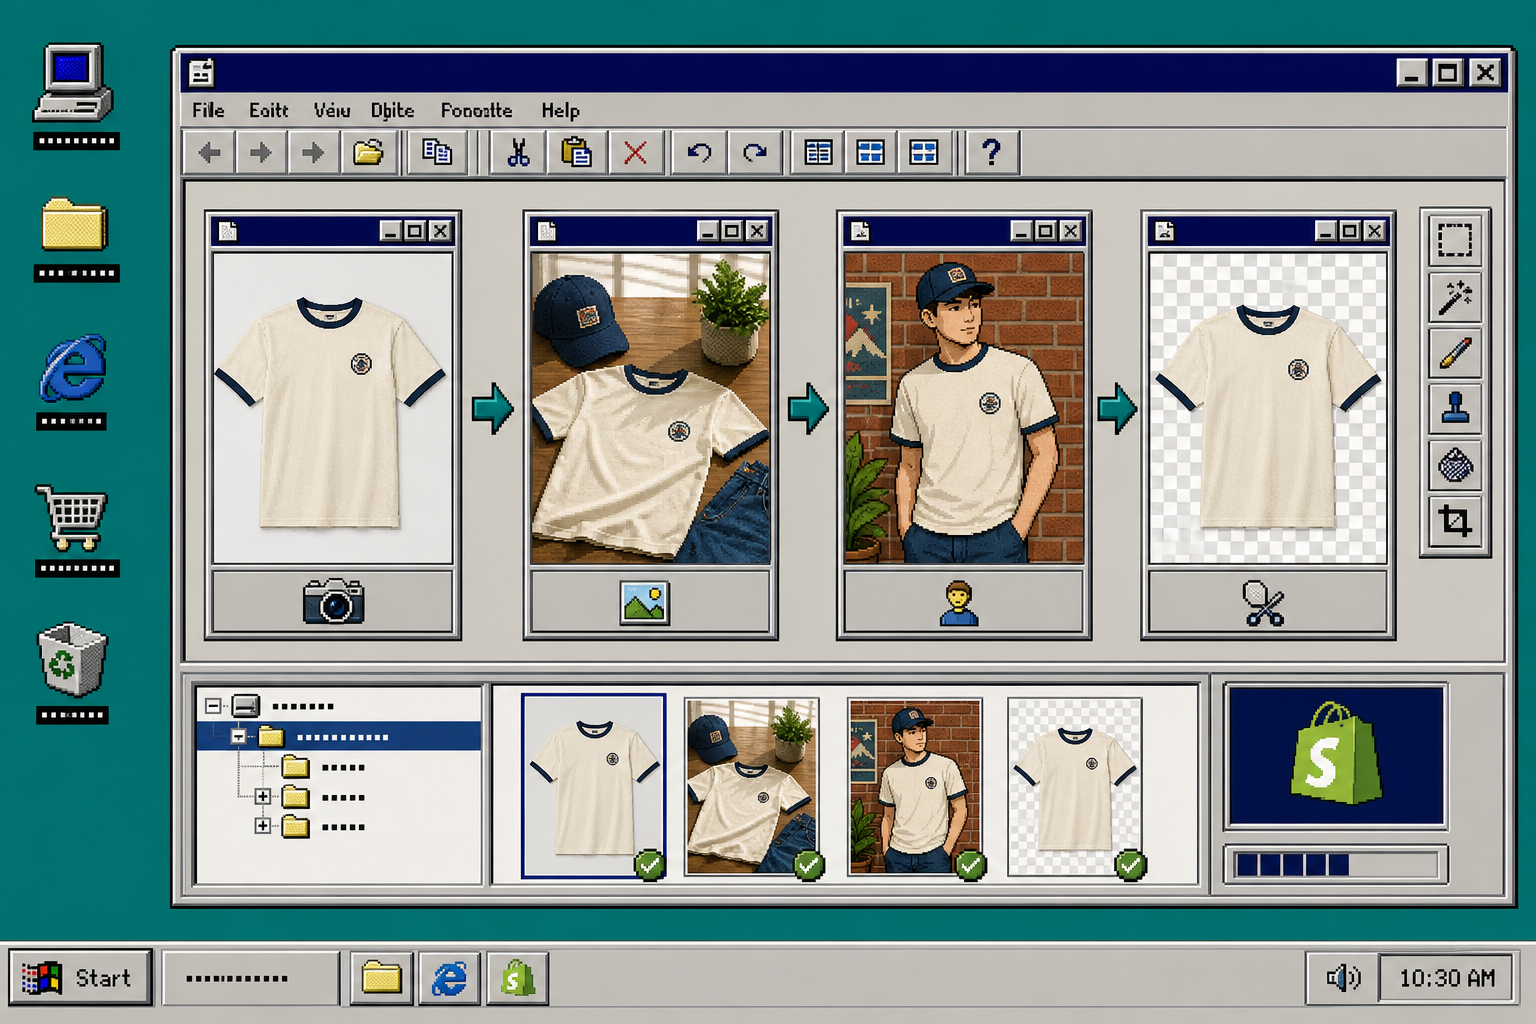
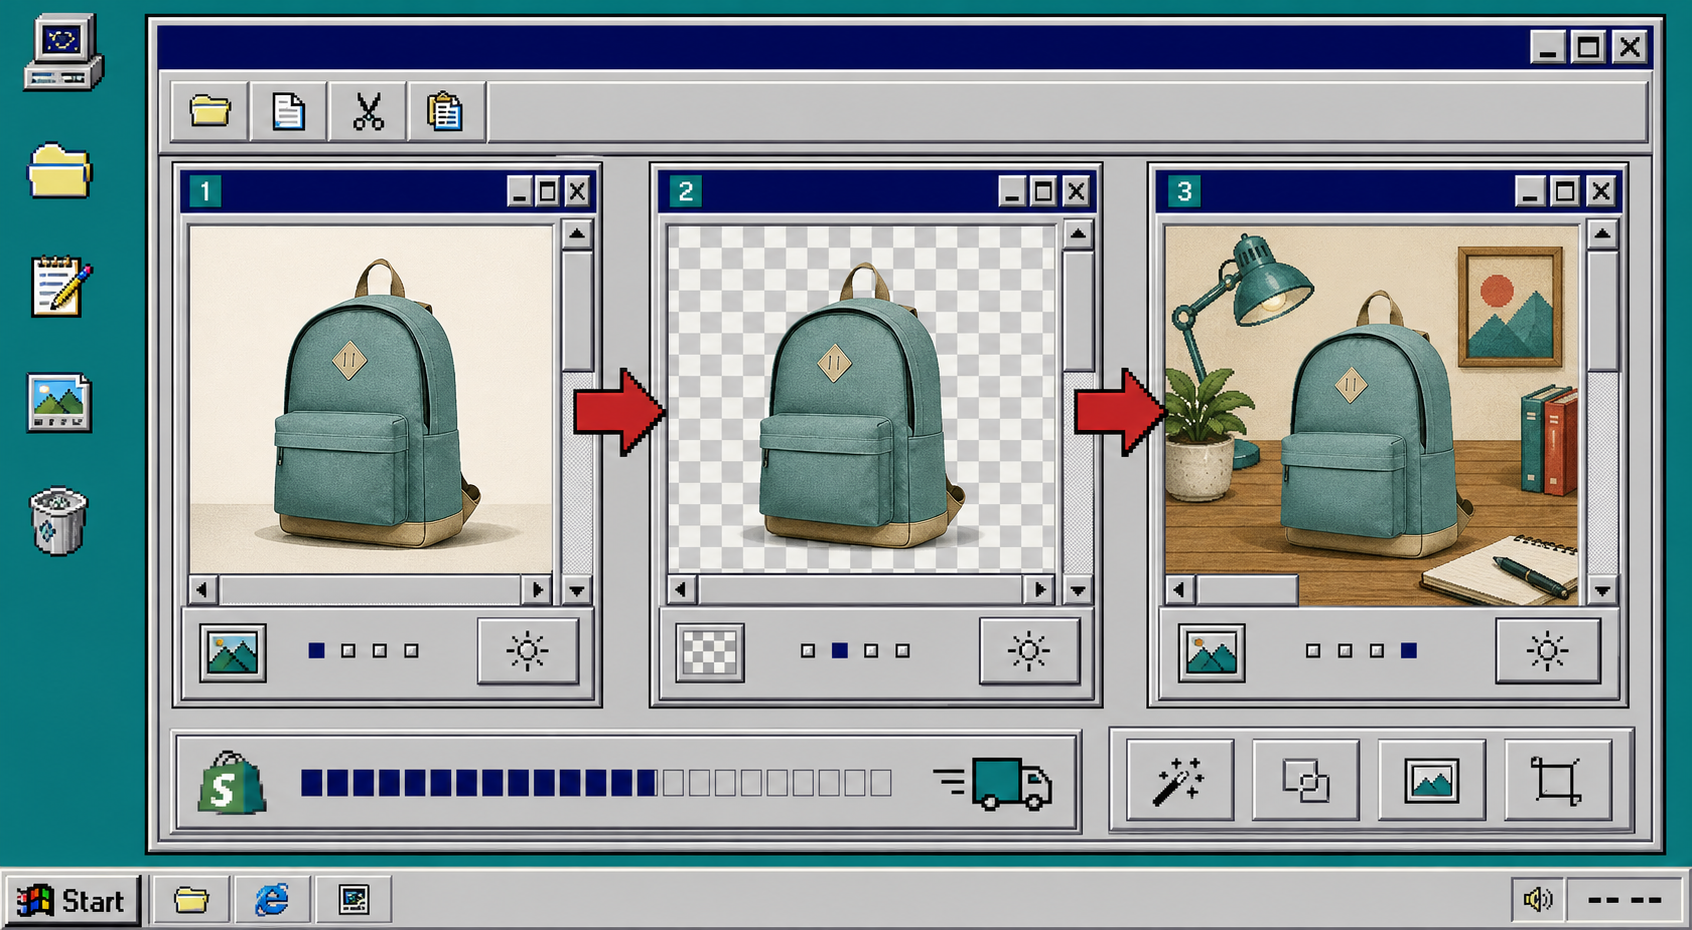
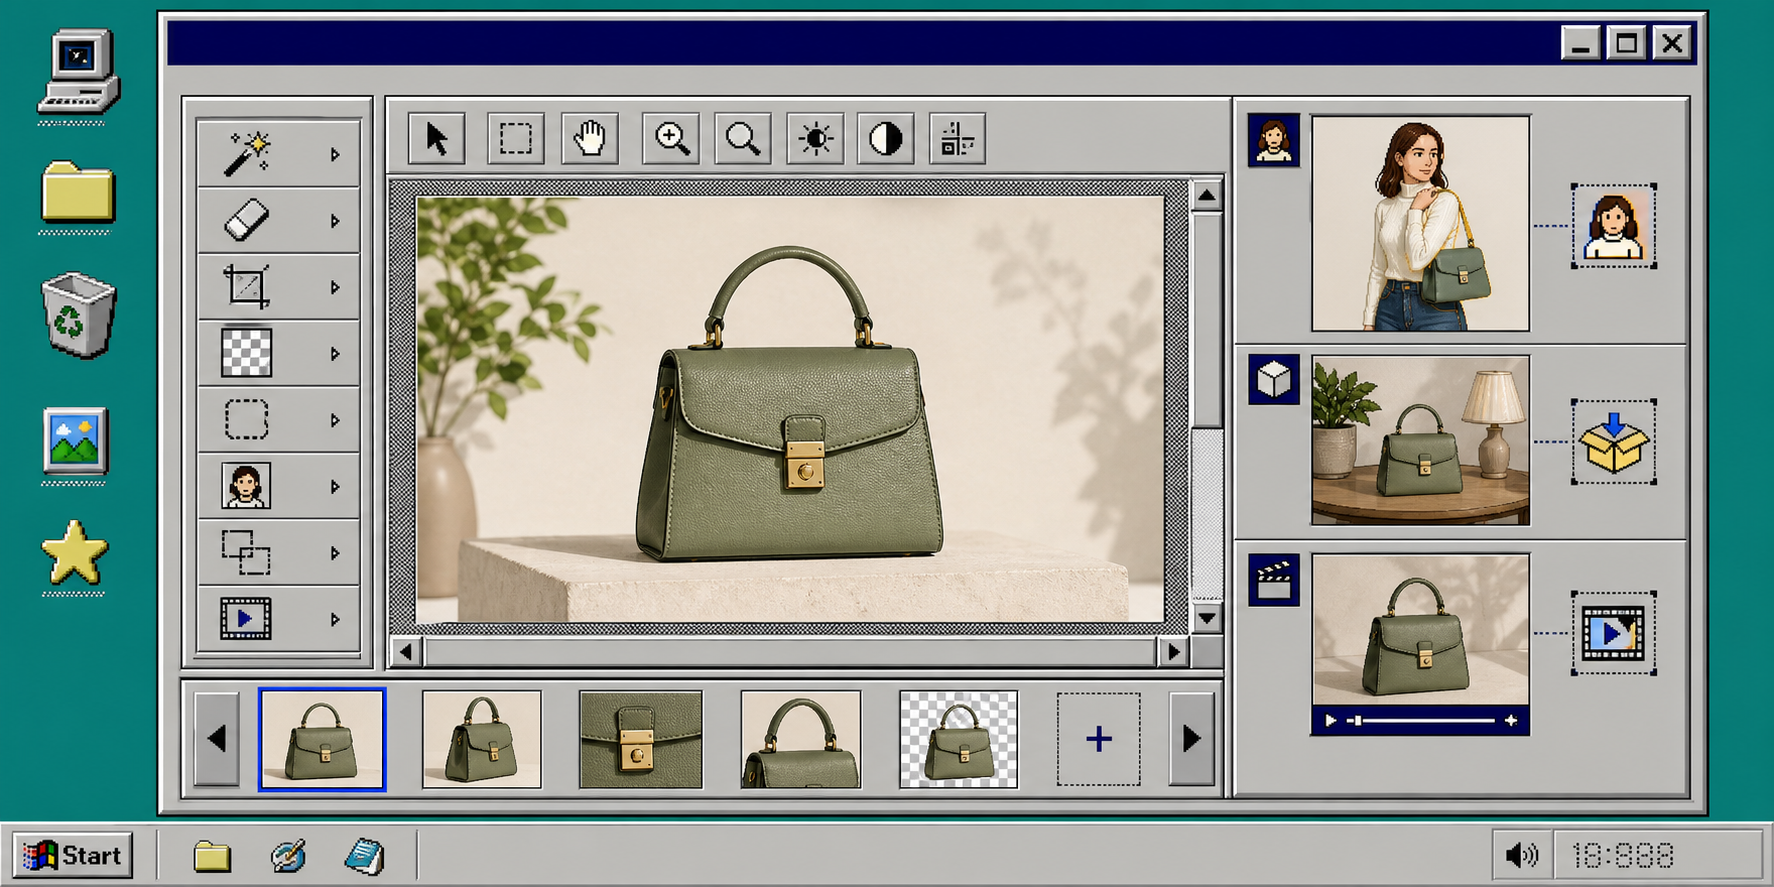
Once you have a clean source, isolate the product. A plain background or a cluttered room is fine for a raw catalog image, but it is not the right starting point for a lifestyle edit.
Inside the editor, remove the background or isolate the product first. That gives you a cutout you can reuse in more than one output. It also makes the next step much less error-prone, especially if you want the product to sit naturally in a new environment.
You can see the workflow center around one canvas, a tool column, and an image strip. That is exactly what you want when you are iterating on a product image instead of starting from scratch every time.
3. Choose The Right Output For The Product Type
Not every product needs the same treatment. The best result comes from matching the output to the category:
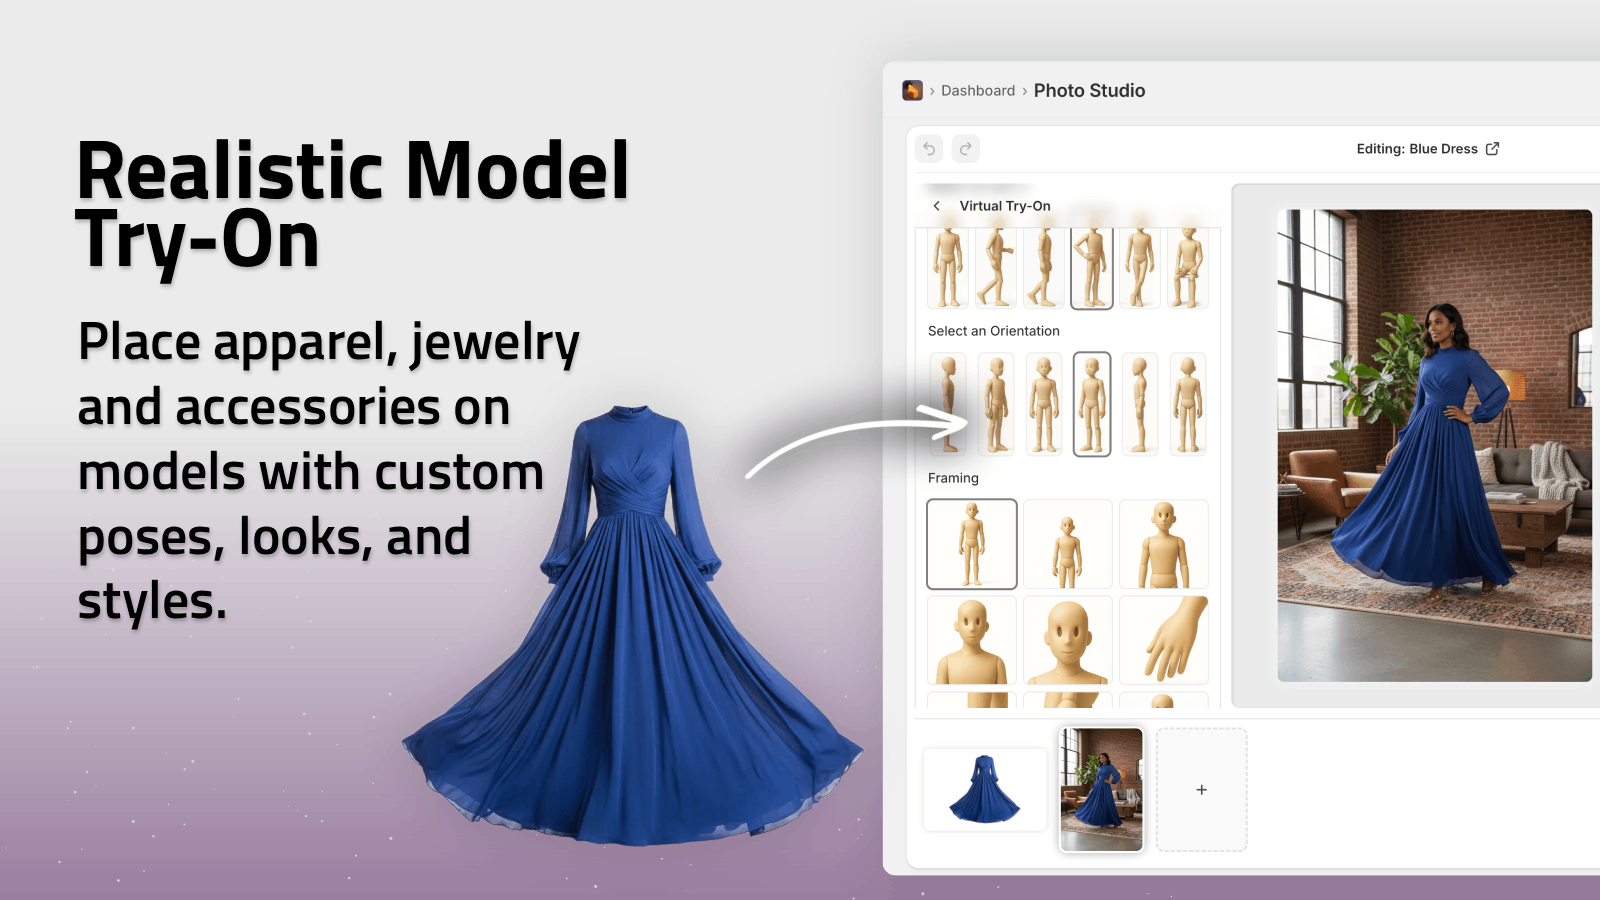
- Apparel, jewelry, and accessories usually work best with try-on images.
- Home decor, bags, and lifestyle goods usually work best with object placement.
- Branded items and packaging usually work best with mockups.
- Paid social and retention content often benefit from short UGC-style clips or b-roll.
That decision tree is close to what I wrote in How to Decide Which Shopify Products Need Try-On, Placement, or Video. The point is to avoid using the wrong visual format just because it is available.
If the product belongs on a person, use try-on. If it belongs on a desk, in a room, or on a shelf, use placement. If the product needs motion to feel alive, move to video instead of forcing the still image to do all the work.
This is the step where merchants often overcomplicate the brief. Keep the prompt specific, but not bloated. Say what the product is, what kind of scene it belongs in, and what needs to stay accurate.
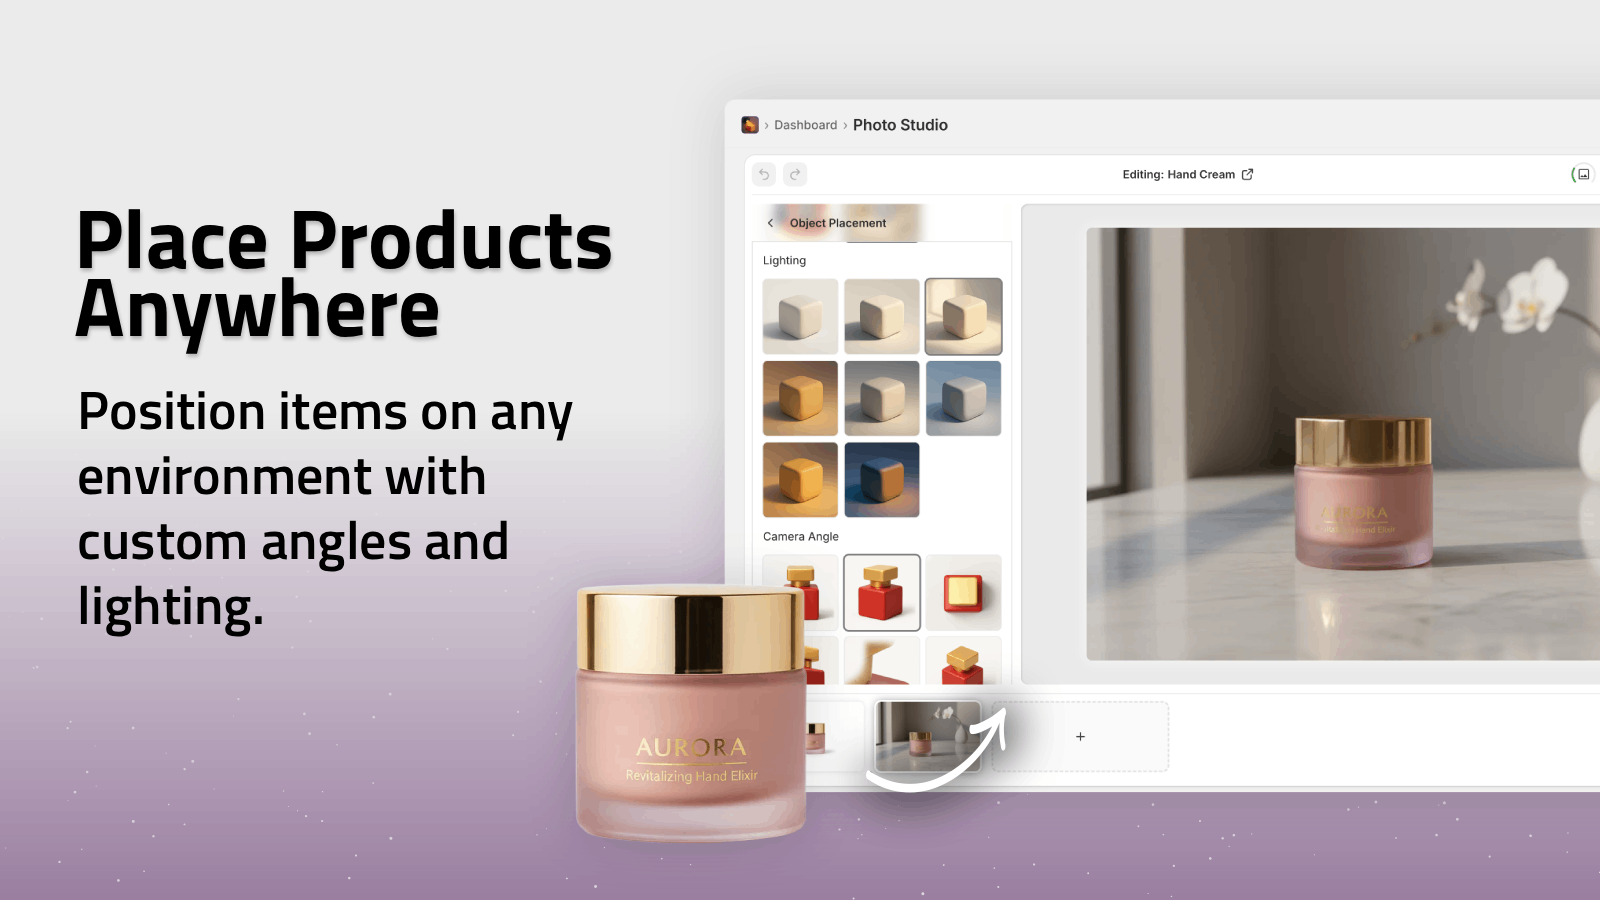
4. Keep The Scene Consistent With The Brand
Once the app knows the product type, tune the scene so it still looks like your store. A premium brand should not suddenly look like a camping catalog. A minimal brand should not suddenly turn into a crowded studio set.
Pick a room, lighting style, and camera angle that match the rest of the catalog. If you sell modern home goods, a clean interior is better than a dramatic exterior. If you sell activewear, a model in a believable everyday setting is better than a generic pose.
I like to keep the scene simple enough that the product still reads instantly. The best AI image edits do not call attention to the tool. They just remove the friction between a flat source image and a useful marketing asset.
If you want a broader example of getting more from one source image, How I Turn One Shopify Product Photo Into Listings, Lifestyle Shots, and Clips shows how I reuse the same base asset across multiple channels.
5. Export The Variants You Actually Need
Do not export every possible version just because the app can make them. Export the set you will actually use:
- One image for the product page.
- One image for the blog or collection page.
- One image or clip for ads and social.
- One backup version in case the first scene feels too aggressive.
If the image set needs to support a fuller product story, How I Build a Shopify Product Page Around a 3D Model is the natural next read. The same discipline applies here: pick the media that earns its place on the page.
If you also want motion, the app can generate UGC-style videos from the same kind of source photo. That is useful when the still image is doing the main job, but you want a second asset for retargeting or social testing.
Troubleshooting
If the output looks fake, start over with a cleaner source image and a simpler scene. Most bad AI results are not caused by the scene choice. They are caused by bad input or too many instructions.
If the product shape changes, use a more appropriate mode for the category. Try-on works best when the garment or accessory is suitable for a person. Placement works better when the item belongs in a room or on a surface.
If the catalog starts to look inconsistent, lock the lighting and scene style before you generate a batch. Consistency matters more than novelty when the goal is to support a store page or a blog post.
If you need to see the editor in motion, watch the demo trailer and compare it with the landing page. The free plan is enough to test the workflow before you commit to a larger rollout.
Wrap-Up
The simplest way to improve Shopify product photography is not to reshoot everything. It is to start with the best available photo, clean it up, choose the right output type, and keep the scene aligned with the brand.
If you want to try it on your own store, install Supra AI Photo Studio, generate one cleaned-up product image, and publish the version that feels most believable first. After that, build the rest of the content set around the same source image.