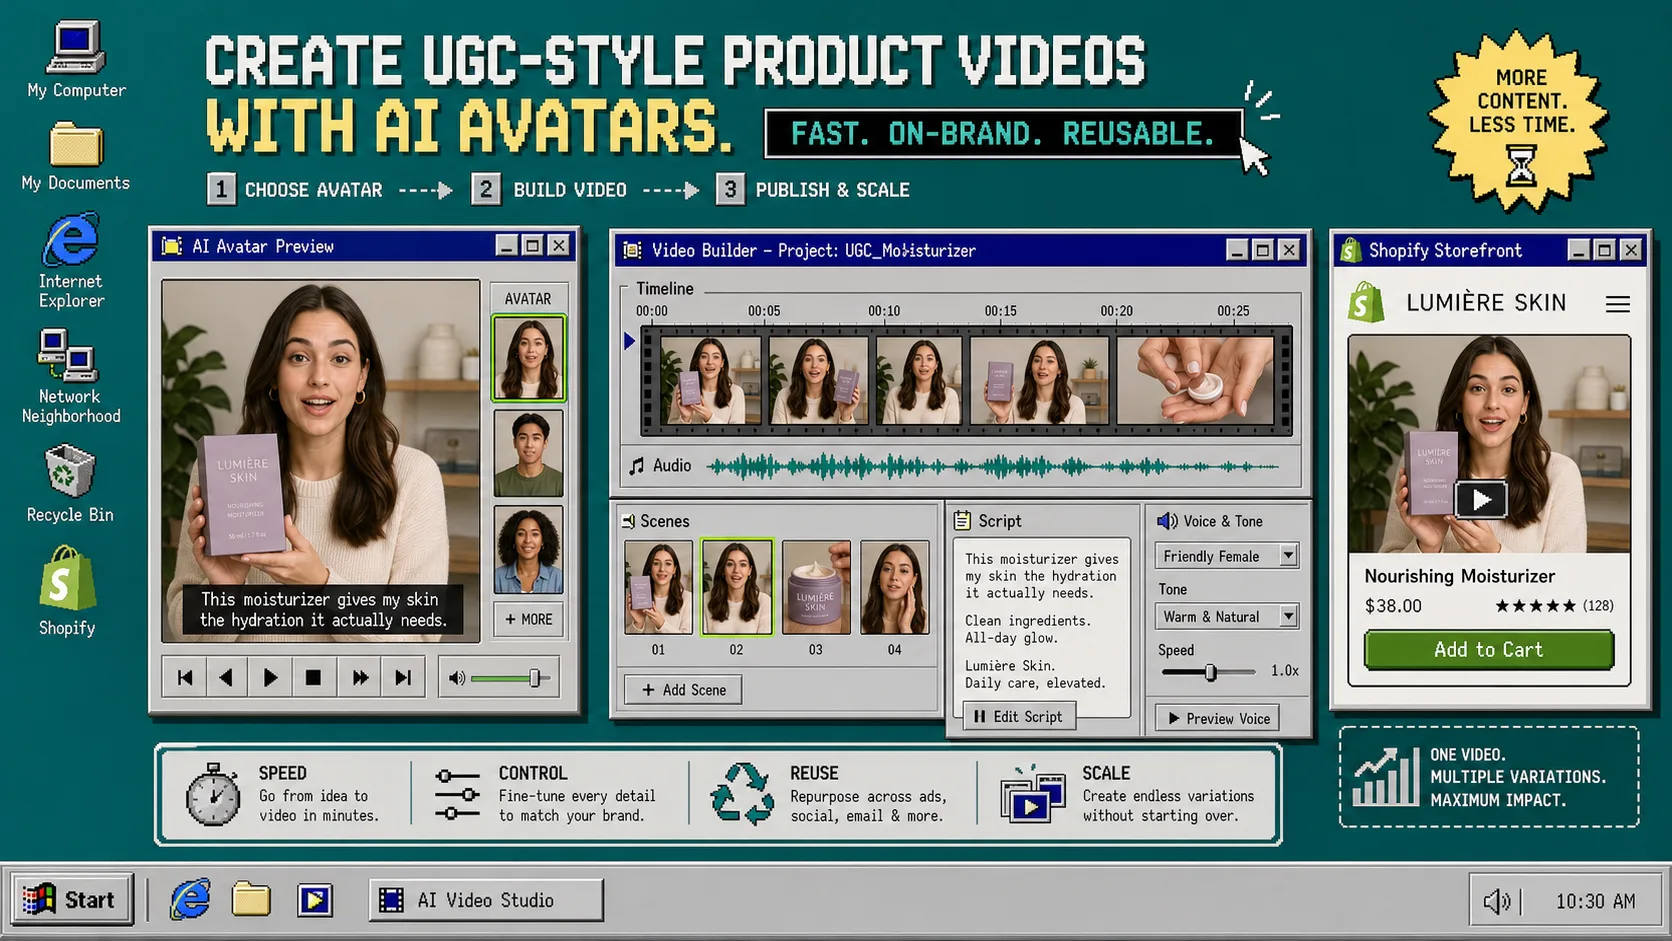
If you need short-form product videos for ads, product pages, and email but do not want to book creators, camera gear, or an editor, start with Supra UGC Maker. It is a Shopify app for building UGC-style product videos with AI avatars, scenes, scripts, speech, and product references.
Use the landing page if you want the overview first, or the Shopify App Store listing if you want the install path. The workflow below is the practical version: pick one product, write one clear hook, and generate one video you can reuse everywhere.
1. Choose One Product and One Job
Start with a single SKU and a single outcome. Do not try to explain the whole catalog in one clip. Pick the product that needs more attention, then decide what the video must do: get attention in an ad, explain a feature on the product page, or support a launch or seasonal push.
That keeps the script short and makes the AI avatar easier to direct. It also gives you a clean success test. If the first version does not improve the hook or clarity, the next edit should change one thing only, not the whole concept.
What you should see at the end of this step is a simple brief: product, audience, promise, and destination.
2. Pick an Avatar That Matches the Buyer
Choose a preset avatar or create a custom AI model, then match the presentation to the audience. A friendly, clear presenter works best when the goal is product education. A more energetic read can work better when the goal is a fast ad hook.
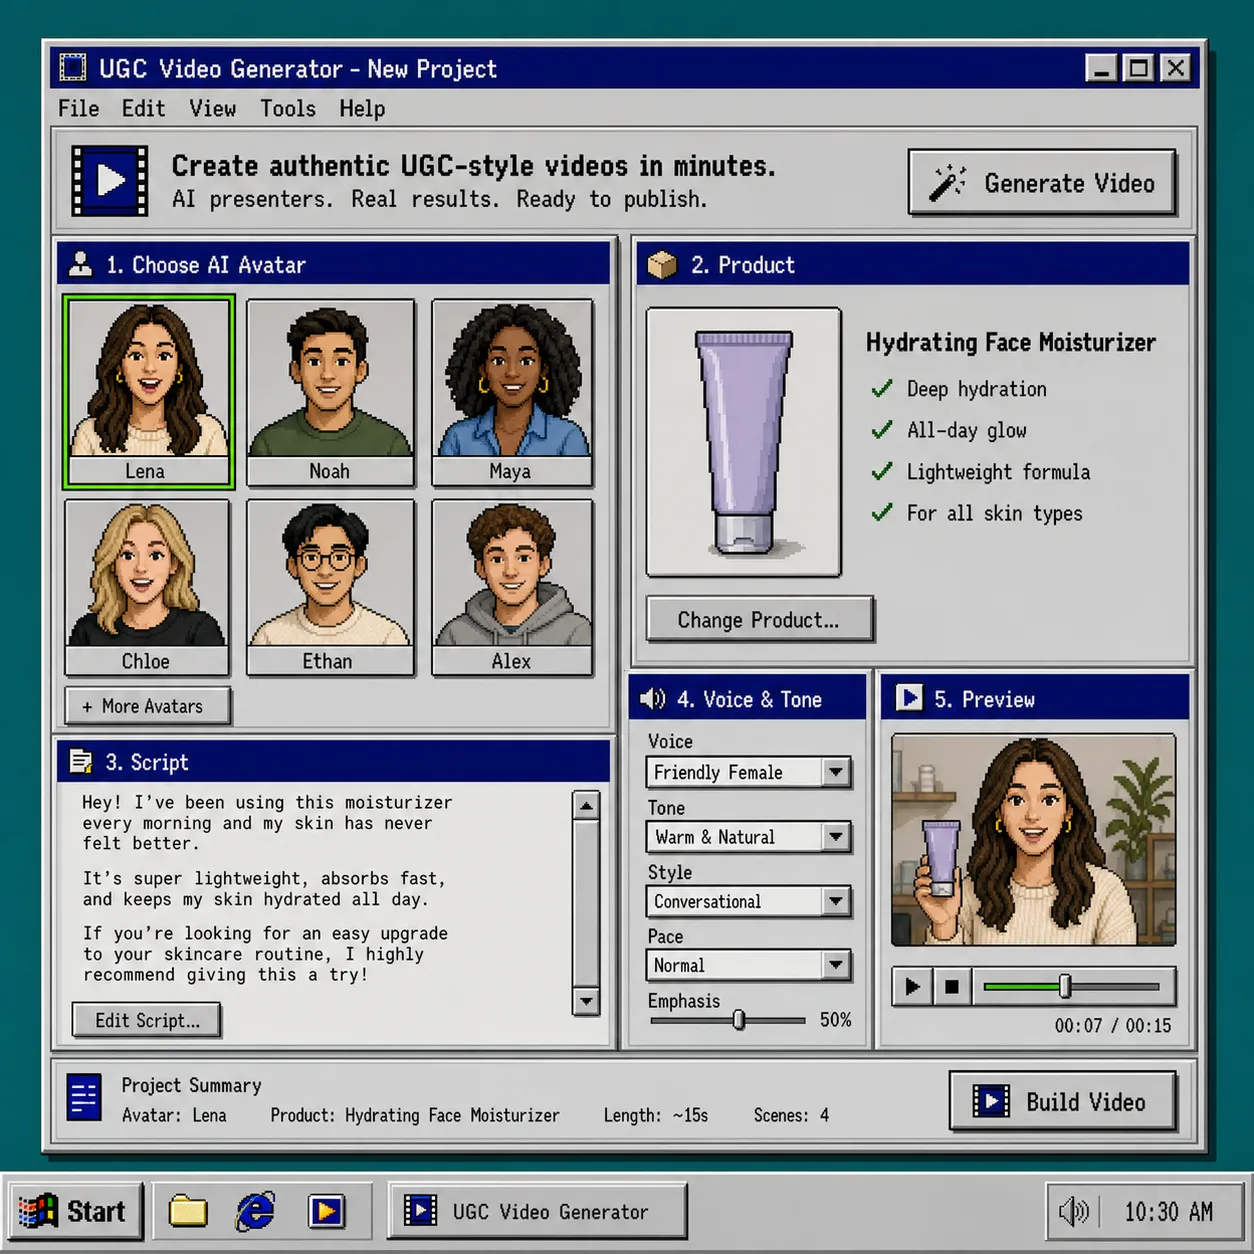
The point is not to make the avatar look clever. The point is to make the message feel direct and easy to follow. If the product is technical, the avatar should sound calm. If the product is visual, the avatar can move faster and get to the proof sooner.
What you should see here is a presenter that fits the store, not a random face in a generic promo.
3. Set the Scene and Add the Product
Now choose the background and product reference together. Supra UGC Maker supports scenes such as studio, outdoor, boutique, and brand-specific settings, so use the one that makes the product feel believable in context.
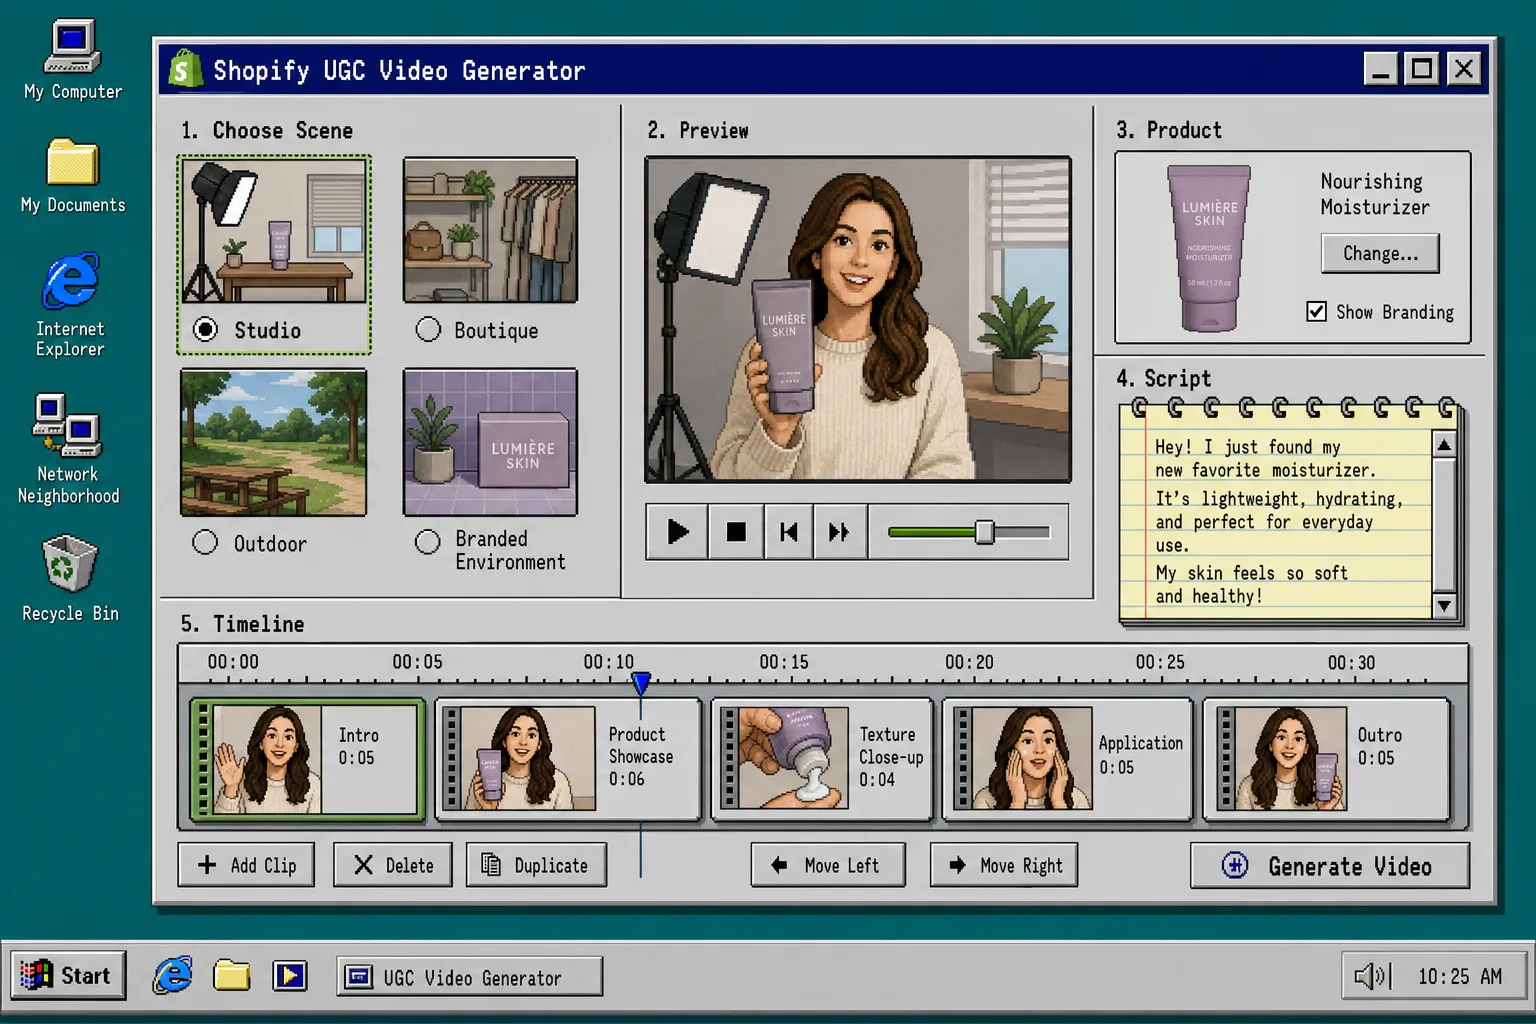
If the item is skincare, a clean vanity or bathroom-like setup usually reads fast. If it is apparel, accessories, or a gift item, a tidy lifestyle or boutique scene may be stronger. If it is a gadget, a studio shot with clean lighting often works better than a busy room.
Keep the product visible early. The viewer should understand what is being sold before the clip starts wandering.
What you should see now is a scene that supports the claim instead of competing with it.
4. Write a Short Script Around One Hook
Use a 15 to 25 second script. Keep it to one hook, one proof point, and one call to action. That format is easier to pace and much easier to test.
A simple script structure looks like this:
- Hook: state the problem or promise in the first line.
- Proof: mention the product benefit, feature, or use case in plain language.
- CTA: tell the viewer what to do next.
For example, a skincare video might open with a line about wanting a faster routine, then show the product being held up, then end with a direct click-through prompt. A launch video might lead with the result, then show the product, then point to the collection page.
Use the voice and tone controls to keep the read natural. Warm, friendly, and conversational usually beats stiff brand language for this format.
5. Generate the First Cut and Review the Weak Spots
Preview the scene before you generate the final clip. Then check the first render for the usual problems: a weak opening, a clip that lingers too long, a background that does not support the product, or a script that says the same thing twice.
The app is built for quick iteration, so the first cut should be treated as a draft, not a finish line. If the opening does not work, change the hook. If the visuals feel off, change the scene. If the pacing drags, shorten the script before you touch the rest of the project.
At this point you should have one usable draft and a short list of edits that actually matter.
6. Trim, Reorder, and Regenerate Only the Weak Parts
Do not restart the whole project when one segment misses. Reorder the clips, trim the dead space, and regenerate the parts that need a cleaner read.
That is the main advantage of building the video inside a reusable project. You can keep the good parts and replace only the weak ones, which saves time when you want several ad variants from the same product.
What you should end up with is a tighter video that keeps the strongest hook and the clearest product shot.
7. Reuse the Same Video Across Ads, Product Pages, and Email
Once the core cut is solid, reuse it where it matters. Put one version in paid social, one on the product page, and one in email or launch messaging. You can also save the scene and project so future versions stay consistent.
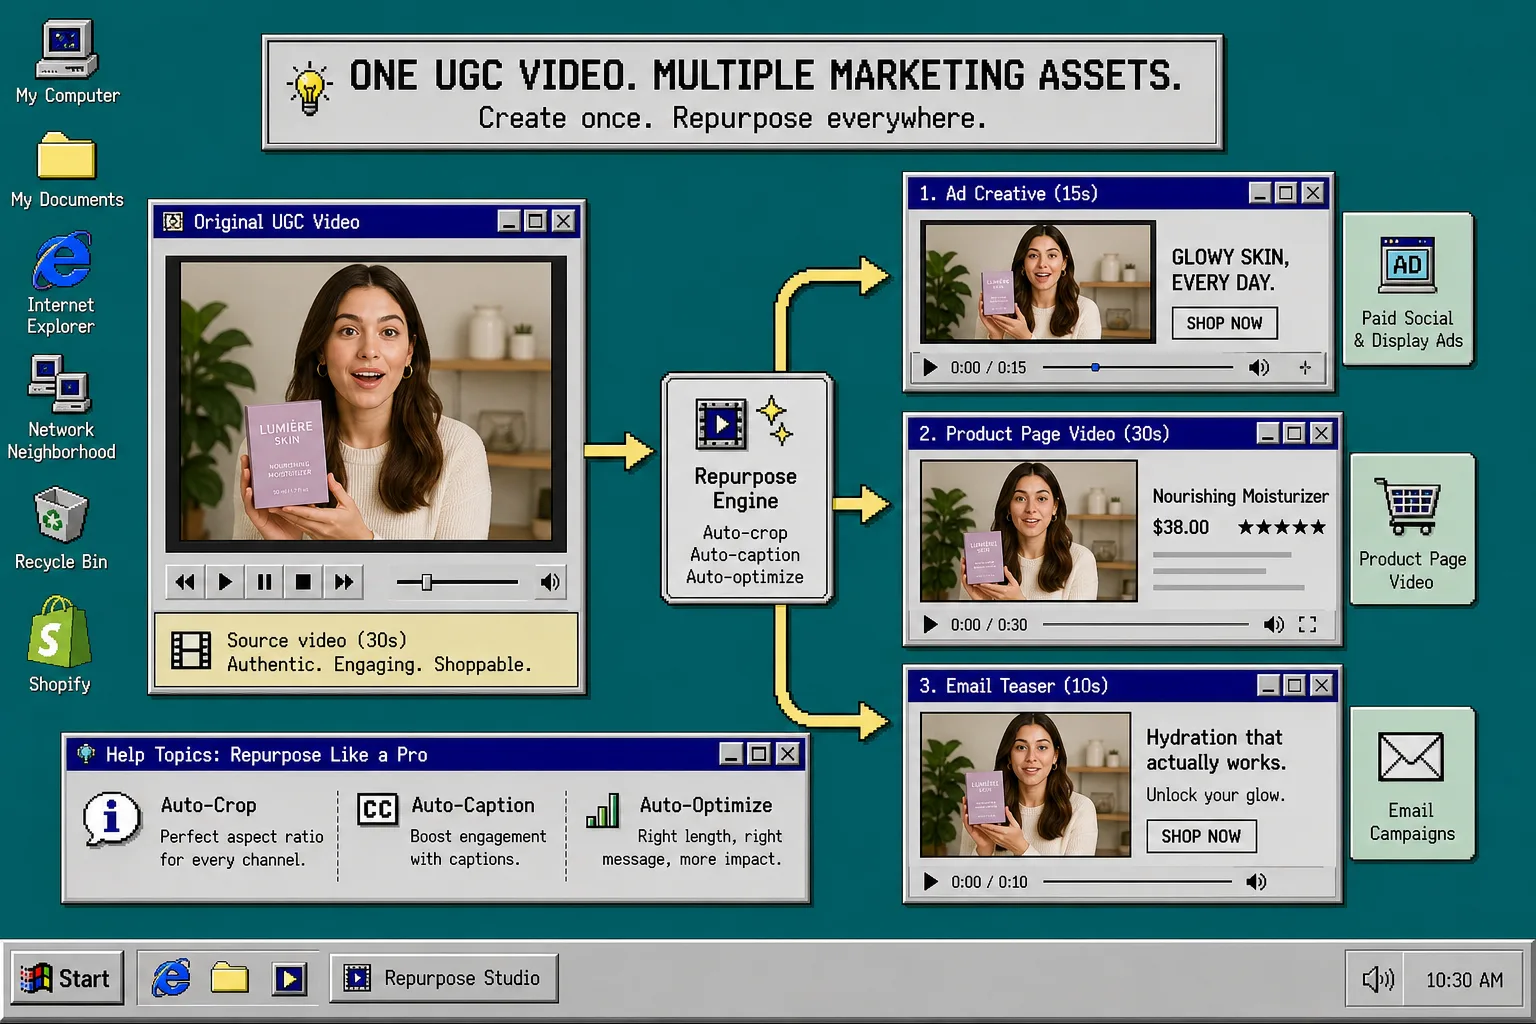
That is where the workflow starts to compound. One product becomes multiple creative angles, and one good script becomes a repeatable testing system. If you need more context on that part of the process, see How I Build a Reusable UGC Video Library for Shopify, How to Build a UGC Video Testing Loop for Shopify Products, How I Reuse One Shopify Product Video Across Ads, Product Pages, and Email, and How to Make Shopify UGC Videos for Ads, Product Pages, and Email.
Troubleshooting
- If the hook feels generic, cut it down to one problem or one outcome.
- If the avatar looks disconnected, change the scene or make the product more visible earlier.
- If the video feels too long, remove one idea and one line before you regenerate.
- If the tone sounds too promotional, switch to a calmer voice and use simpler language.
- If you only get one good version, save the project and test new hooks instead of rebuilding the same setup.
Next Step
Open Supra UGC Maker, pick one product, and build the first version with a short hook and a clean scene. If you want the install path first, use the Shopify App Store listing and start from there.
The practical rule is simple: one product, one hook, one avatar, then one new variation at a time.