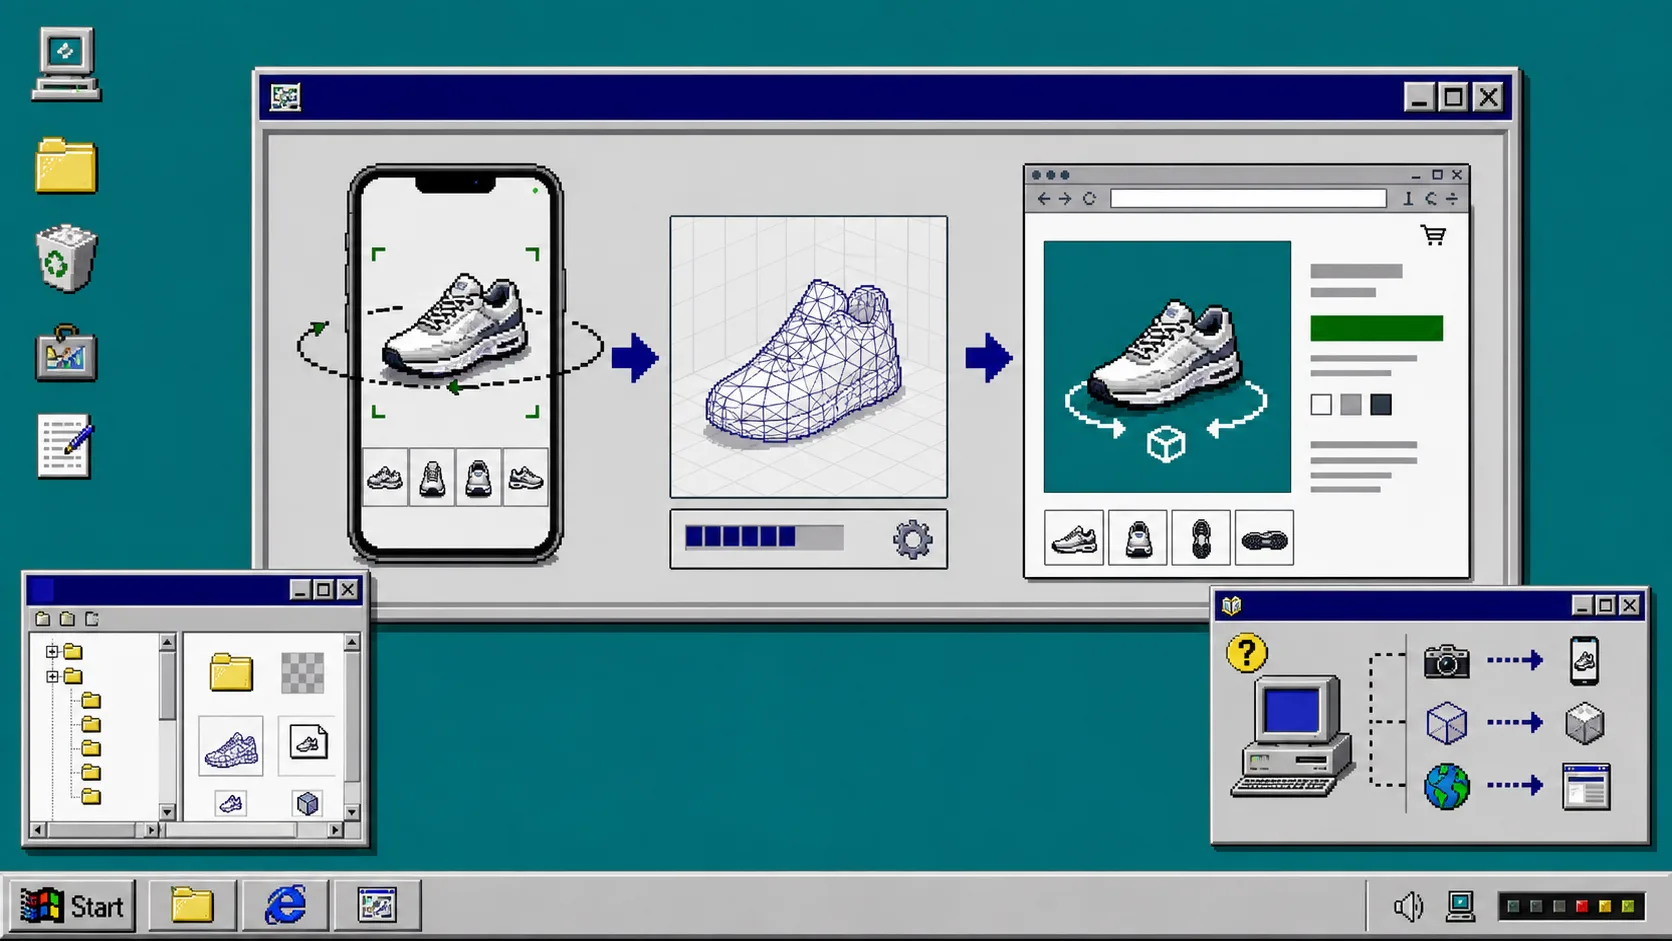
If your product photos still leave shoppers guessing about depth, scale, or texture, a 3D model can help. The useful version is not a decorative spinning cube hidden below the fold. It is a clean model that loads where shoppers expect product media, rotates smoothly on a phone, and makes the item easier to inspect before checkout.
You need a physical product, a phone, steady lighting, Shopify admin access, and a theme that supports Shopify product media or an app block. Supra 3D Capture is built for this phone-first route: take guided photos, process them into a web-ready GLB, then publish it to Shopify. Start with one SKU. A product with a clear silhouette, useful details, and enough margin to justify better product media is a better first test than your whole catalog. If you need help selecting it, use this Shopify 3D capture priority scorecard.
1. Pick One Product and Define the Viewer Job
Choose a product shoppers need to understand from more than one angle. A bag, shoe, ceramic item, textured accessory, or product with a distinctive side profile is a good candidate. Avoid starting with a glossy, transparent, furry, or very thin item; those surfaces are harder for any photogrammetry workflow to reconstruct cleanly.
Write one sentence before you capture: what should the shopper learn by rotating this model? Examples: the heel shape, the depth of a tote, the texture of a ceramic glaze, or the layout of a product’s controls. That sentence is your QA target later.
2. Prepare a Clean Capture Station
Place the item in even, bright light. Use a simple background that contrasts with the product, remove loose packaging, and keep the item still. Clean smudges, straighten labels, and decide which configuration you are showing. A 3D viewer is unforgiving about changes between photos: if a strap moves or a lid opens halfway through the orbit, the reconstruction can look confused.
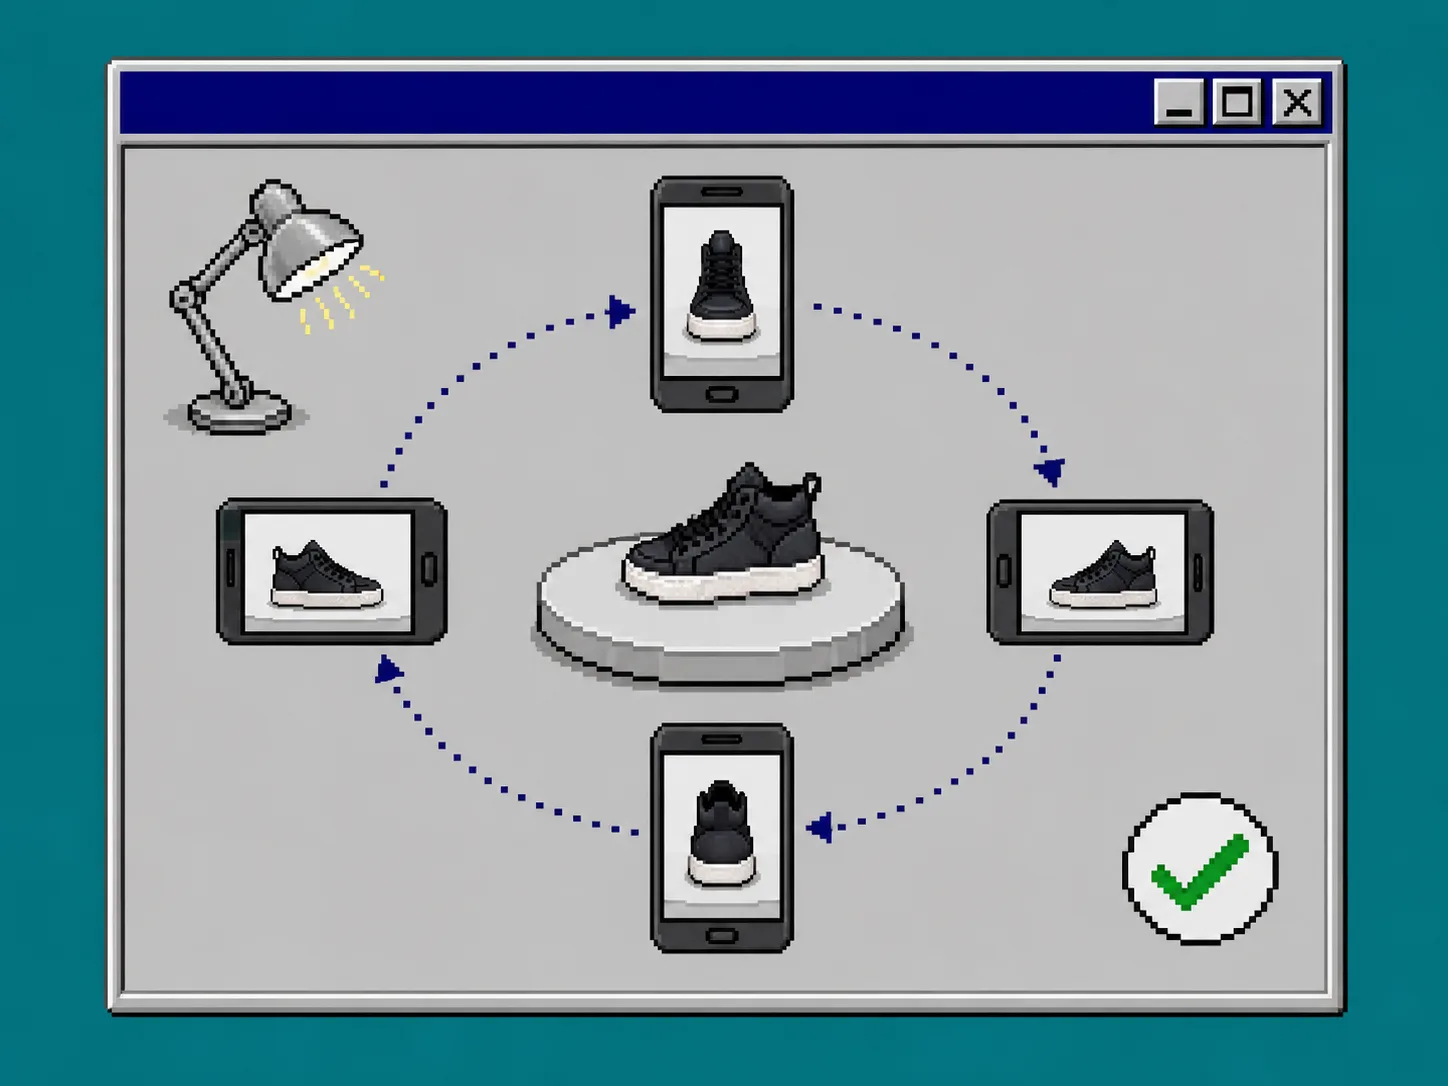
Open a guided session in Supra 3D Capture on your phone. Move around the item at a steady distance and keep overlap between shots. The goal is not an artistic photo set; it is consistent coverage. Capture the front, both sides, back, top, and the angles in between. The app’s flow starts with 10 or more guided phone photos and processes them into a GLB optimized for the web.
What you should see: a complete orbit with every important edge represented in more than one photo. If a shopper could ask, “What does the back look like?” and you have no answer in the capture, take another pass now.
3. Process the Model Before You Touch Your Theme
Upload the completed capture and let the processing pipeline create the model. Review the result before publishing it anywhere. Rotate it slowly and look for melted edges, missing surfaces, floating details, or a texture seam in the place shoppers will inspect first.
Do not try to fix a weak capture by hiding it in a theme section. Re-capturing one product is cheaper than creating a confusing product page. For a merchant’s first run, the safest plan is the same staged approach described in this phone-first Shopify 3D media pilot: validate one model, learn the failure points, then repeat.
4. Attach the GLB to Shopify Product Media
In Supra 3D Capture, publish the approved model to the matching Shopify product. The app is designed to attach the GLB as Shopify-native product media, so a compatible theme can use Shopify’s 3D viewer. You can also use its Online Store 2.0 app block when you need deliberate placement outside the usual media gallery.
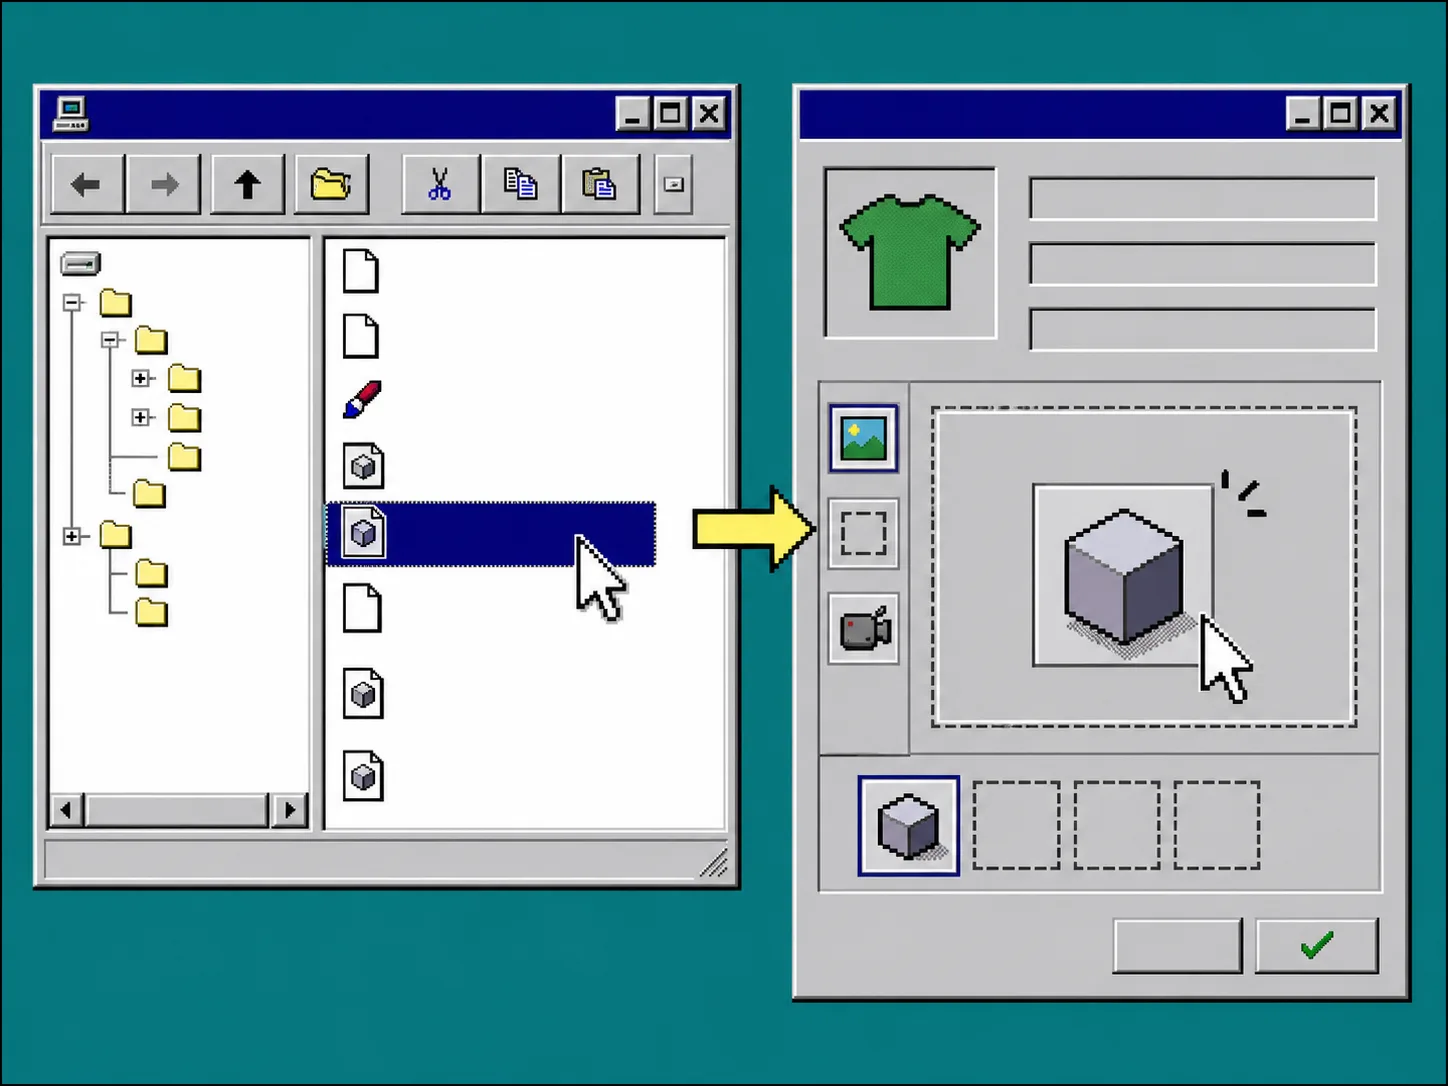
Open the product in Shopify admin and confirm the model belongs to the exact product and variant context you intended. Then preview the storefront. Put the model where product exploration happens, not behind a vague “learn more” link. If your product photos are a story, the 3D viewer is the moment a shopper gets to inspect the object themselves.
What you should see: a product-media thumbnail or a dedicated app-block placement that opens into a rotatable model. The Supra 3D Capture Shopify App Store listing is the place to check the current app setup and plan limits before expanding the workflow.
5. Test the Shopper Path on a Real Phone
Open the live product page on a phone, not only in a desktop browser. Rotate the model, zoom only as far as the viewer allows, and check that the first product image and add-to-cart path remain easy to find. Try a slower connection if you can. A large model that delays the main product page is not a win.
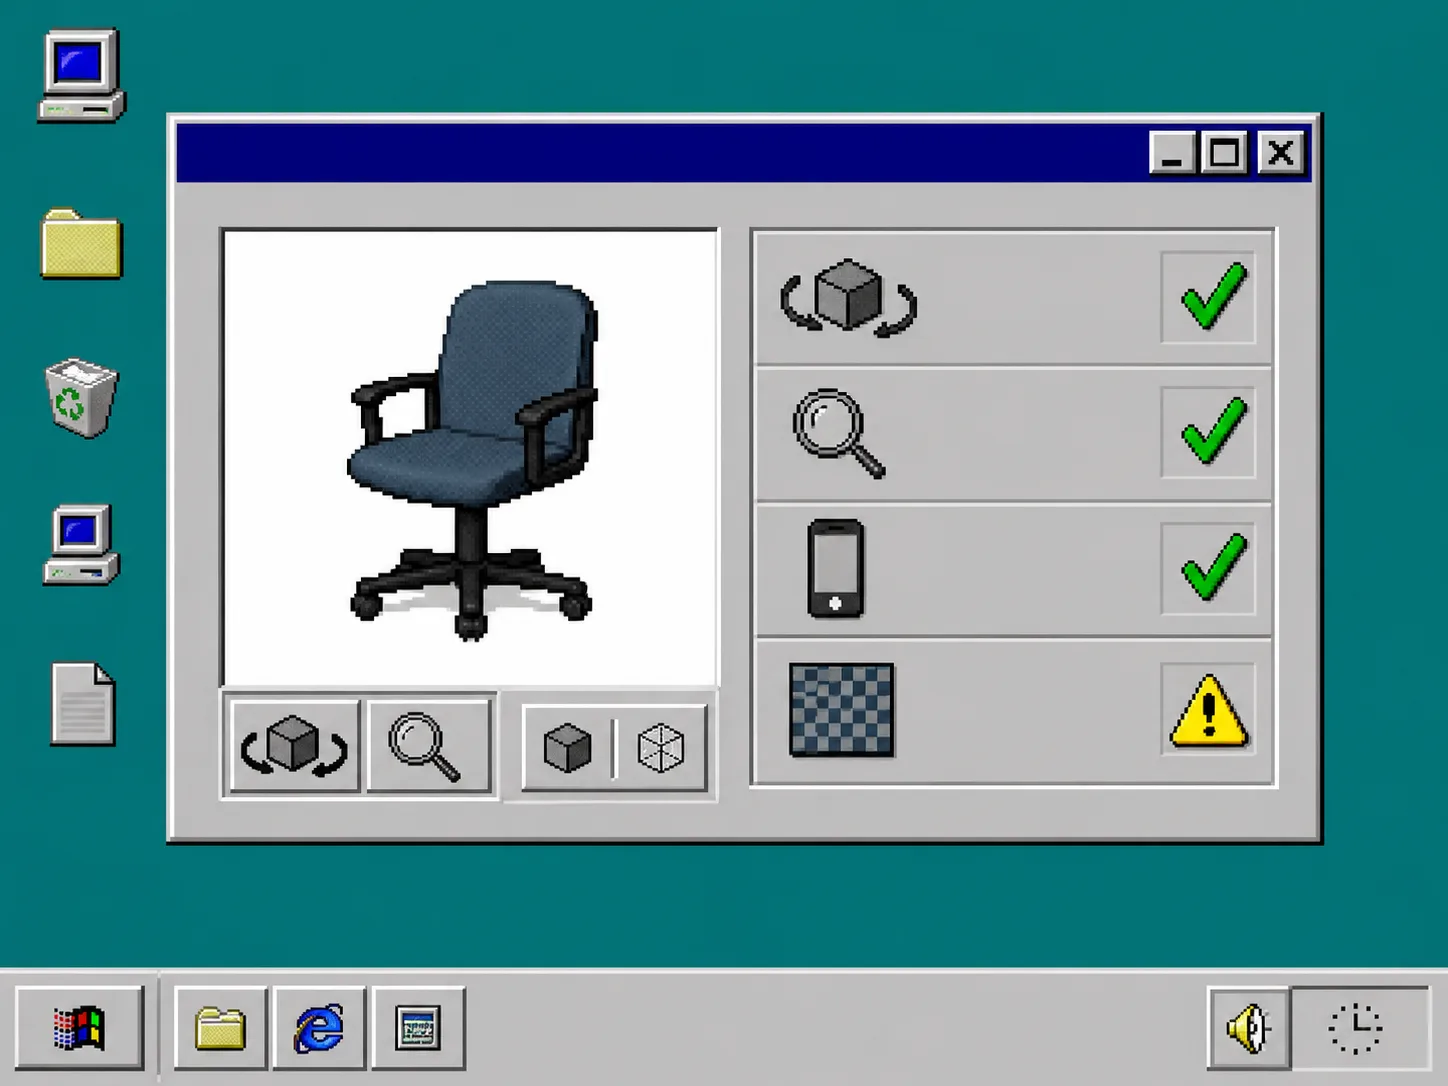
Check these four points: the model loads, it rotates without obvious visual defects, it communicates the job you wrote in step 1, and it does not displace a useful photo or buying control. For a deeper before-theme checklist, see this hands-on Shopify 3D media test.
Troubleshooting
The model has soft or broken areas. Capture again with more even overlap and more consistent lighting. Do not move the product between frames.
The model is hard to find. Check whether it was attached as Shopify product media or placed with the app block, then preview the published theme instead of assuming the admin preview matches the storefront.
The model looks fine on desktop but awkward on mobile. Keep the 3D viewer in the product-media flow and verify the gallery controls, page speed, and add-to-cart area on the actual device your shoppers use.
You are unsure which SKU to do next. Prioritize products where shape, side details, texture, or scale cause customer questions. Do not promise a conversion lift; treat each model as a way to reduce an expectation gap and improve product-page confidence.
Finish With One Measurable Pilot
A good first Shopify 3D model is small, visible, and testable: one product, one clean capture, one published GLB, and one mobile QA pass. Start your first guided capture with Supra 3D Capture and note what shoppers can inspect that they could not understand from the photo gallery alone. Once that works, repeat the workflow for the next high-priority SKU.