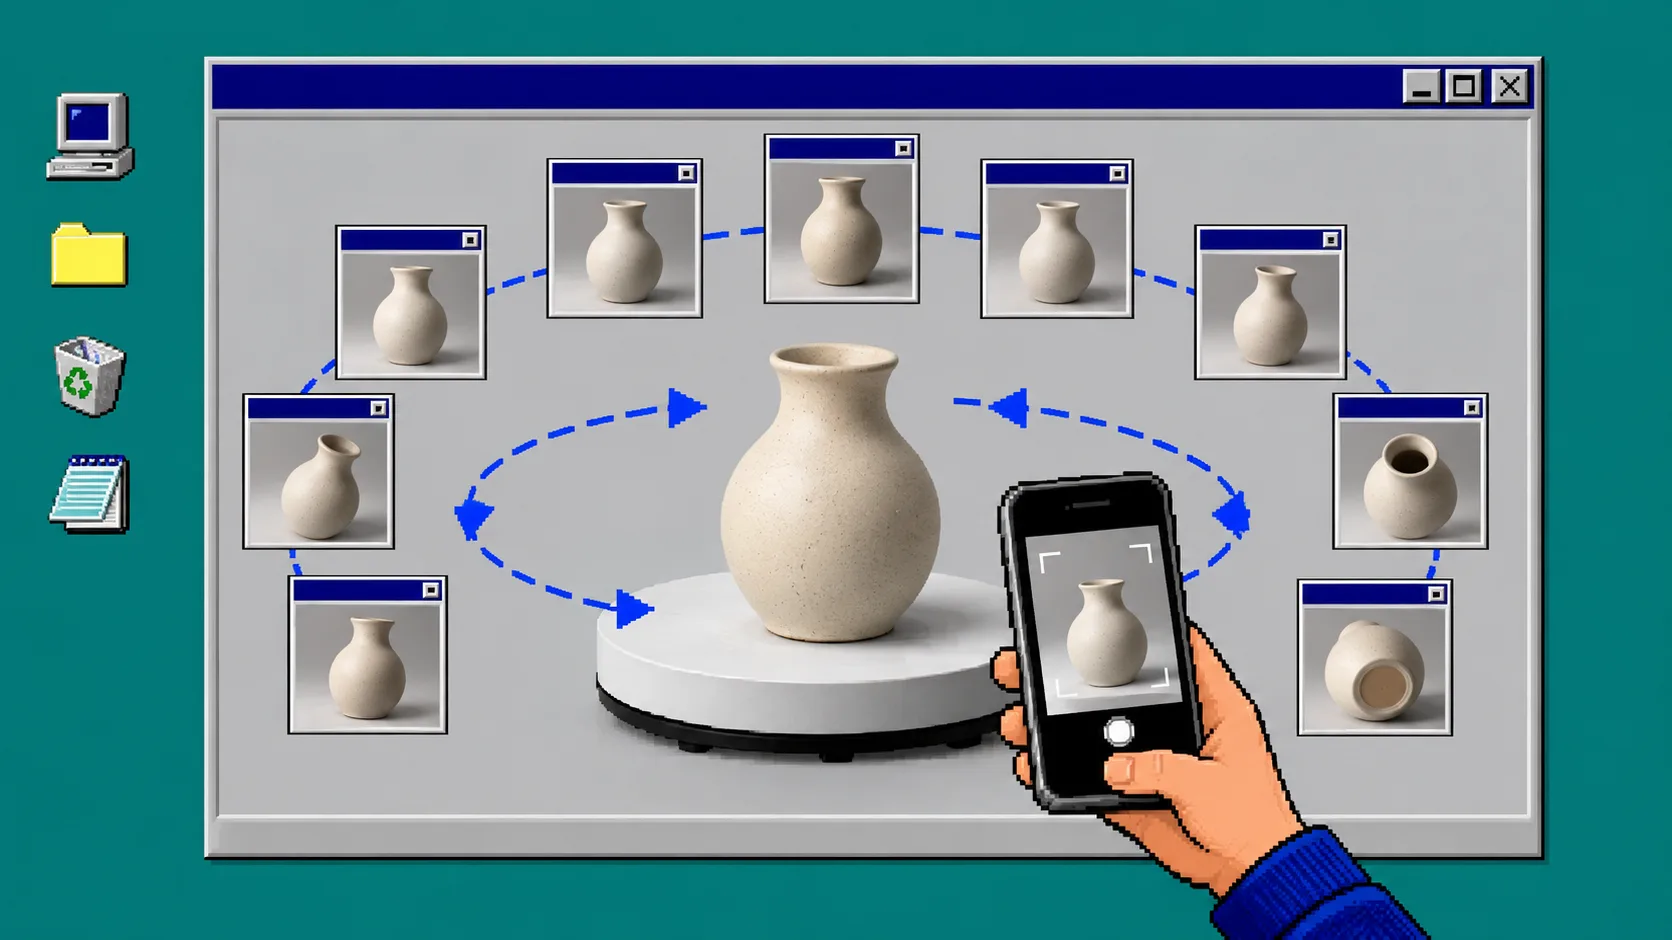
Your product photos can show color and finish, but they rarely let a shopper inspect the depth, shape, or proportion that decides a purchase. You can create that extra confidence without a 3D studio: a regular phone, a stable product, and Supra 3D Capture are enough to turn a guided set of photos into a web-ready GLB model for Shopify.
Before you start: choose one matte, medium-sized SKU with visible detail; clear a small table; use a phone with a clean lens; and set aside 10 minutes. If you have not checked your storefront yet, start with How to Check Whether Your Shopify Theme Supports 3D Product Media. It prevents a good model from becoming a theme-integration surprise.
1. Choose a scan-friendly product
Start with a product that can sit still and has a readable silhouette: a mug, shoe, bag, ceramic item, or boxed product is a good first run. Avoid making your first experiment a transparent bottle, mirror-finish accessory, or fluffy textile. Those items can still be worth testing, but reflections and fine fibers make photogrammetry harder to reconstruct.
Pick a SKU with a real product-page need. It should be something buyers want to rotate: a product with an unusual side profile, useful texture, or a shape that flat photography hides. That is more useful than adding 3D simply because it is new. For a prioritization pass, use this companion guide: How to Choose Your First Shopify Products for 3D Models.
2. Set up soft, even light
Place the item on a plain, non-reflective surface. Light it from more than one side so the form is visible without a hard shadow moving across the product. Window light can work when it is indirect, but do not let the light change halfway through your capture. Keep the background simple and leave enough room to walk around the item.
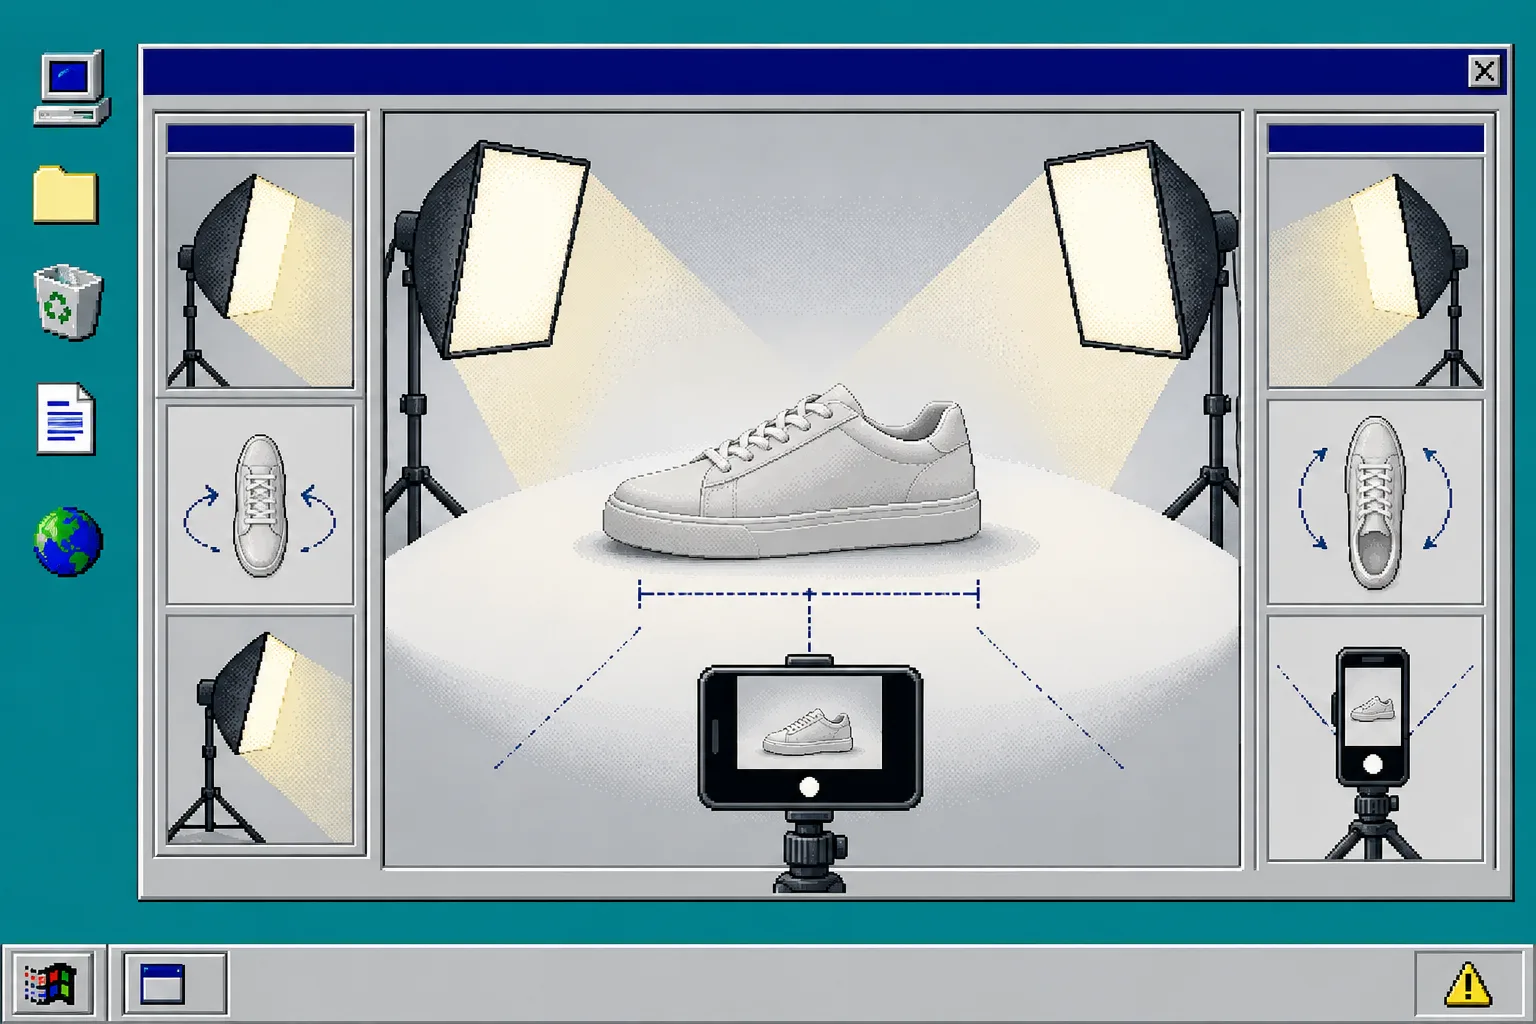
The goal is consistency, not a dramatic catalog photograph. A bright highlight that changes from one shot to the next can look like product detail to the reconstruction process. Clean the phone lens, lock the product in place, and remove hands, packaging, price tags, or loose cords from the scene.
3. Open a guided capture session and orbit the product
Open Supra 3D Capture on your phone and start its guided capture flow. Hold the phone at roughly the same distance from the product, then walk around it in a slow, overlapping orbit. Take the first ring of photos near the product’s middle height. Follow with higher and lower angles so the model has evidence for the top, bottom edge, and transitions between surfaces.
Do not rush for a perfect photo count. The app guides you to keep each shot in frame; the important habit is giving each new photo overlap with the last one. Keep the product still, move your body rather than twisting only your wrist, and avoid changing zoom or camera mode. Supra’s workflow starts with 10+ guided phone photos, so think of the session as a continuous loop, not a collection of unrelated hero shots.
4. Review the capture before you process it
Before you send the set to processing, scan for missing views. Can you see the back, top, lower edge, and both sides in the thumbnails? Did glare swallow a label, seam, or surface feature? Retake the questionable area while the lighting and object position are unchanged.
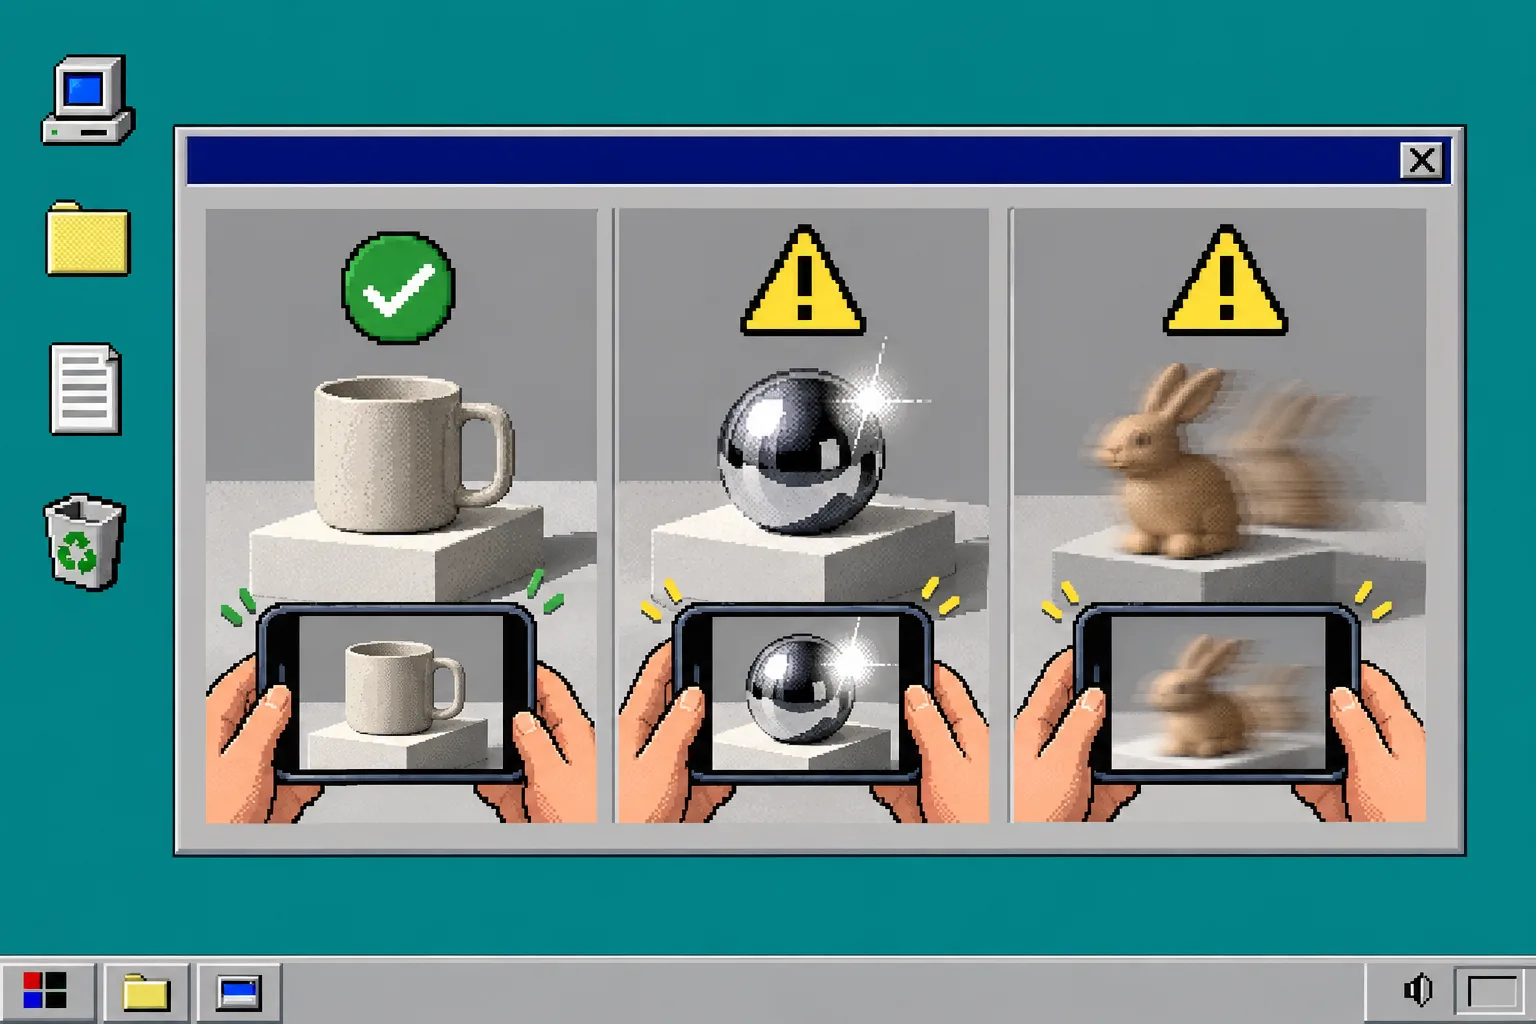
A useful rule is simple: if a human cannot read the product detail in several adjacent views, the reconstruction should not have to guess. For shiny, clear, or fuzzy merchandise, test a less challenging SKU first and build a repeatable setup before you add complexity.
5. Process the photos into a web-ready GLB
Upload the guided photo set from the app and let Supra 3D Capture process it. Its photogrammetry pipeline reconstructs and optimizes a GLB model for the web, so you do not need to learn desktop modeling software or buy specialized capture hardware. When processing is complete, inspect the preview for holes, warped edges, or areas where the model loses the product’s outline.
If the first result is merely acceptable, do not treat it as a failure. Note the weak area, correct one variable—lighting, camera overlap, or object stability—and capture again. This is faster than changing several things at once and not knowing which fix helped.
6. Publish it where shoppers can use it
Attach the approved model to the Shopify product so it appears as native Shopify 3D product media when your theme supports the viewer. You can also place it with Supra’s Online Store 2.0 theme app block when a dedicated spot on the page makes more sense.
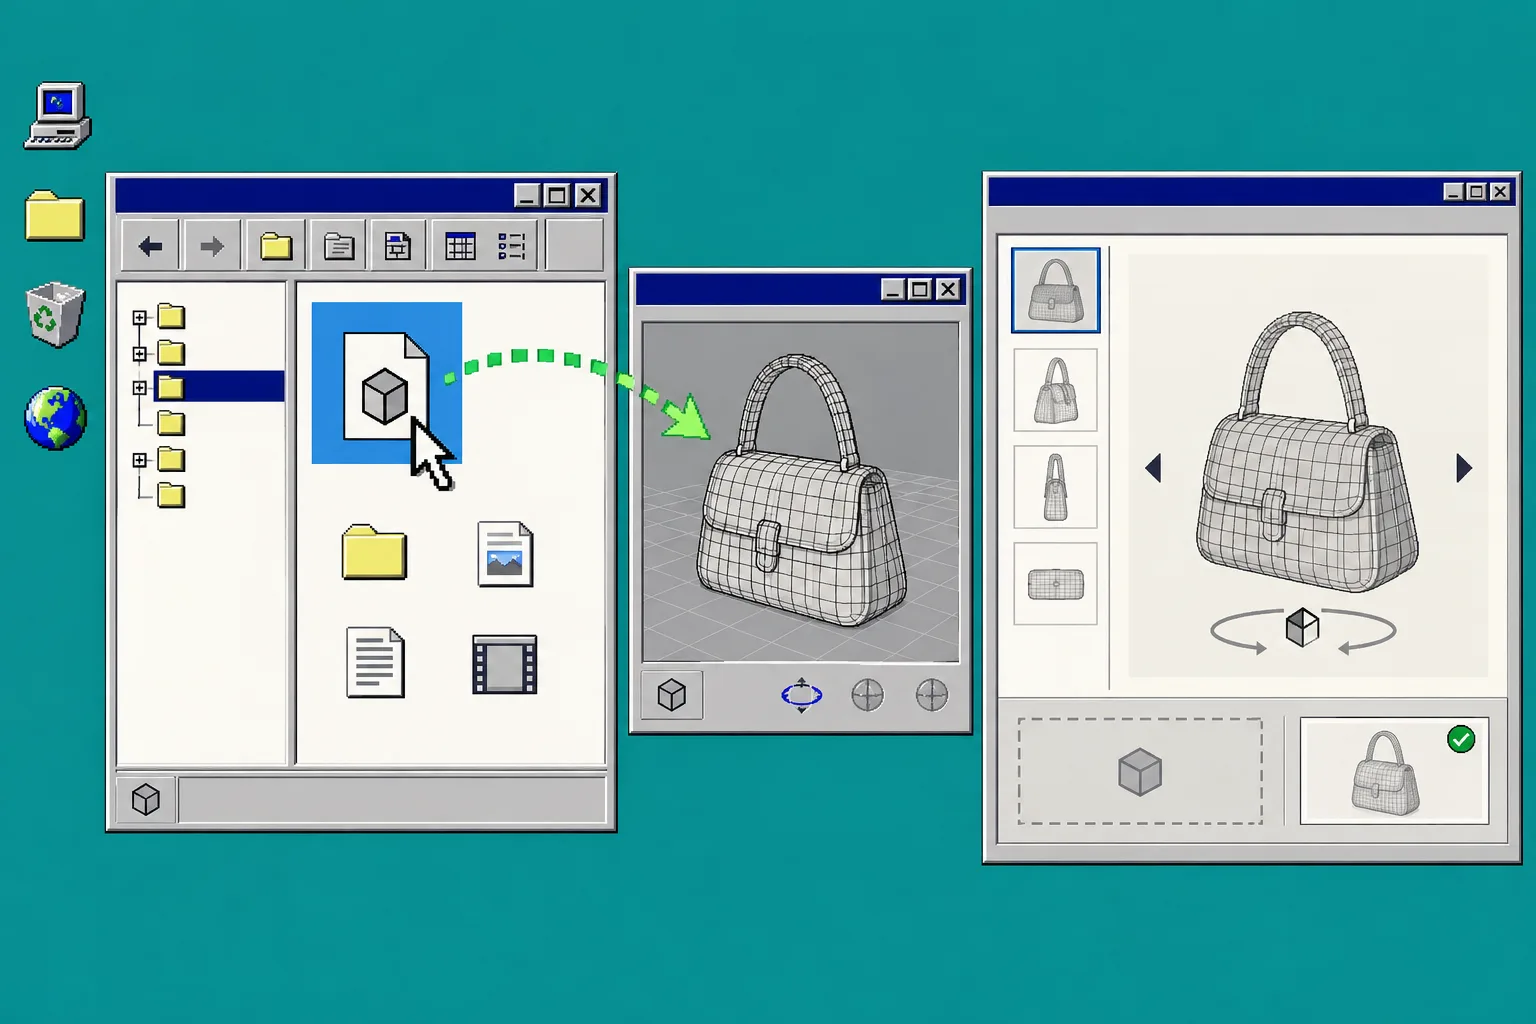
Check the product page on desktop and mobile. Rotate the model, open the image gallery, and make sure the media order supports the buying decision: lead with the clearest still image, then give the shopper the interactive model when they want to inspect further. If you are deciding where to test the experience first, I Chose a Low-Risk Product Before Testing Shopify 3D Media offers a sensible rollout mindset.
7. Measure confidence signals, then repeat
Watch the product-page questions, return reasons, and shopper behavior around the chosen SKU. Do not promise yourself a conversion lift from one model. Instead, look for whether the media answers the shape, material, or scale questions that photos leave open. That is the practical value of interactive 3D: fewer expectation gaps and a more informative product page.
For a broader audit before you decide how far to roll this out, I Audited My Shopify Catalog Before Capturing a Single 3D Model is a useful next read.
Troubleshooting quick fixes
- The model looks soft or incomplete: add more overlapping angles around the weak area; do not change the product position.
- A glossy surface becomes noisy: diffuse the light and reduce direct reflections before recapturing.
- The product drifts in the result: stabilize the item and make slower, steadier phone movements.
- The model does not show on the product page: confirm your theme’s 3D support, then check the media placement and the Online Store 2.0 app block.
The next action
Choose one low-risk product today, set up even light, and run one guided orbit in Supra 3D Capture. A clean first GLB gives you a concrete product-page test—without turning your team into a 3D department.