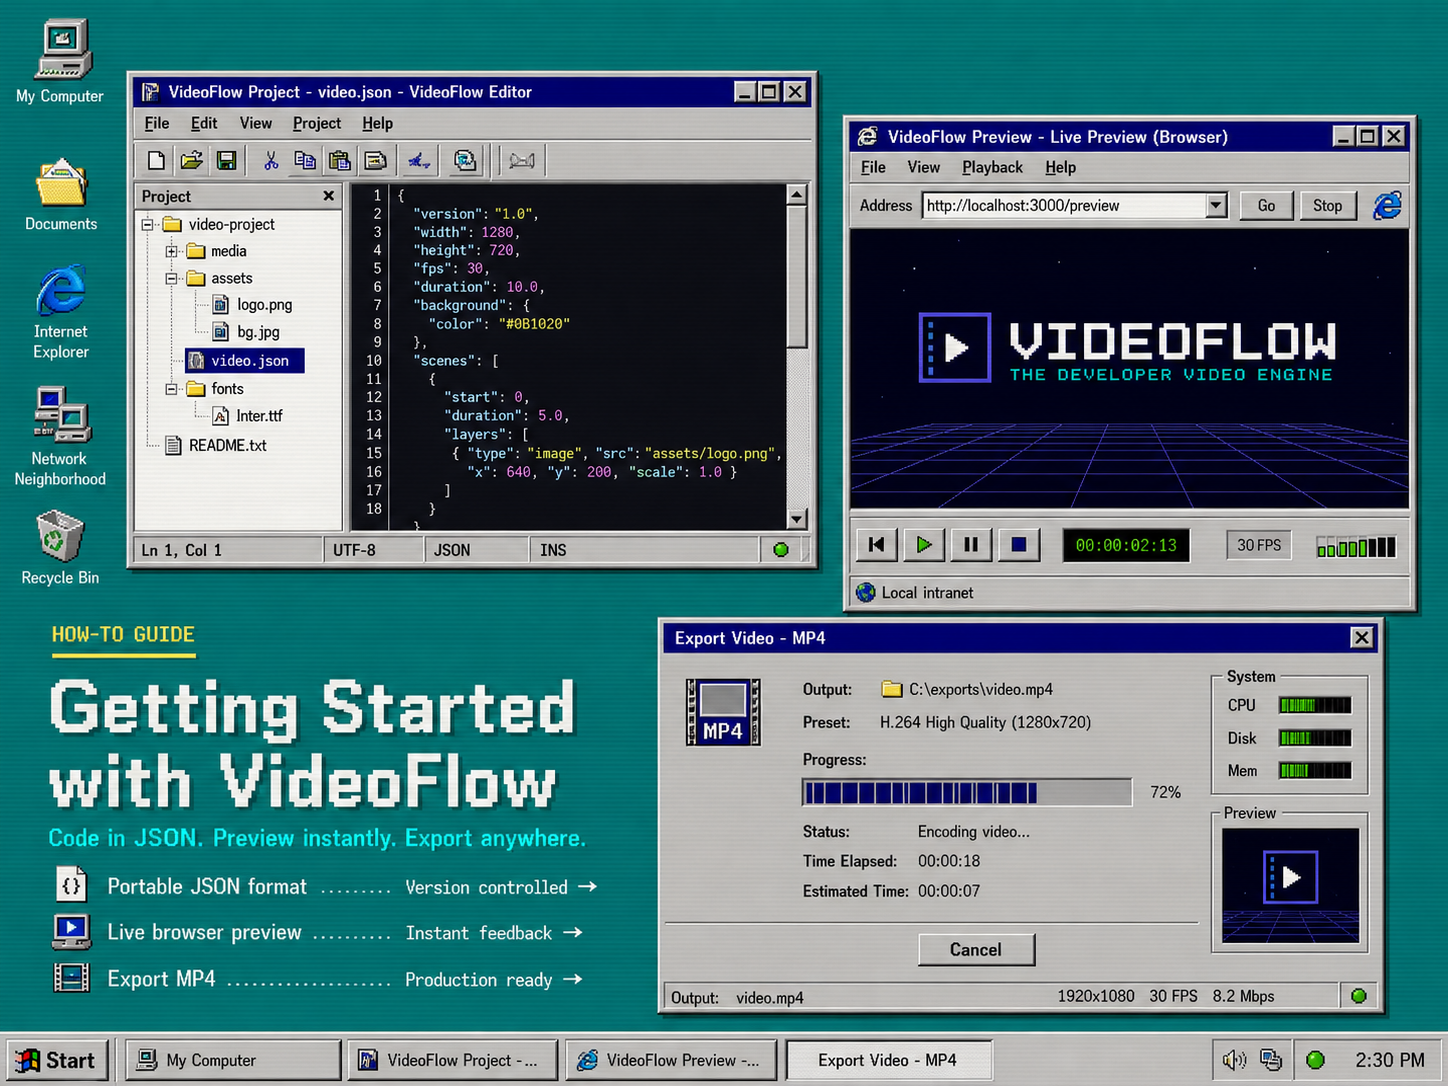
If you need a video workflow that stays portable when the output target changes, VideoFlow gives you a cleaner boundary: author the scene once, compile it to VideoJSON, and let different renderers turn that data into MP4 output. Start with the official VideoFlow site, then keep these pages open while you work: docs, core, renderers, React video editor, playground, and GitHub.
If the architecture question is still fuzzy, How to Separate Video Data From Rendering With VideoFlow is the right companion piece. It explains why the scene should stay separate from the render target.
1. Author The Scene Once
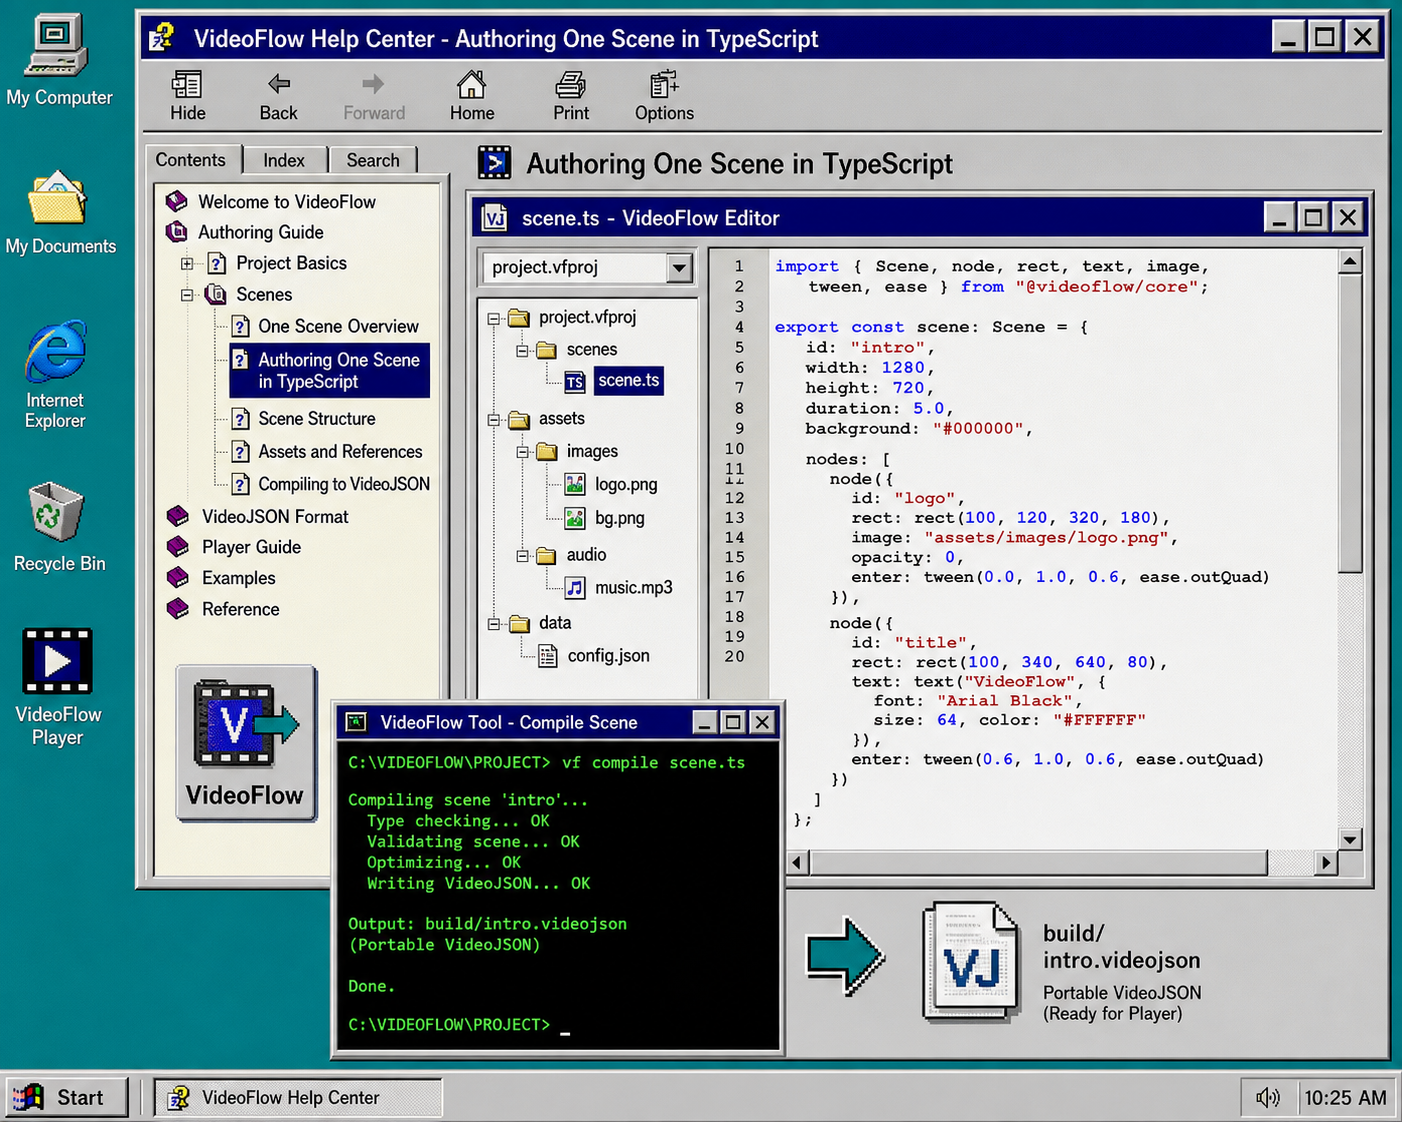
Start in @videoflow/core and define the scene in TypeScript. The point is not to make the first video clever. The point is to make it portable enough to survive preview, editing, and export later.
npm install @videoflow/core

import VideoFlow from "@videoflow/core";

const $ = new VideoFlow({
  name: "My Video",
  width: 1920,
  height: 1080,
  fps: 30,
});

$.addText(
  { text: "Hello, VideoFlow!", fontSize: 7, fontWeight: 800 },
  { transitionIn: { transition: "overshootPop", duration: "500ms" } }
);

const json = await $.compile();
After this step, you should have one VideoJSON object that can be stored, diffed, or handed to another renderer without rewriting the scene.
If you want a broader version of this idea, How to Build a JSON-First Video Workflow With VideoFlow covers the same boundary from a wider angle.
2. Compile To VideoJSON
The compile step is the seam that makes the rest of the workflow sane. Once the project is compiled, you are no longer maintaining a hidden timeline inside one UI. You are working with data.
That matters because VideoJSON is easier to version in Git, easier to generate from automation, and easier to hand off between browser preview, server rendering, and human review. It also keeps the scene resolution independent, so the same structure can render consistently across 720p, 1080p, and 4K when you size it with the fluent API.
If you are building AI-assisted workflows, this is the point where the model should stop pretending to edit a timeline and start producing structured data instead. That is the safer shape for review.
After this step, you should have a JSON artifact that can move through the rest of the pipeline without losing meaning.
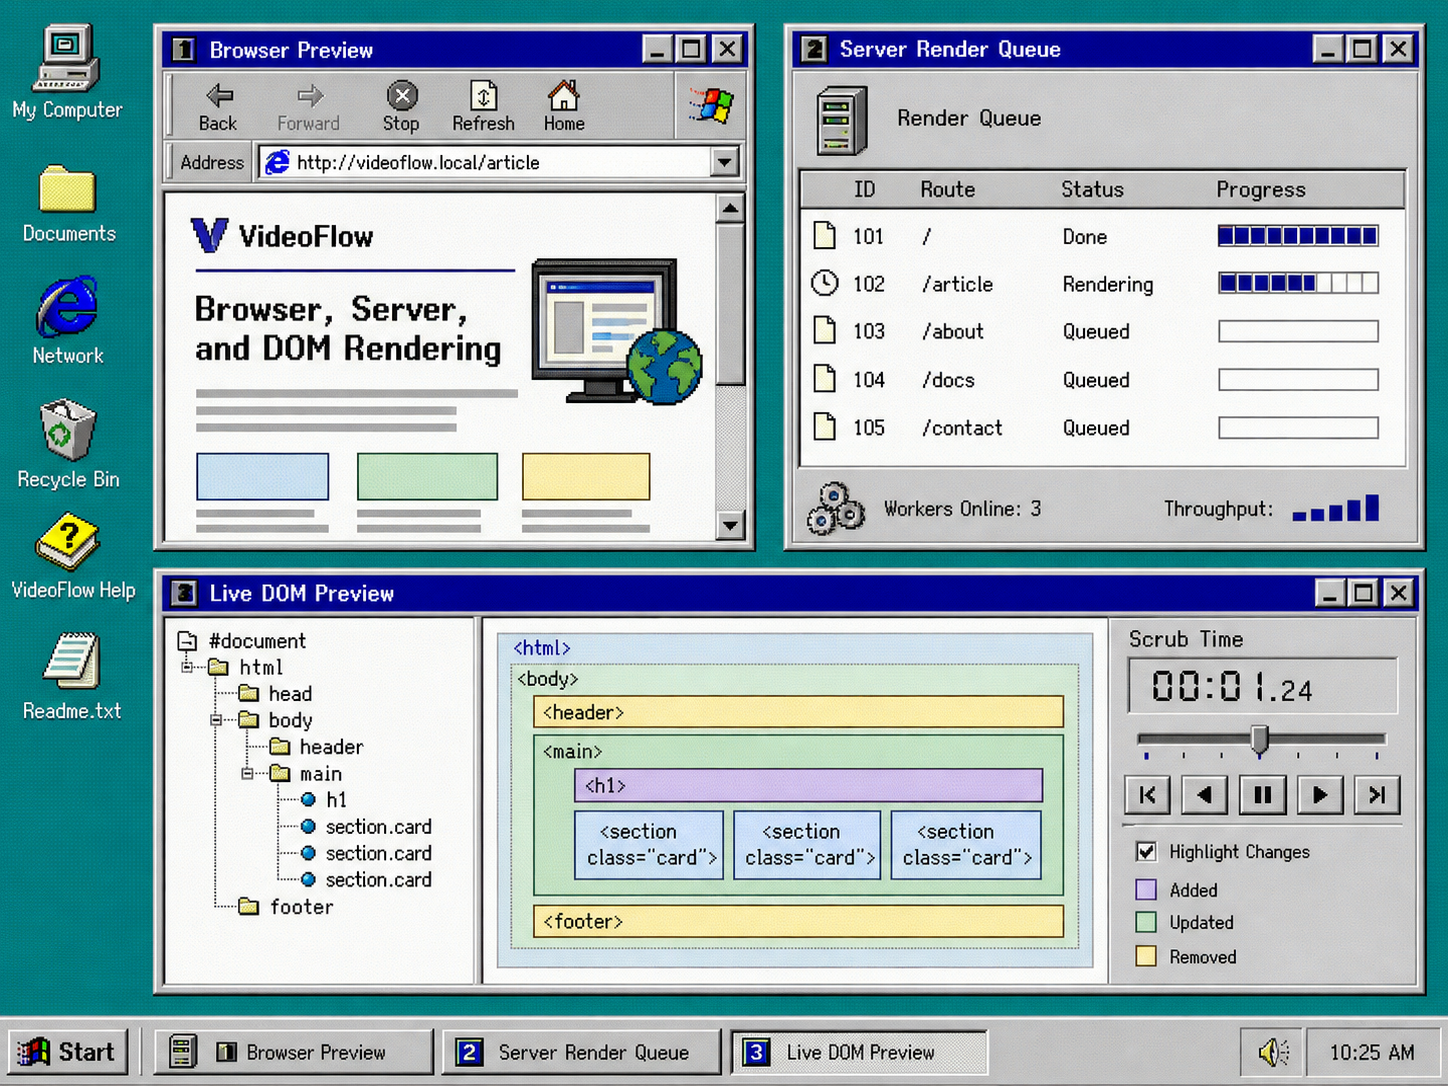
3. Choose The Renderer Last
Only add renderers after the scene is stable. VideoFlow splits the output surface into three practical paths: browser export, server rendering, and live DOM preview. That keeps each environment focused on the job it is good at.
npm install @videoflow/renderer-browser @videoflow/renderer-server @videoflow/renderer-dom
Use the browser renderer when export happens close to the user. Use the server renderer when you need queues, APIs, scheduled jobs, or larger batch runs. Use the DOM renderer when you want a live, scrubbable preview inside an app.
The browser renderer is especially useful when you want progress callbacks and cancellation without shipping the project to a separate render service. The server renderer is better when the work belongs in Node and needs headless throughput. The DOM renderer is the one I reach for when the preview needs to feel like a real editor surface.
If you want the practical split in more detail, How to Preview, Edit, and Export the Same Video JSON Everywhere and How I Keep One Video JSON Working Across Three Renderers are the two posts I would open next.
For the browser-only export angle, How to Build a Browser-Based MP4 Exporter Without a Rendering Server is the useful companion.
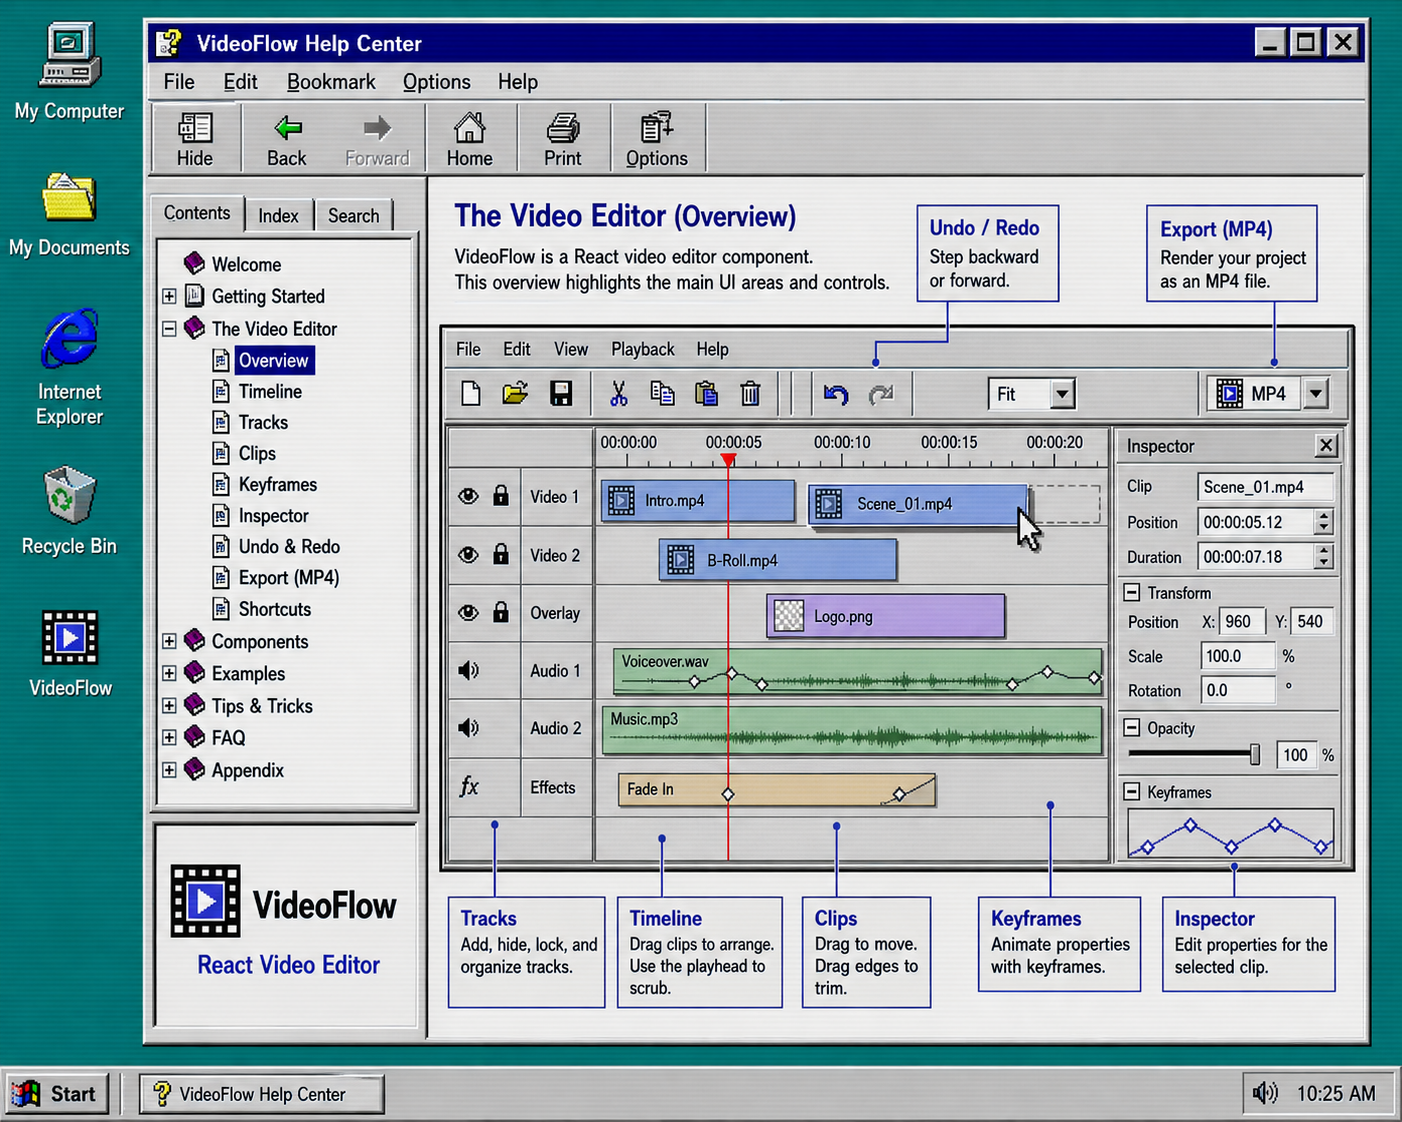
4. Add The React Editor Without Forking The Model
Add @videoflow/react-video-editor when a human needs a visual editing surface. The key rule is simple: the editor should sit on top of the same JSON, not invent a second file format.
npm install @videoflow/react-video-editor

import { VideoEditor } from "@videoflow/react-video-editor";
import "@videoflow/react-video-editor/style.css";

export default function App() {
  return (
    <VideoEditor
      video={videoJSON}
      onChange={(next) => saveToServer(next)}
      onSave={async (next) => await persist(next)}
      onUpload={async (file) => await upload(file)}
      theme="dark"
    />
  );
}
That editor gives you a multi-track timeline, drag and trim controls, an inspector, keyframes, undo/redo, MP4 export, and theme options. In practice, that means designers and operators can make changes without owning the render pipeline itself.
If you are embedding this into a product, How to Add a React Video Editor Without Rewriting Your Video Pipeline is the integration version. For the reviewability side, How I Keep Video Templates Versionable Without Freezing the Editor is the right follow-up.
5. Keep The Template In Git
Once the scene is data, your review process should look like code review. If a change is real, git diff should show a meaningful scene update instead of a hidden timeline mutation.
That is where VideoFlow feels like infrastructure instead of a one-off tool. The core and renderers are open source under Apache-2.0, so the project stays inspectable and the boundaries stay explicit. The same JSON can support browser export, server rendering, and live preview without splitting into separate systems.
That also makes the AI story easier to control. Let the model draft VideoJSON or TypeScript builder code, review the diff, and only then render. That keeps automation useful without letting it become the source of truth.
If you want a related view of this pattern, How to Keep One Video JSON Working Across Three Renderers and How I Keep Video Preview, Editing, and Export in Sync With VideoJSON are both worth reading.
Troubleshooting
If browser export feels slow, move the actual export to the server renderer and keep the browser for preview.
If the preview and final MP4 do not match, check that both paths are using the same assets, dimensions, and timing values.
If the editor drifts from the code source, keep the saved record in VideoJSON and treat the UI as a view over that record.
If a render looks different at another resolution, go back to the core scene and verify the sizing and layout rules before you patch the output.
Next Step
Start with one scene in @videoflow/core, compile it to VideoJSON, and add only the renderer that matches your current workload. Once that works, bring in the browser renderer, the server renderer, or the React editor as needed.
If you want to go deeper, the docs and examples are the fastest places to continue.