How to Set Up a Portable VideoJSON Workflow in VideoFlow
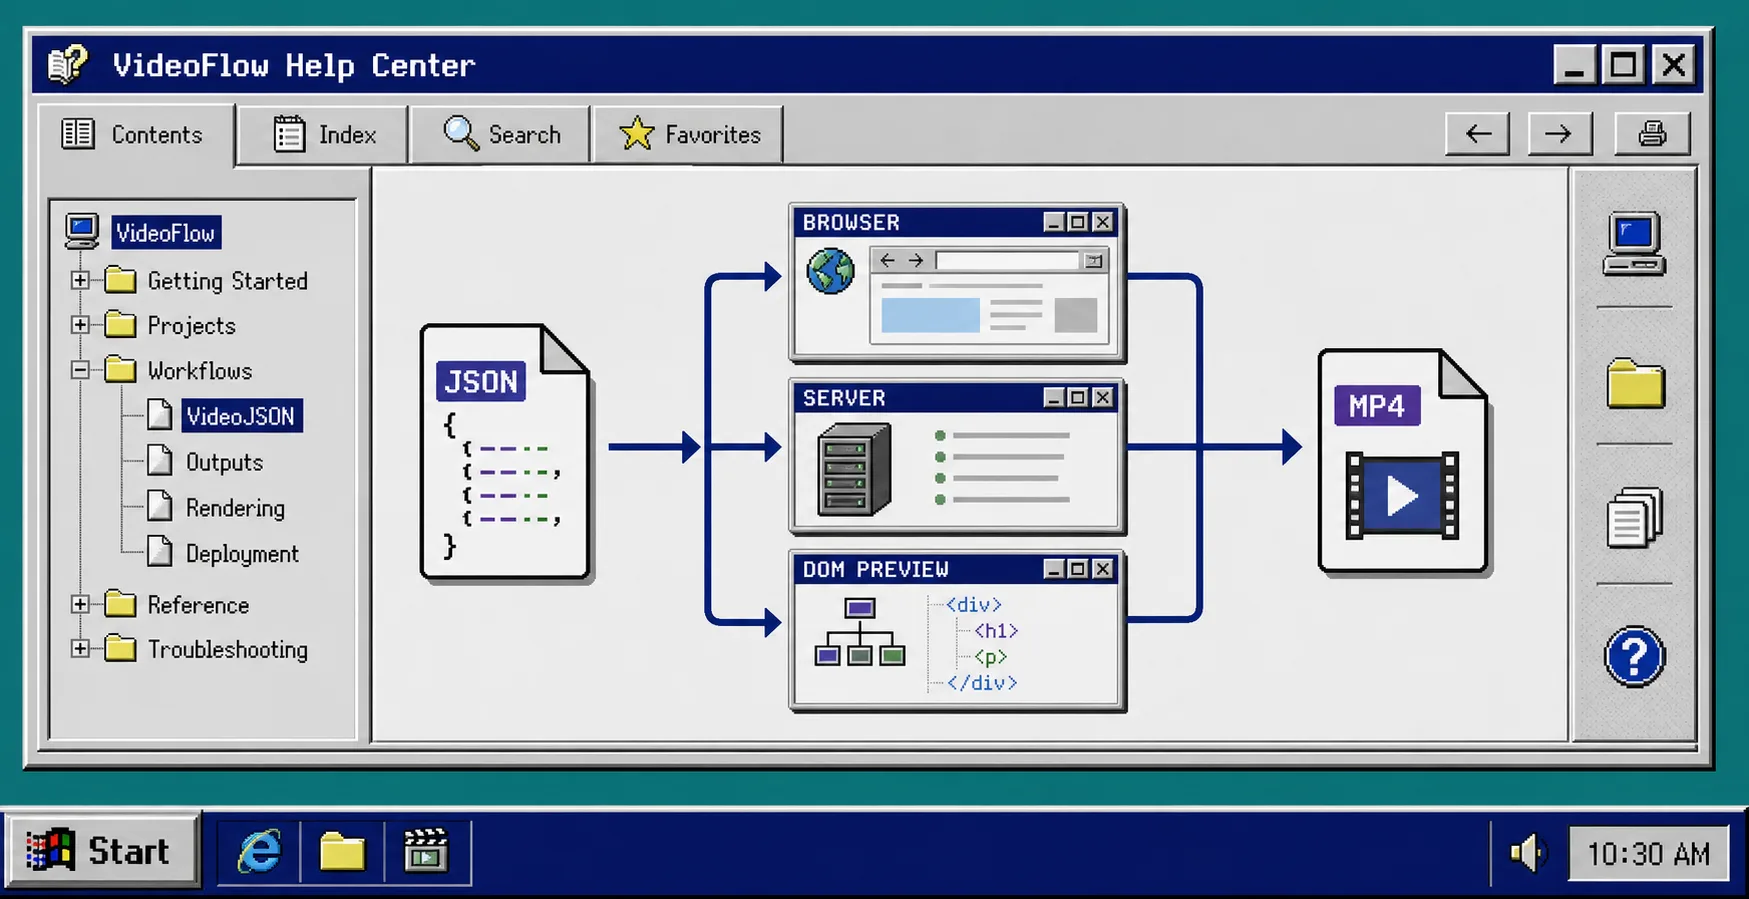
If you want one video project that can live in Git, render in the browser, queue on a server, and still open in a visual editor, start with VideoFlow. The setup is straightforward: keep the scene definition in TypeScript, compile it to portable VideoJSON, and reuse that same JSON for preview and export.
You only need Node 20+, a project folder, and one decision up front: whether your first pass should optimize for browser export, server-side rendering, or a live editing surface. VideoFlow’s core and renderers are open source under Apache-2.0, and the docs plus the playground are enough to get moving without guessing.
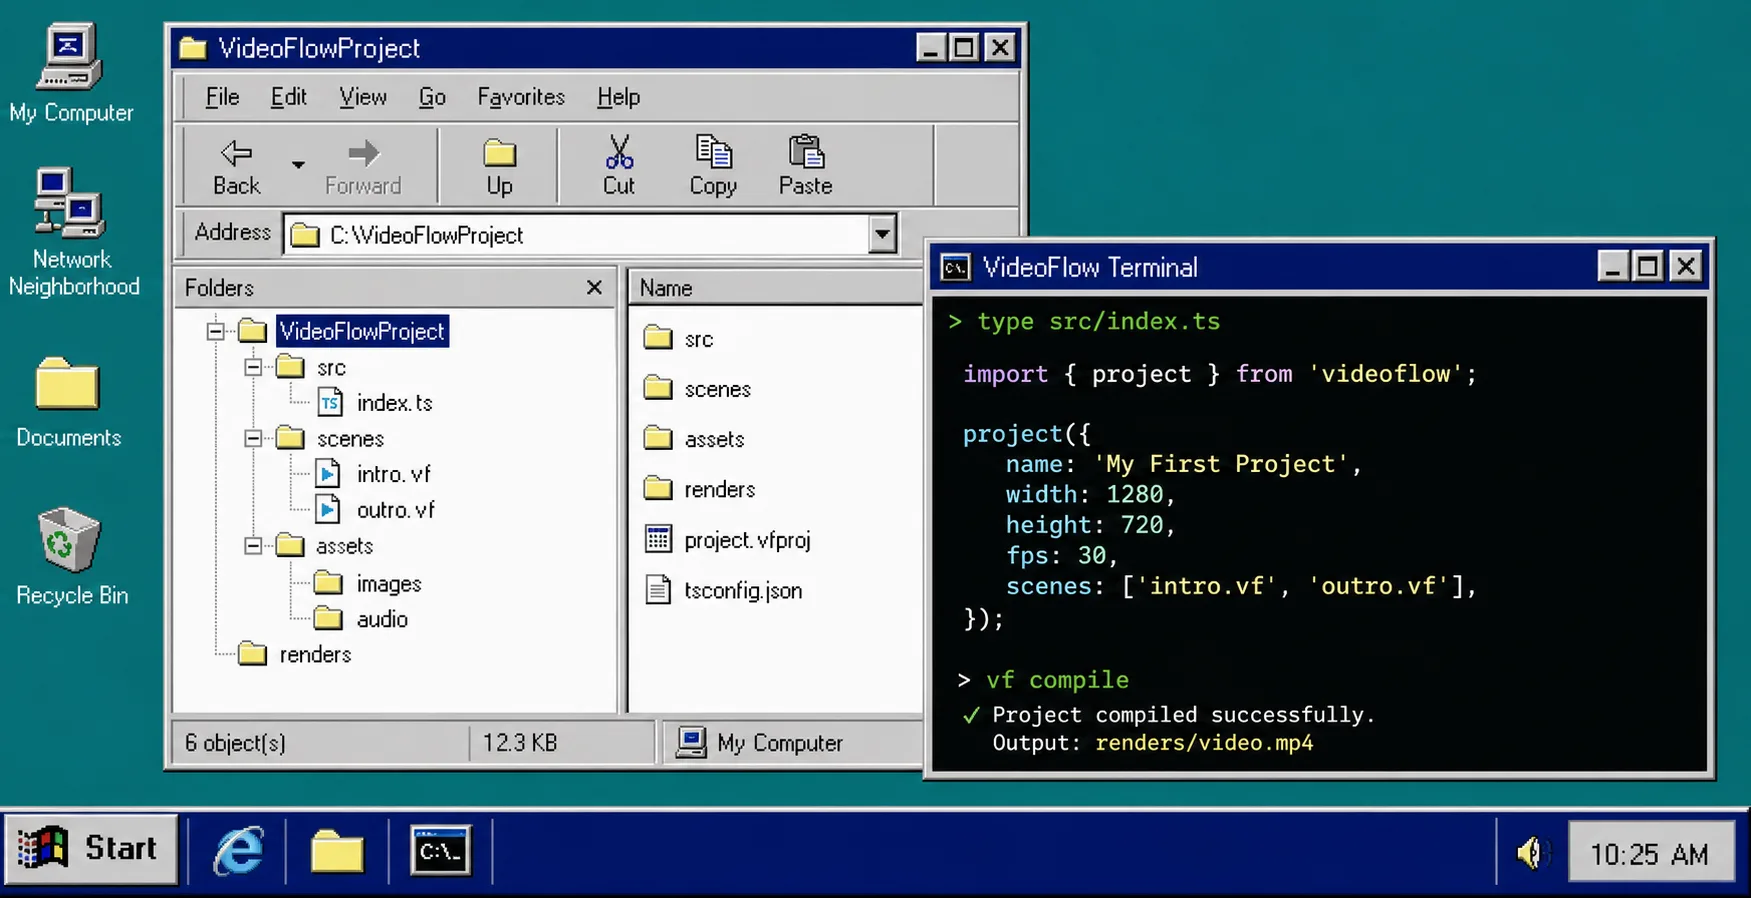
1. Install the core package and create a small project
Start with the core package and a plain TypeScript entry point. Keep the first scene tiny so you can verify the pipeline before you add transitions, audio, or editor controls.
npm install @videoflow/core
Then create a file such as src/index.ts and define one scene:
import VideoFlow from "@videoflow/core";

const $ = new VideoFlow({
  name: "Portable VideoJSON Demo",
  width: 1920,
  height: 1080,
  fps: 30,
});

$.addText(
  { text: "Hello, VideoFlow!", fontSize: 7, fontWeight: 800 },
  { transitionIn: { transition: "overshootPop", duration: "500ms" } }
);

const json = await $.compile();
You should see a project that compiles cleanly and returns a JSON object instead of a one-off rendered timeline.
2. Compile the scene to VideoJSON before you worry about rendering
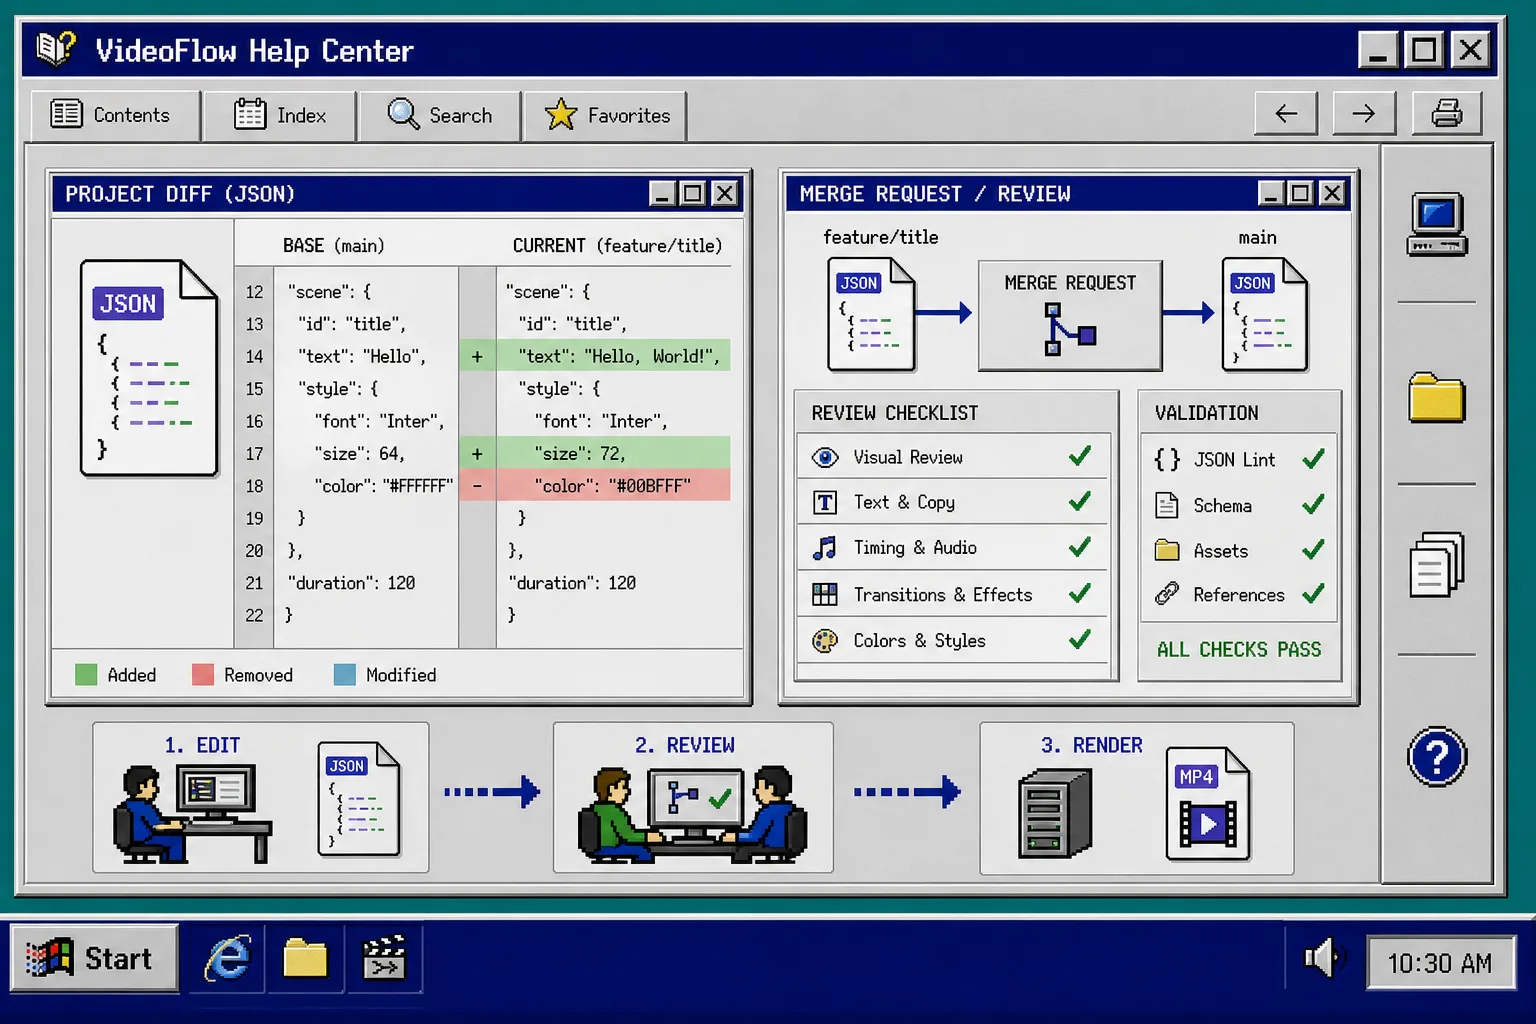
Treat compile() as the handoff point. Once the scene is compiled, you can version it, diff it, hand it to another renderer, or feed it to an AI workflow without rebuilding the authoring code.
That is the part that makes the format useful. VideoJSON is not just an intermediate artifact; it is the thing you can keep stable while the surrounding tools change. If you want the review angle spelled out further, see How to Build a Reviewable JSON-to-Video Pipeline With VideoFlow.
You should see a JSON file that stays readable in Git and does not depend on a hidden timeline state.
3. Use the browser renderer when export happens inside your app
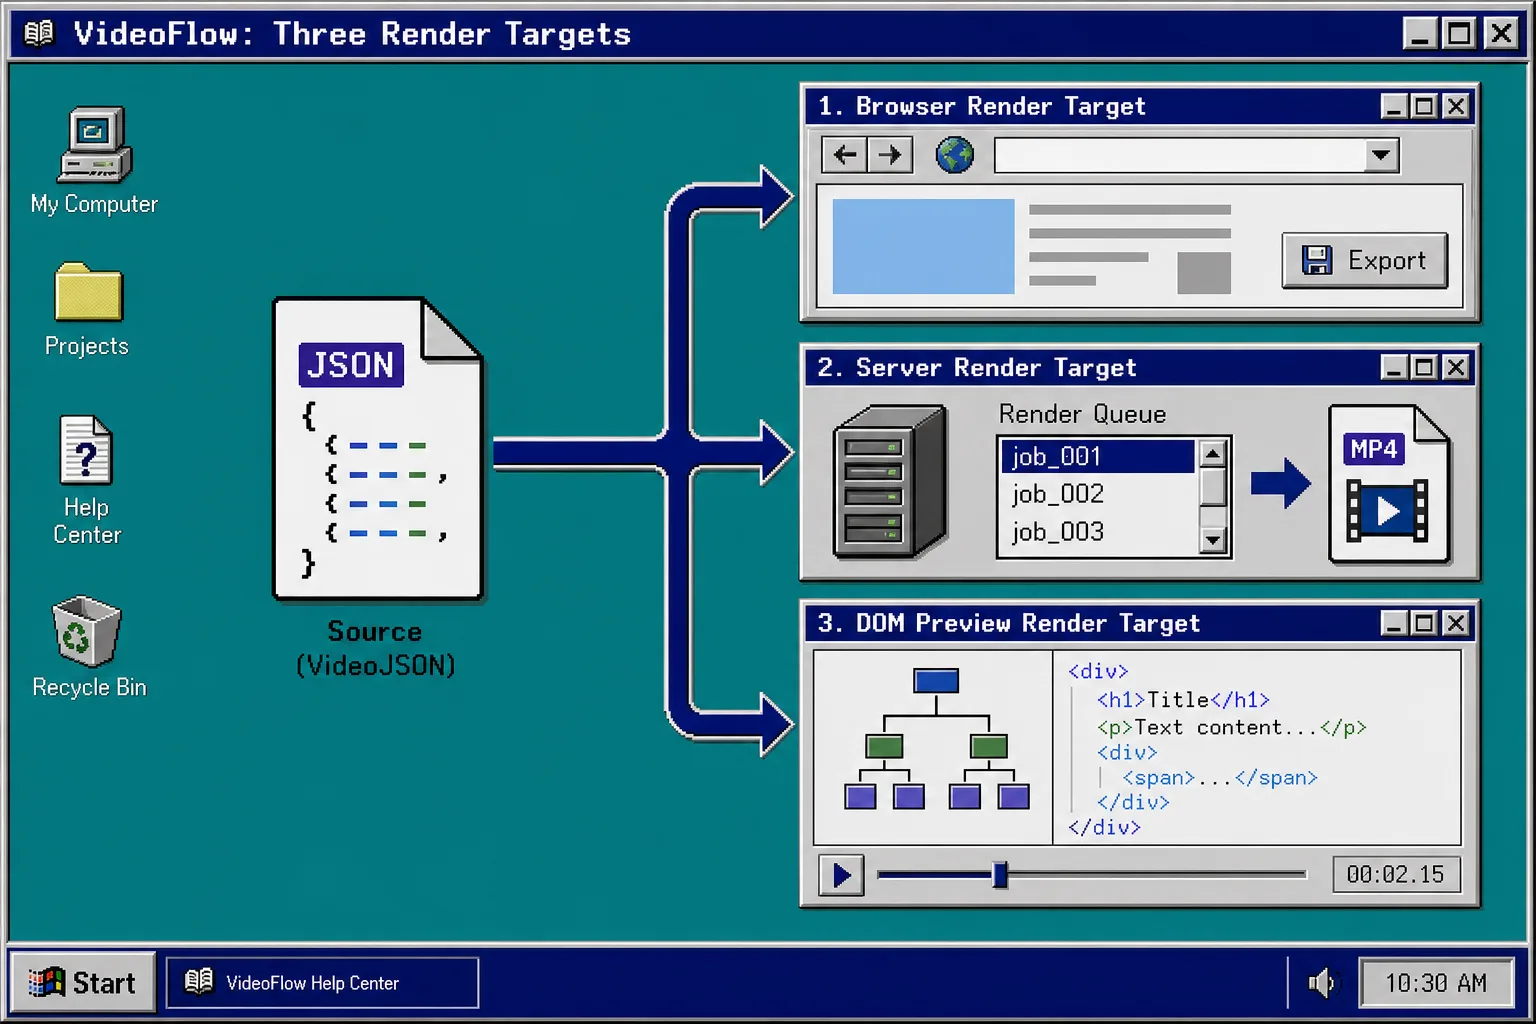
If your users click an Export button inside a web app, the browser renderer is the cleanest fit. It keeps the work local to the session, which avoids uploading the project just to get an MP4 back.
That renderer supports progress callbacks, AbortController cancellation, and worker acceleration, so it is the right choice when you want export to feel like part of the product instead of a separate backend job. The renderer choice is the same one I break down in How to Choose the Right VideoFlow Renderer for a Project.
You should see a browser-side export flow that feels immediate, with the same VideoJSON still acting as the source of truth.
4. Use the server renderer when the job belongs in a queue
For batch jobs, APIs, scheduled renders, and CI, move the same VideoJSON to the server renderer. That path is better when the work needs to run headlessly from Node.js and land as an MP4 file or Buffer.
This is the version you want for large queues, scheduled content, or agent-driven workflows. It keeps the authoring model the same while letting the runtime change. I use that split in How I Build a Three-Renderer Video Workflow With VideoFlow, which shows why one JSON object can support more than one delivery path.
You should see the same scene render consistently even though the execution environment changed.
5. Add the React editor only when people need to edit the same JSON visually
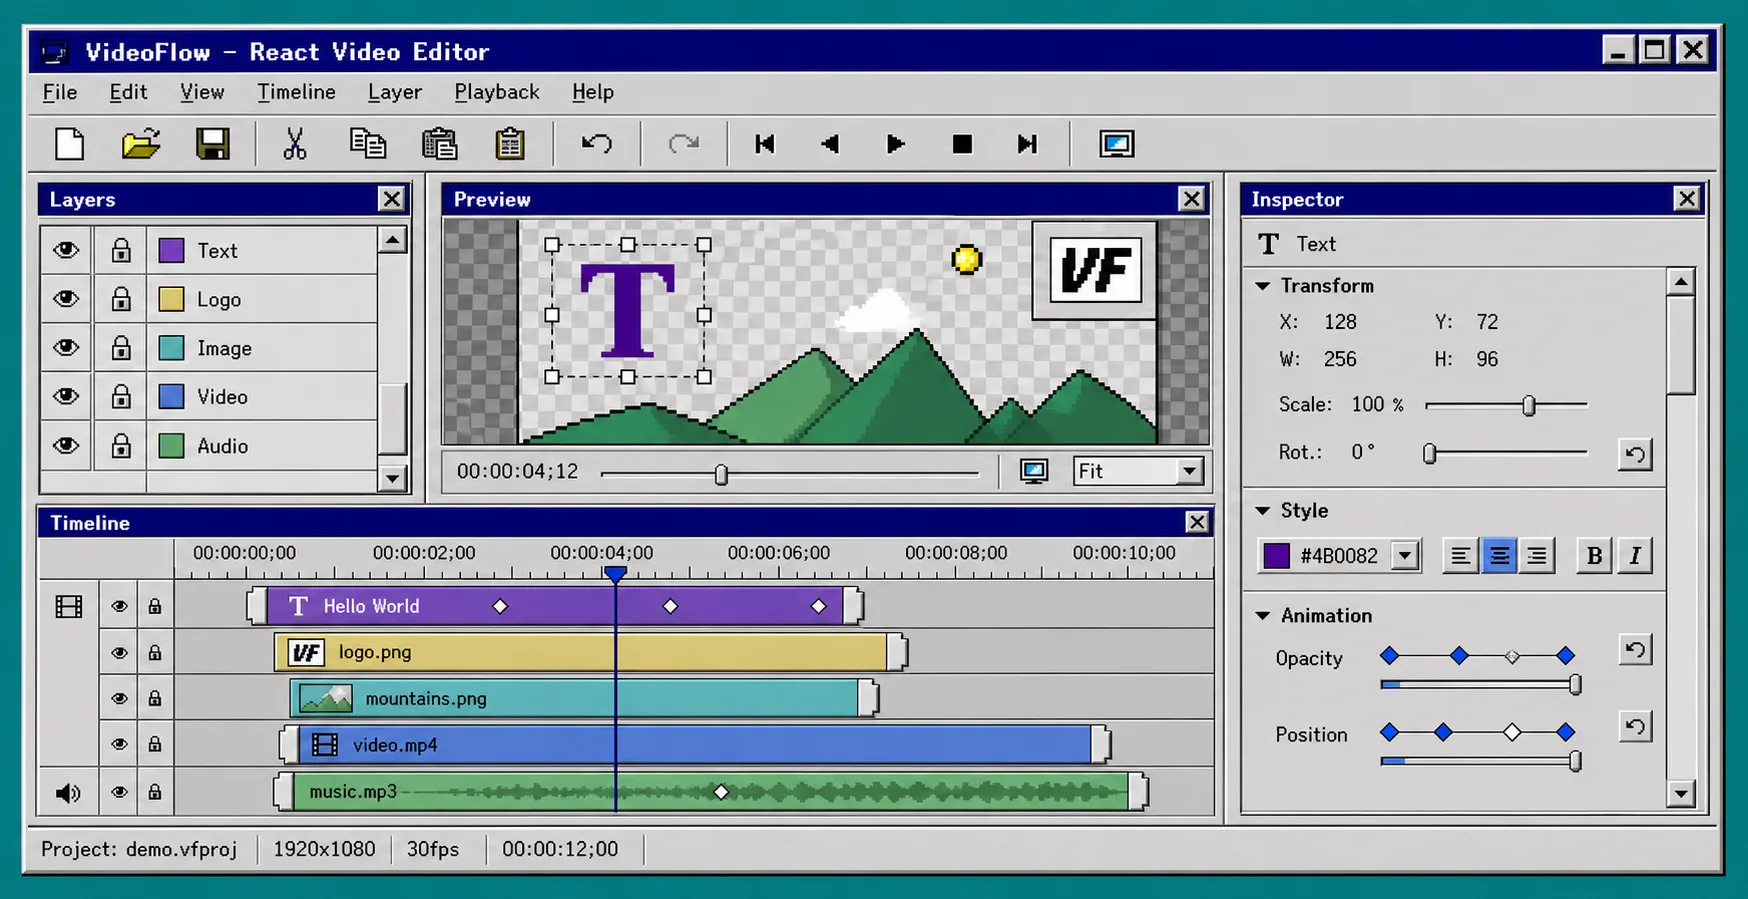
The React editor is optional, and that is the point. Keep the core format independent, then add the editor when the product actually needs a visual editing surface.
import { VideoEditor } from "@videoflow/react-video-editor";
import "@videoflow/react-video-editor/style.css";

export default function App() {
  return (
    <VideoEditor
      video={videoJSON}
      onChange={(next) => saveToServer(next)}
      onSave={async (next) => await persist(next)}
      onUpload={async (file) => await upload(file)}
      theme="dark"
    />
  );
}
When you add the editor, the main things to look for are a multi-track timeline, live preview, and an inspector that still points back to the same underlying JSON. If you want the editor-first version of the workflow, the React editor page and How to Build a Merge-Request-Friendly Video Workflow With VideoFlow are the right companions.
You should see one shared data model feeding both code and visual editing.
6. Keep the workflow reviewable in Git
Once the project works, organize it so the JSON diff stays small and the render step is easy to inspect. Put reusable scenes in predictable files, keep asset paths stable, and avoid hidden state that only lives in the UI.
That is how the file stays readable in a merge request. It is also why How to Keep Video Templates Diffable in Git With VideoFlow matters: the more your project behaves like code, the easier it is to review. If you want the stricter checklist version, How to Build a Merge-Request-Friendly Video Workflow With VideoFlow is the next stop.
You should see a change set that is small enough to review without opening the renderer first.
Troubleshooting
- If compilation fails, check that you are importing from
@videoflow/corein the authoring path and not mixing in editor-only code too early. - If browser export stalls, verify that the runtime supports the browser renderer requirements and that you are not blocking the main thread with unrelated work.
- If the server render does not match preview, confirm that width, height, fps, and timing values are the same in both environments.
- If the editor cannot load assets, make sure the URLs are public and stable before you wire them into the project.
- If your Git diff is noisy, split reusable scene pieces into separate files and keep generated output out of the authoring branch.
Recap
The clean setup is simple: author in TypeScript, compile to VideoJSON, and reuse that same JSON for browser export, server rendering, or a live editor. That gives you one source of truth instead of three nearly matching versions of the same video.
If you are building this today, start with one tiny scene, compile it once, and render it in the browser before you add the editor or queue the server job. That is the fastest way to confirm the workflow is actually portable.