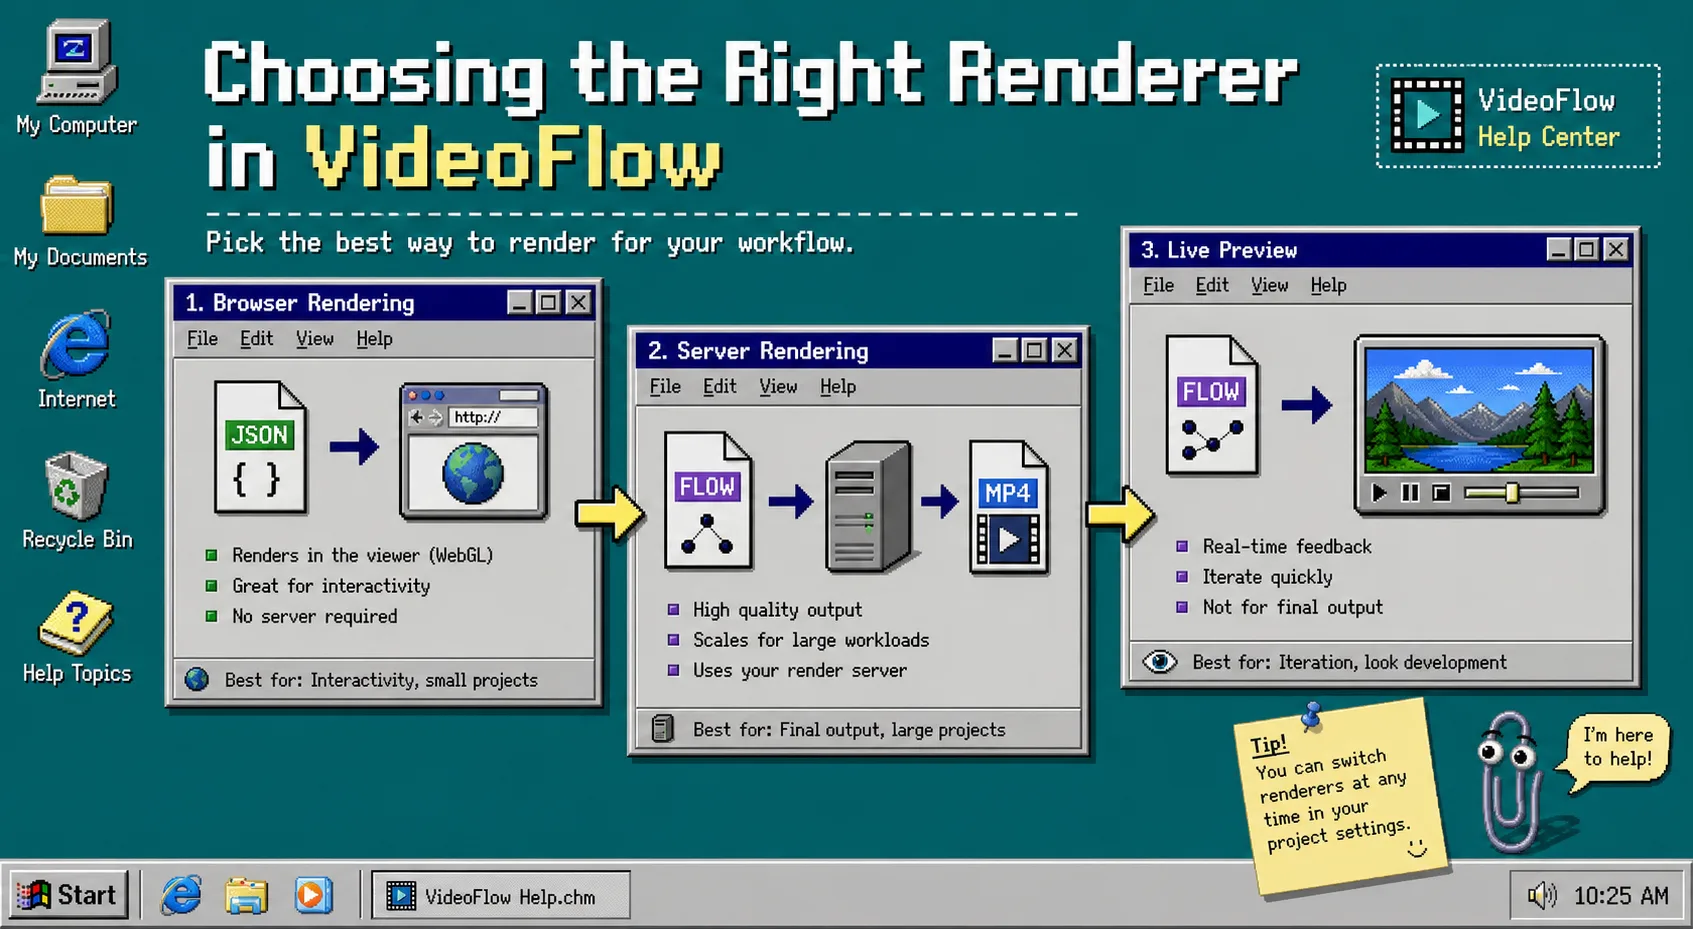
VideoFlow is most useful when you keep one scene definition and decide where the render should happen later. That lets you preview, export, and automate from the same VideoJSON instead of rebuilding the project for each environment.
If you want the product pages open while you work, keep the VideoFlow site, Core docs, Renderers docs, and Examples nearby. If you already read How to Build a Reviewable JSON-to-Video Pipeline With VideoFlow, this guide is the decision step before that workflow.
1. Install the pieces you need
Start by adding the packages that match the path you want to support. You can install all of them up front, or start small and add the rest later.
npm install @videoflow/core @videoflow/renderer-browser @videoflow/renderer-server @videoflow/renderer-dom @videoflow/react-video-editor
When the install finishes, you should have three separate roles available: one package for authoring, one for live preview, and one for export.
2. Compile one scene into VideoJSON
Build the project once in @videoflow/core and keep the compiled JSON as the thing you review and hand off. Do not start with a renderer-specific timeline.
import VideoFlow from "@videoflow/core";

const project = new VideoFlow({
  name: "Renderer Choice Demo",
  width: 1280,
  height: 720,
  fps: 30,
});

project.addText({ text: "Choose the right renderer", fontSize: 6, fontWeight: 700 });

const videoJSON = await project.compile();
That videoJSON object is the shared source of truth. It is the part you can store in Git, pass into a preview, or send to a render job without rewriting the scene logic.
If you want the broader pattern of separating video data from output, How to Separate Video Data From Rendering With VideoFlow is a useful companion read.
3. Preview the scene in the DOM renderer
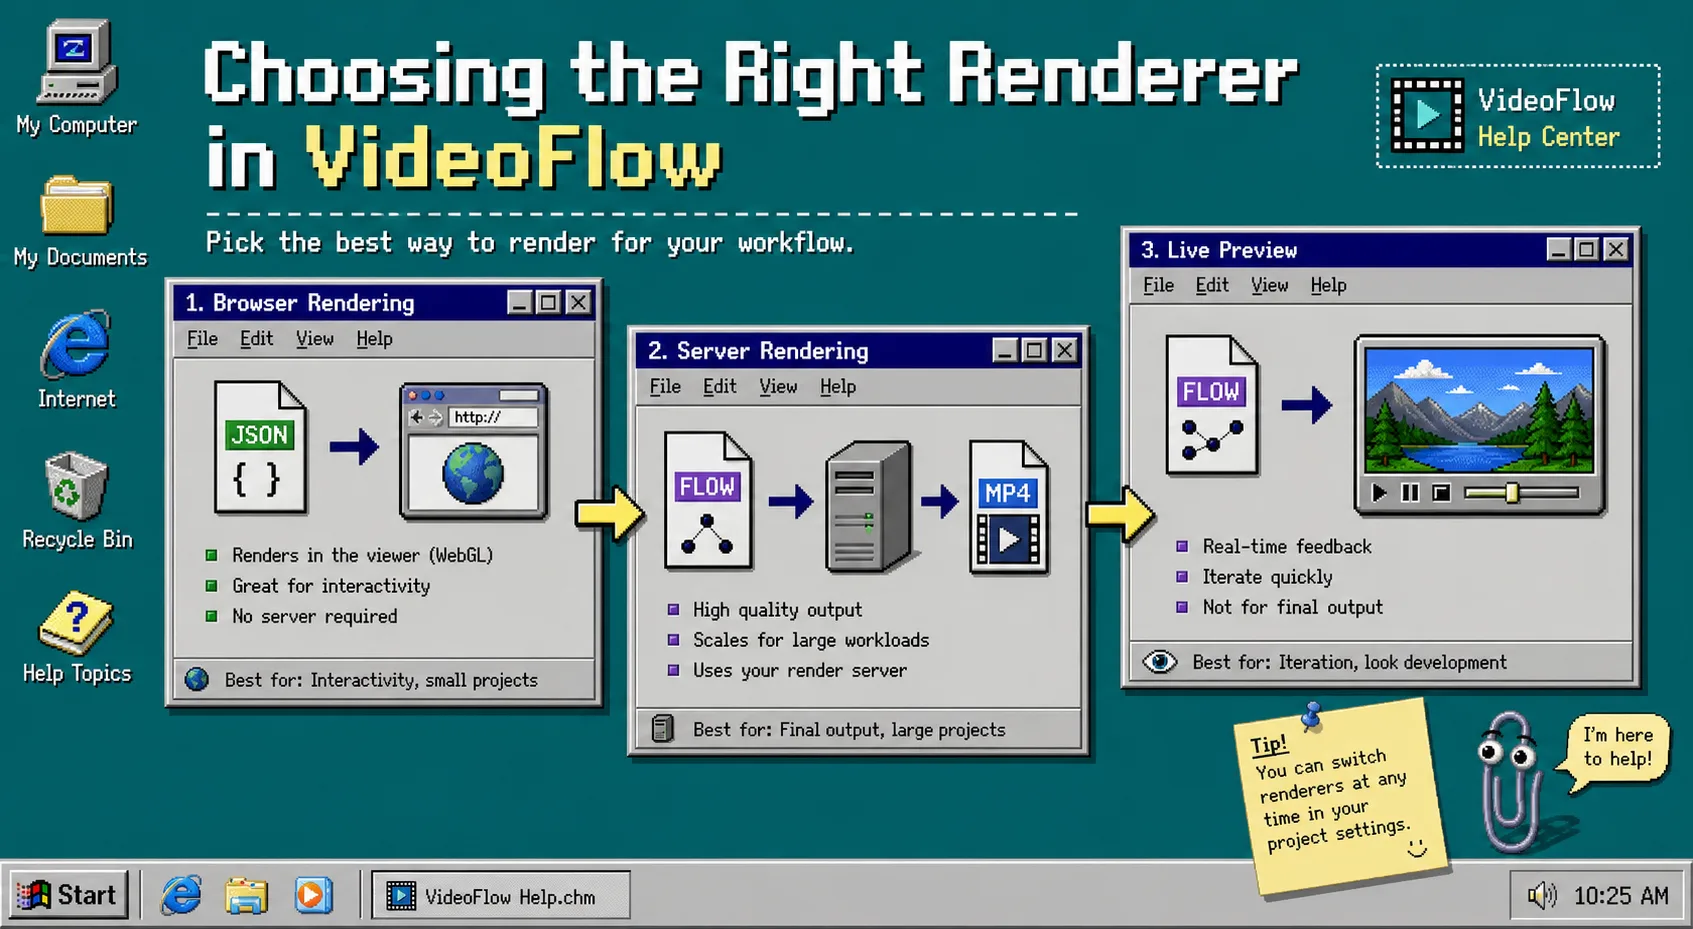
Use the DOM renderer when you want a live, scrubbable review surface that stays close to what the final scene will show.
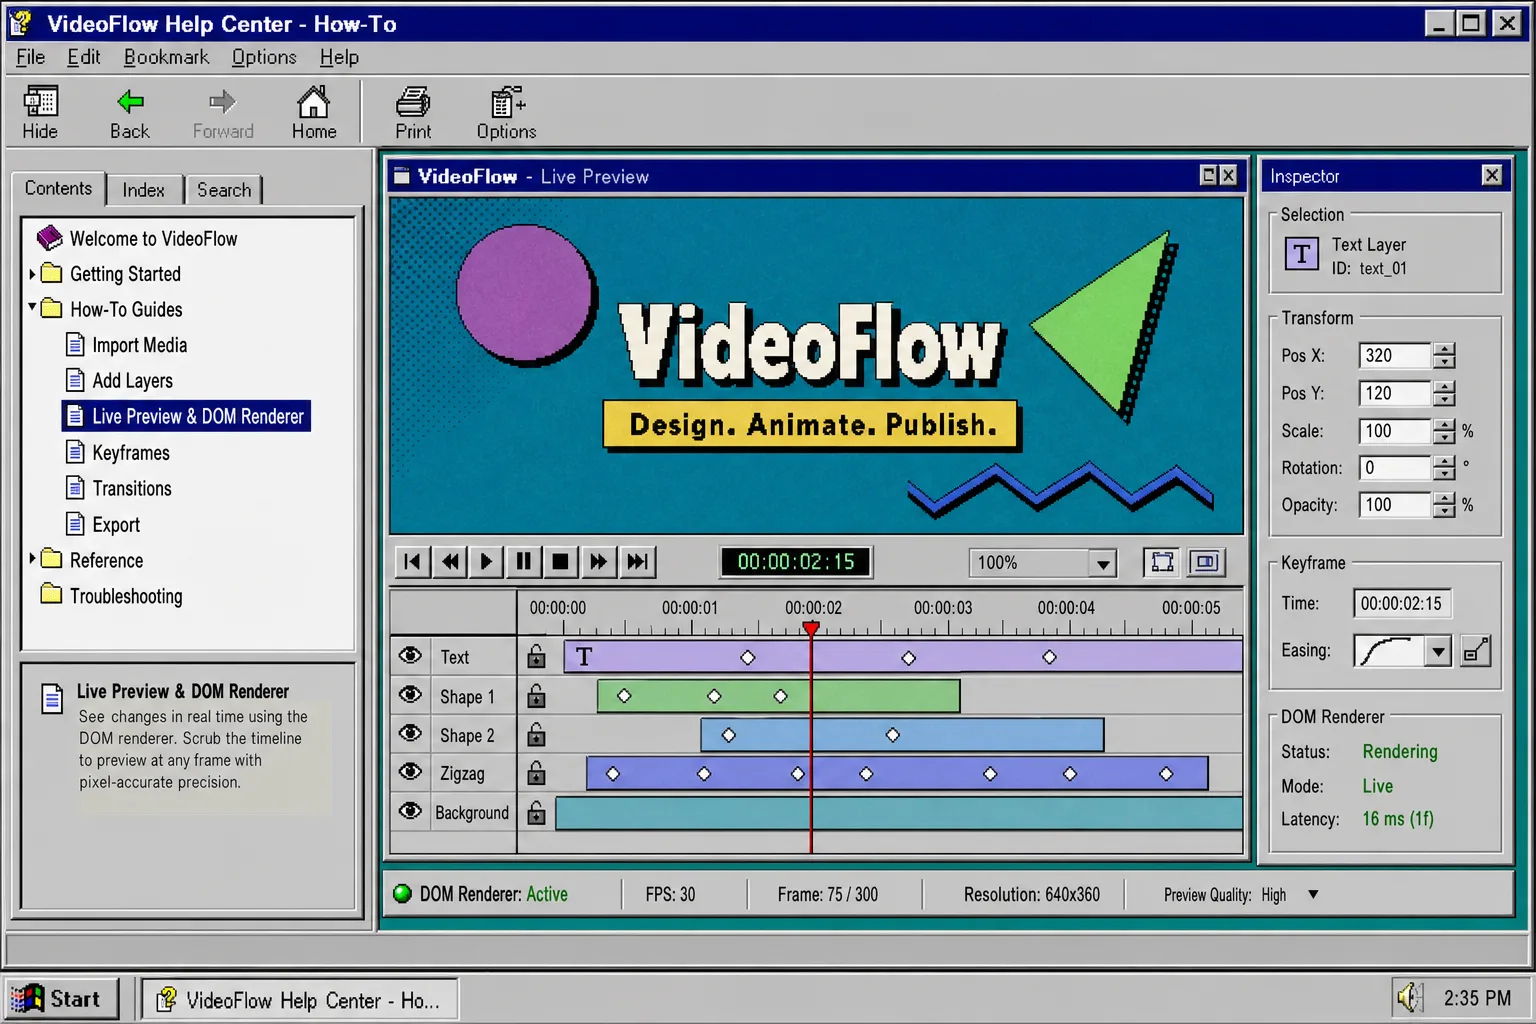
Mount the preview in your review page, scrub the timeline, and check the frame before anyone exports the project. You want three answers before you move on:
- Does the composition match the intent?
- Do the timings feel right?
- Are the dimensions and aspect ratio correct?
If the frame is wrong here, fix the scene here. That is exactly why How to Preview, Edit, and Export the Same Video JSON Everywhere works as a workflow instead of a slogan.
4. Export locally with the browser renderer
Use the browser renderer when the user should export from their own session and the project does not need to leave the browser.
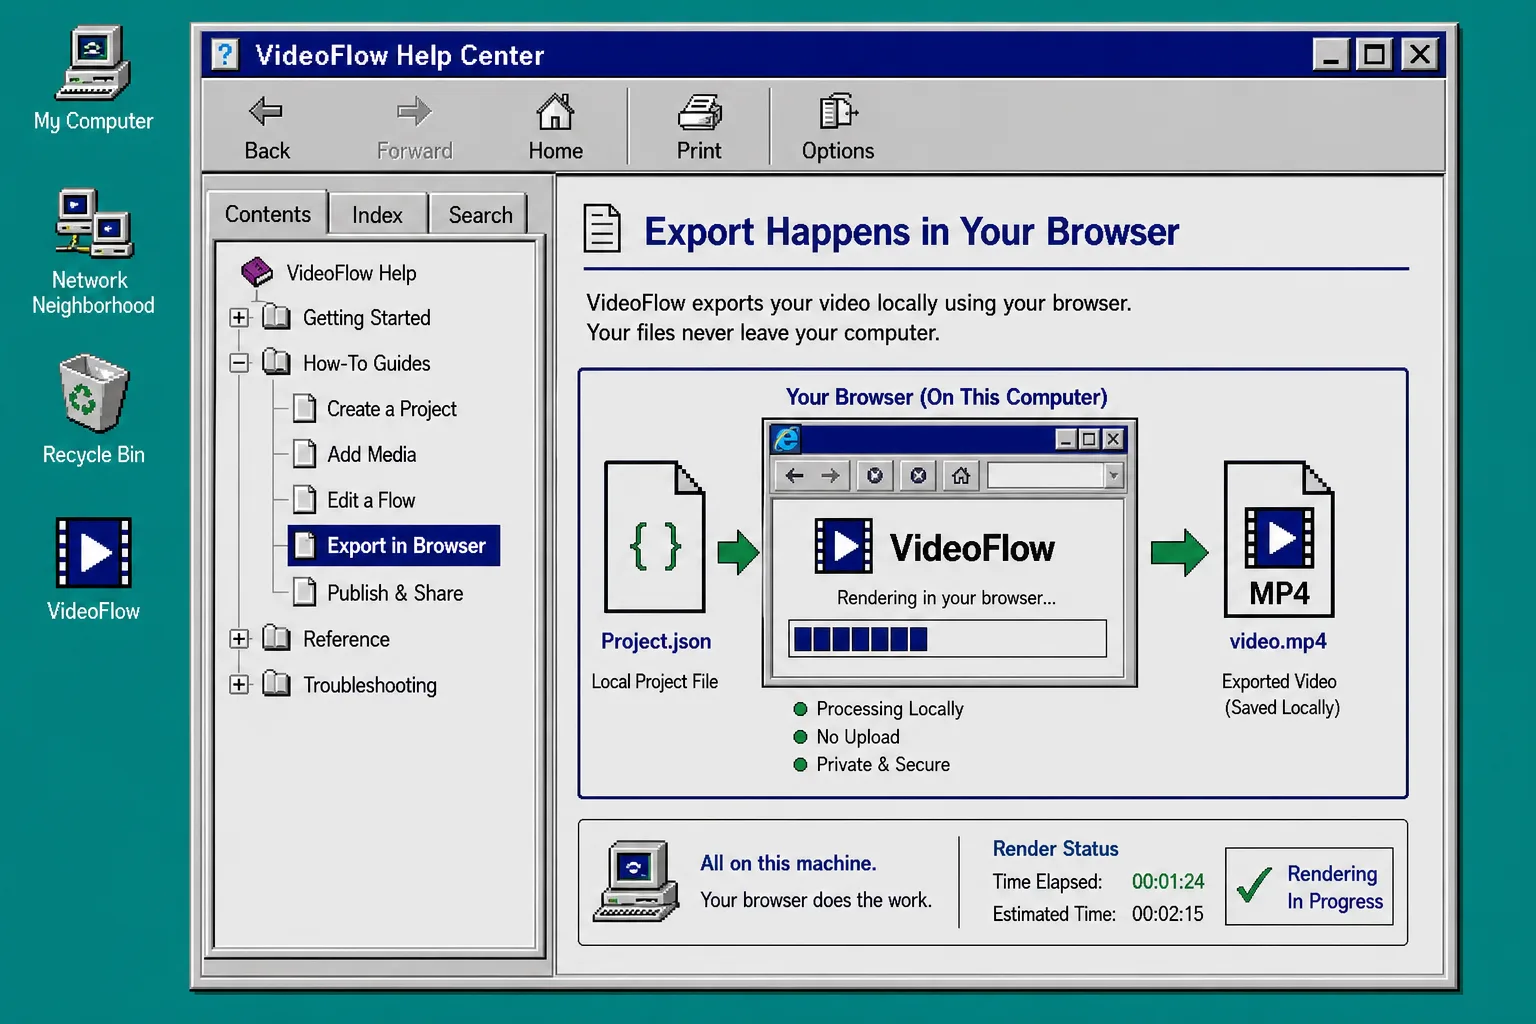
That path is a good fit when you want a client-side MP4 button, a private local export, or a flow that avoids sending the source project to a server. The product brief also calls out browser progress callbacks, AbortController cancellation, and worker acceleration, which are exactly the kinds of details that matter when the export happens inside a UI.
If you want a more export-focused walkthrough, How to Build a Browser-Based MP4 Export Workflow With VideoFlow is the next article to read.
5. Queue batch jobs on the server renderer
Use the server renderer when the job belongs in Node.js, on an API, in CI, or in a scheduled batch pipeline.
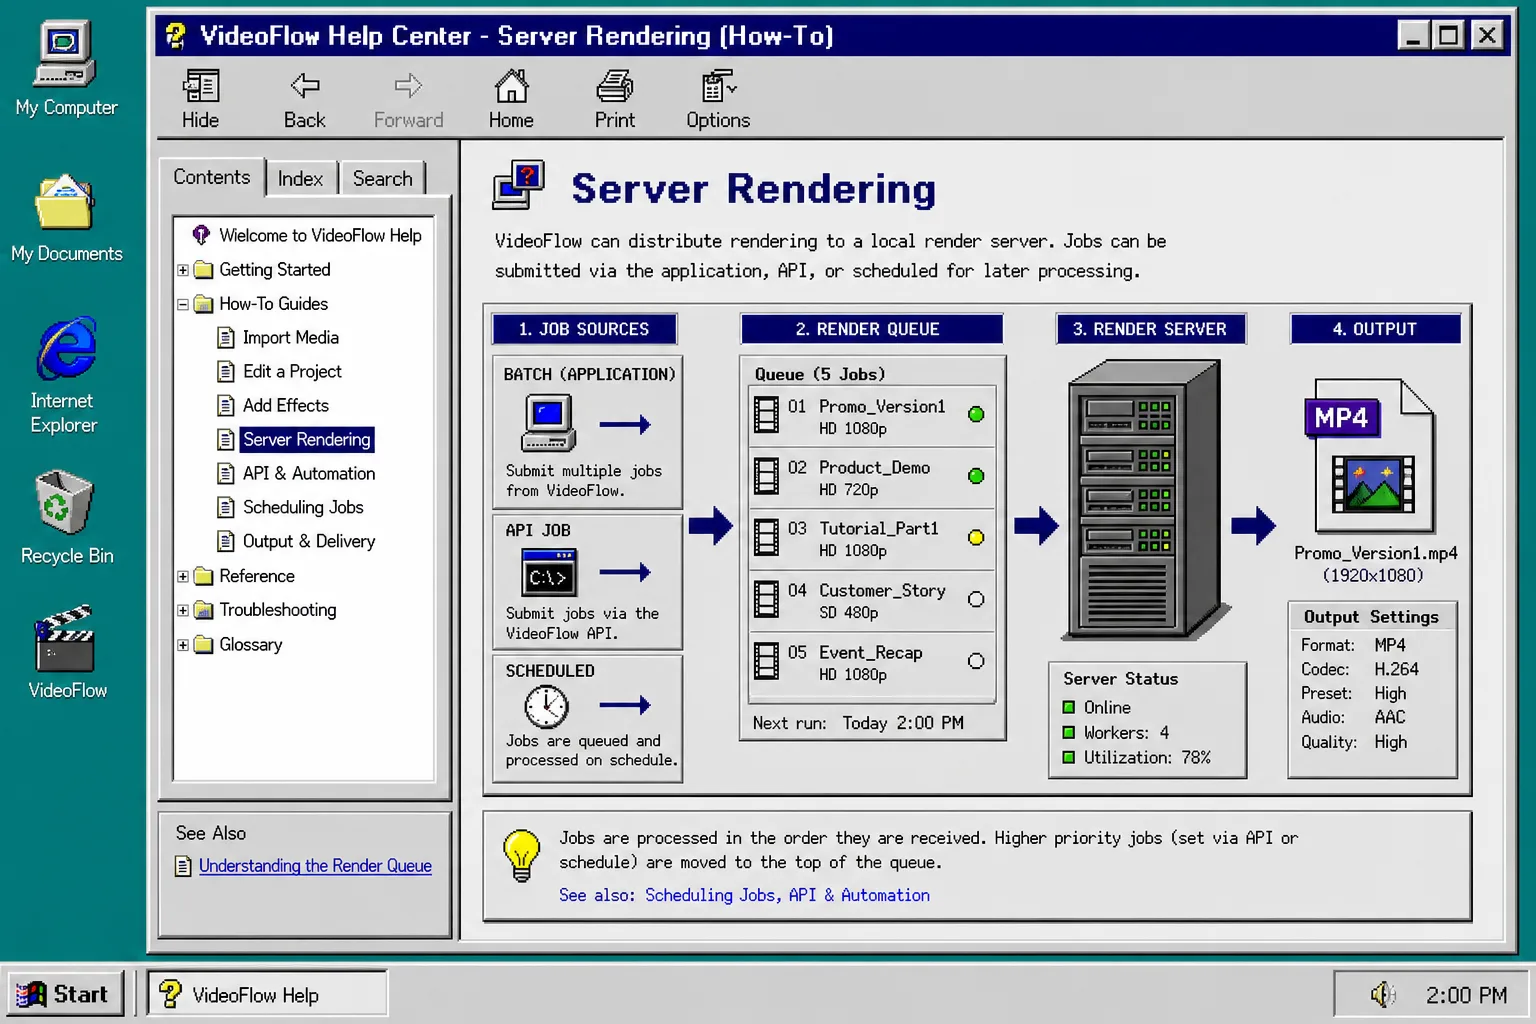
This is the path for larger workloads and repeatable automation. The product brief describes the server renderer as headless by default, with browser-side portability handled elsewhere in the stack and optional FFmpeg support when you need alternate encoding needs.
A simple rule helps here: if the export should survive a user closing the tab, use the server renderer. If the export should stay local to the session, use the browser renderer. If you still need to inspect timing and layout first, keep the DOM preview in front of both.
How I Pick the Right VideoFlow Renderer for the Job covers the same decision from a more operational angle.
6. Lock the choice into your app
Once you know which renderer belongs to the workflow, wire the choice into your app instead of making users guess.
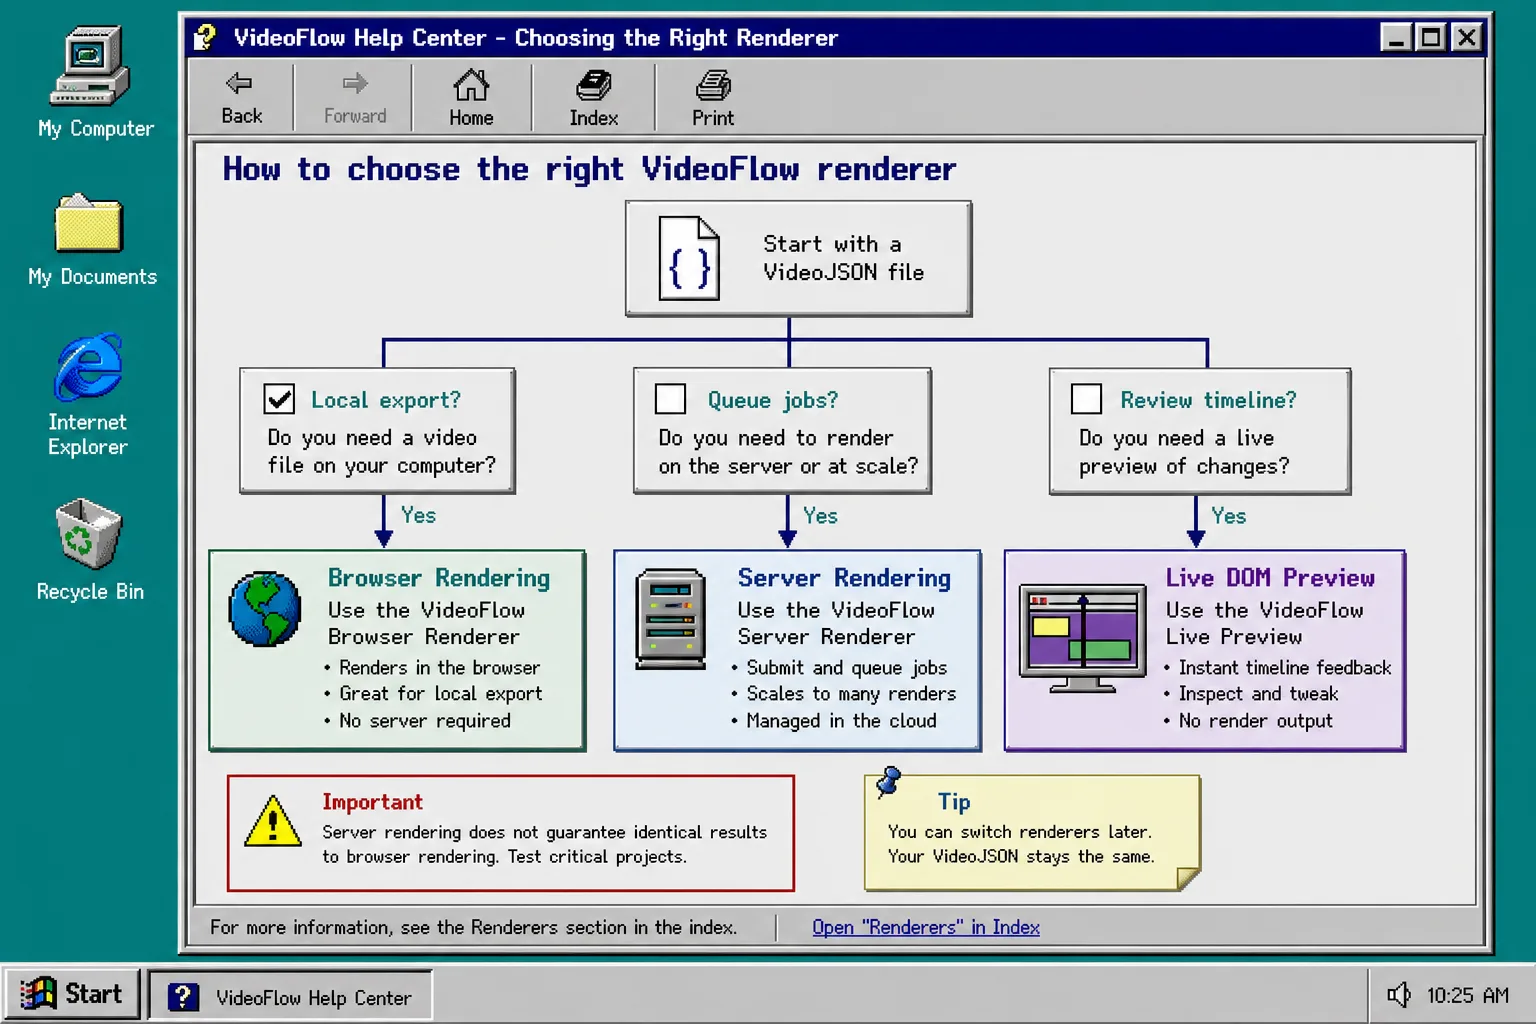
A good review flow usually looks like this:
- Author the scene in
@videoflow/core. - Review the same JSON in the DOM renderer.
- Export locally with the browser renderer if the user should keep the job on their machine.
- Send the same JSON to the server renderer if the job needs queues, APIs, or scheduled processing.
- Add
@videoflow/react-video-editoronly when users need a timeline UI on top of the same data.
That is also the point where the React editor becomes useful. It gives reviewers a multi-track timeline, keyframes, transitions, effects, undo/redo, and MP4 export without forcing you to invent a second video format. If that sounds like your stack, How I Built a React Video Editor Around Portable JSON with VideoFlow is the companion guide.
Troubleshooting
If preview and export disagree, check width, height, fps, and layer order first. Mismatched project dimensions are the fastest way to get a cropped frame or a timing surprise.
If the browser export is slow, keep the scene smaller and make sure the session is actually using the browser renderer path you expect. The browser renderer is meant for client-side export, not for huge unattended batch queues.
If the server job fails, confirm that the machine can run the headless render path and that any optional encoding settings match your environment. In other words, the fix is usually in the render environment, not the scene itself.
If the DOM preview looks blank, check the container height and the stylesheet load order before you debug the scene. A missing preview shell can look like a broken render when it is really a UI setup problem.
Wrap-Up
The short version is simple: use the DOM renderer for review, the browser renderer for private local export, and the server renderer for queued or automated jobs. Keep the video in one VideoJSON file, and the renderer choice becomes a deployment detail instead of a rewrite.
If you want the next layer, start with one VideoFlow scene, preview it in the DOM renderer, and then test the browser or server path that matches your real workflow. After that, read How to Build a Portable VideoJSON Workflow for Browser, Server, and Editor for the wider pattern.