How to Build a Video Review Workflow With VideoFlow
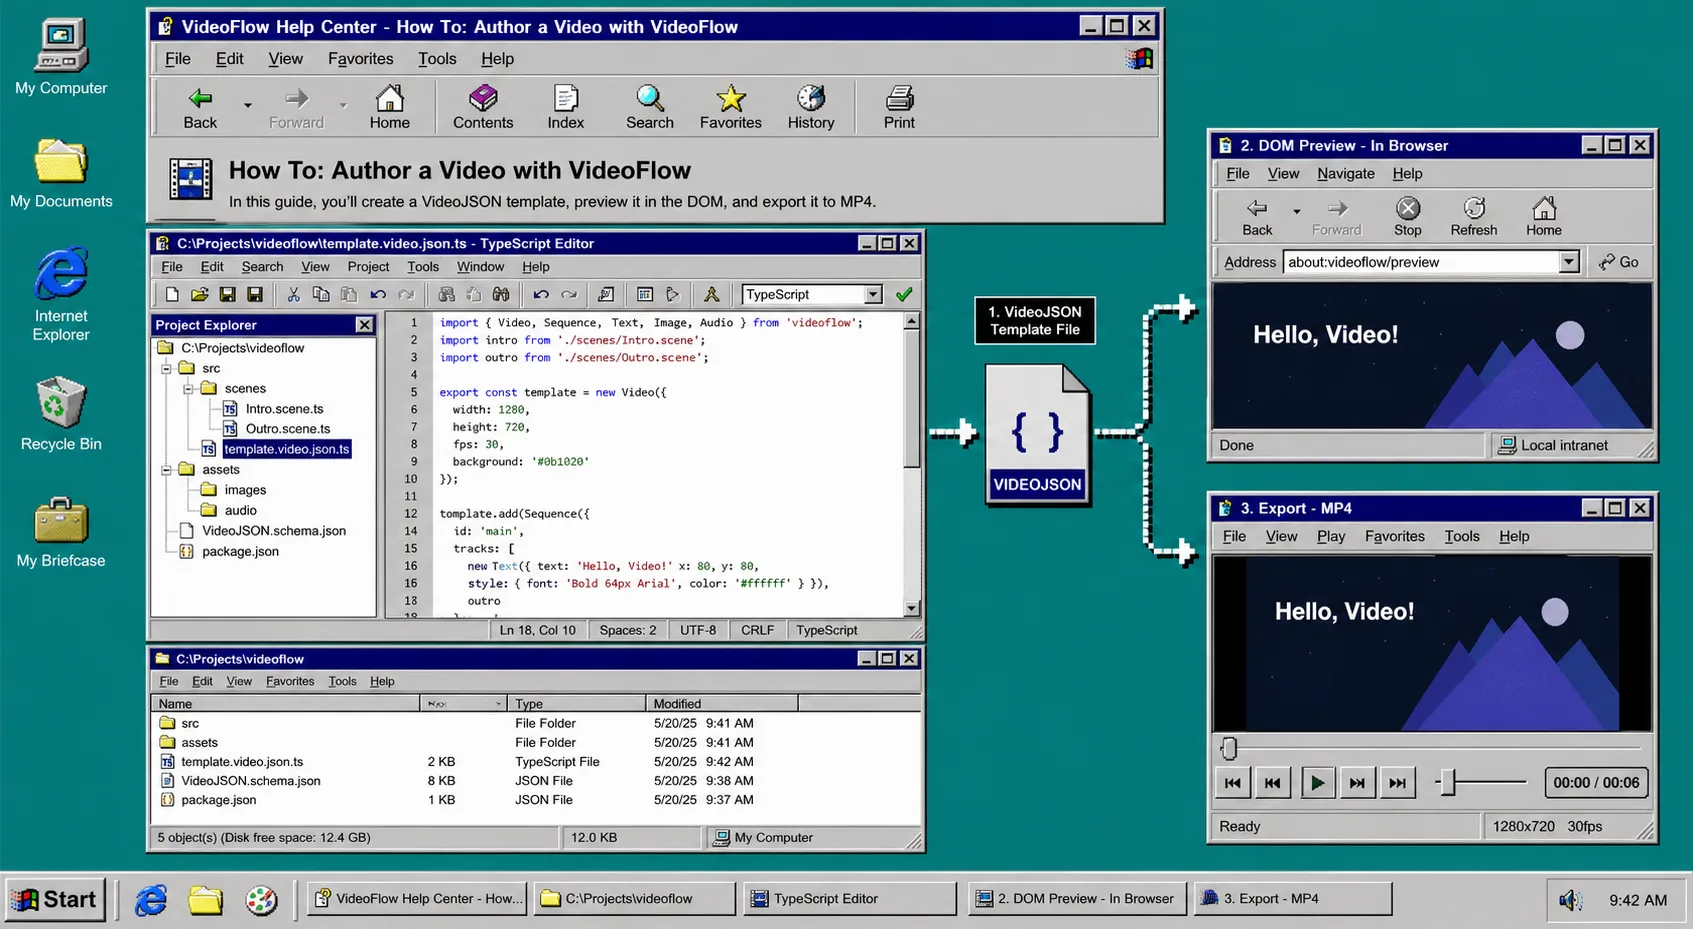
If you need to hand a video draft to someone else before export, the easiest path is to keep one source of truth all the way through the work: TypeScript for authoring, VideoJSON for portability, a live preview for review, and MP4 export at the end.
That is the workflow VideoFlow is built for. It is an open-source toolkit for programmatic video creation, and the important part is not just that it can render video. It is that the same video project can move between the browser, a server, and a live DOM preview without turning into three different tools. You can start with the core docs at videoflow.dev/core, check the renderer options at videoflow.dev/renderers, and use the playground when you want to test the workflow before wiring it into an app.
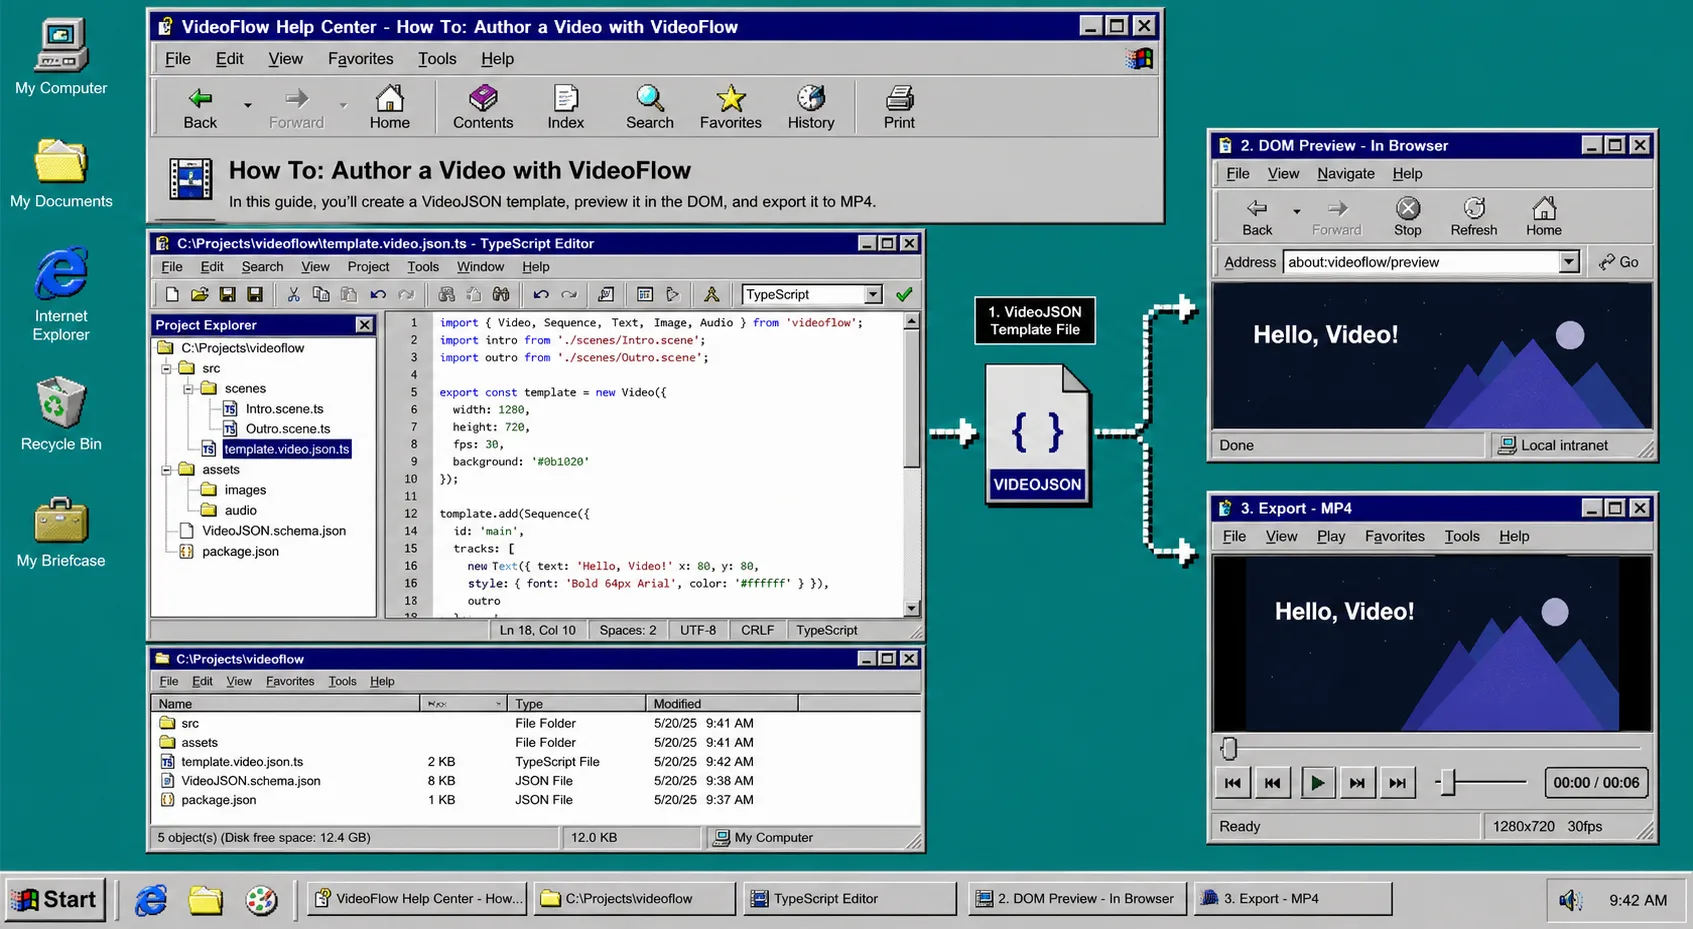
This guide shows a practical review loop you can use when the goal is simple: make the draft easy to inspect before anyone ships it.
1. Start with one TypeScript scene
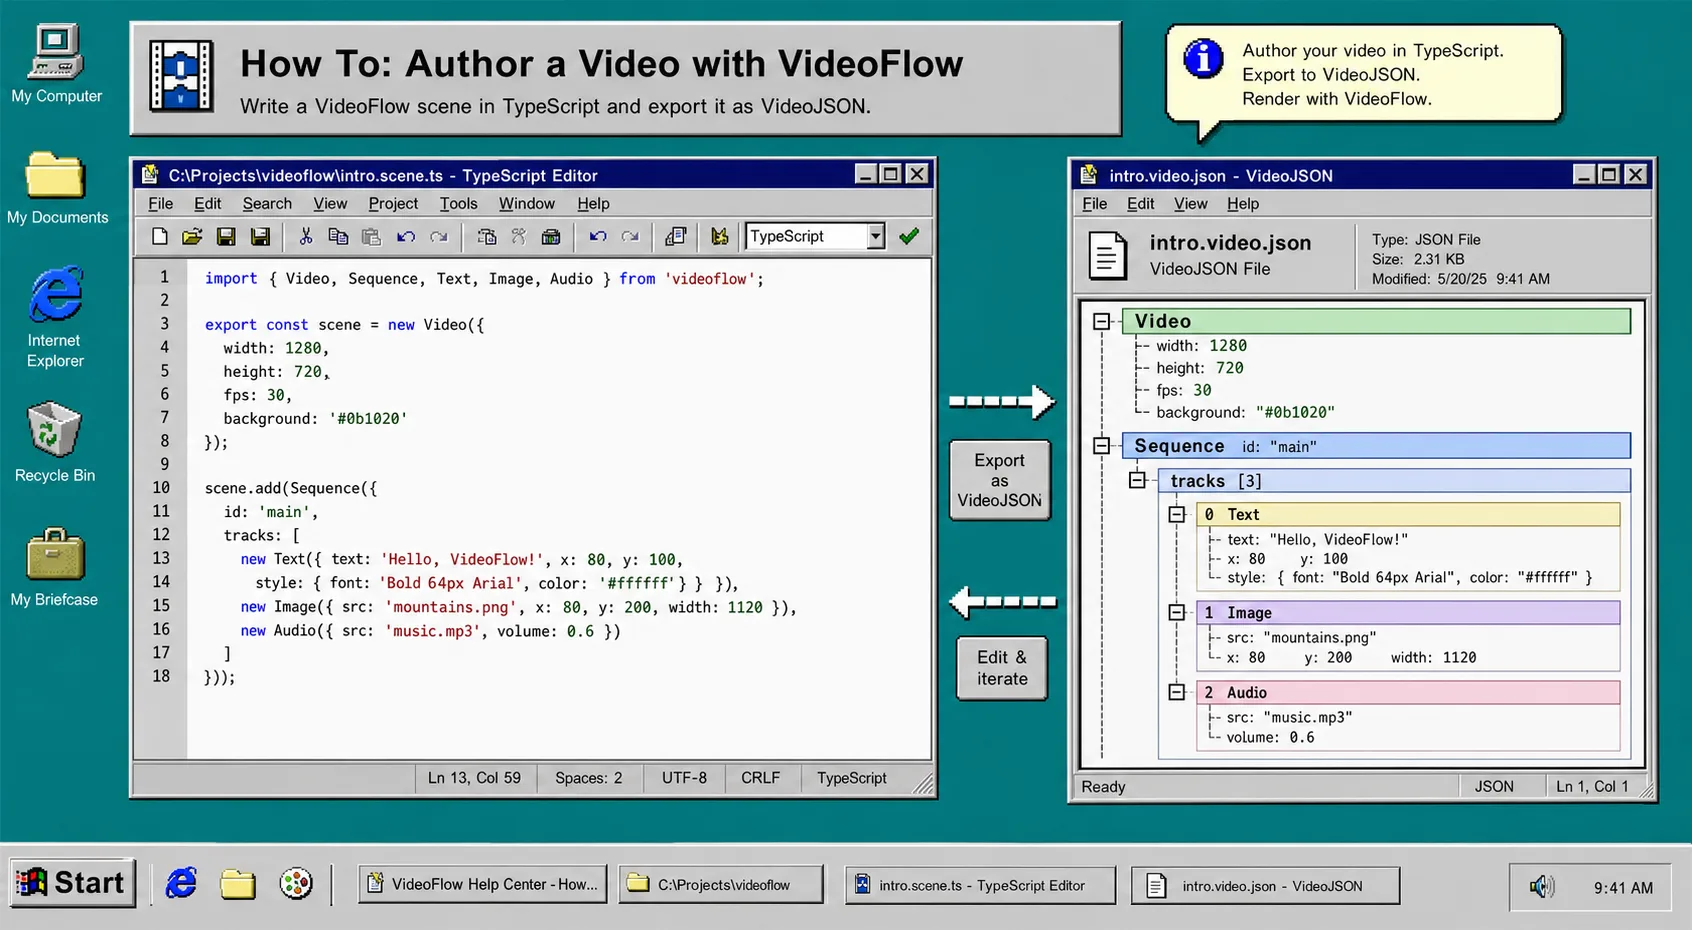
Begin in the core package and define a single scene with explicit dimensions, frame rate, and layers. The point is not to build the biggest project first. The point is to make the draft understandable enough that someone else can review it without opening a timeline maze.
npm install @videoflow/core
import VideoFlow from "@videoflow/core";

const $ = new VideoFlow({
  name: "Review Draft",
  width: 1280,
  height: 720,
  fps: 30,
});

$.addText(
  { text: "Hello, VideoFlow!", fontSize: 7, fontWeight: 800 },
  { transitionIn: { transition: "overshootPop", duration: "500ms" } }
);

const json = await $.compile();
const blob = await $.renderVideo();
You should end this step with a small project that compiles cleanly and produces portable VideoJSON. If you want the deeper version of this first step, How to Set Up a Portable VideoJSON Workflow in VideoFlow covers the same idea from the template side.
2. Preview the same JSON before export
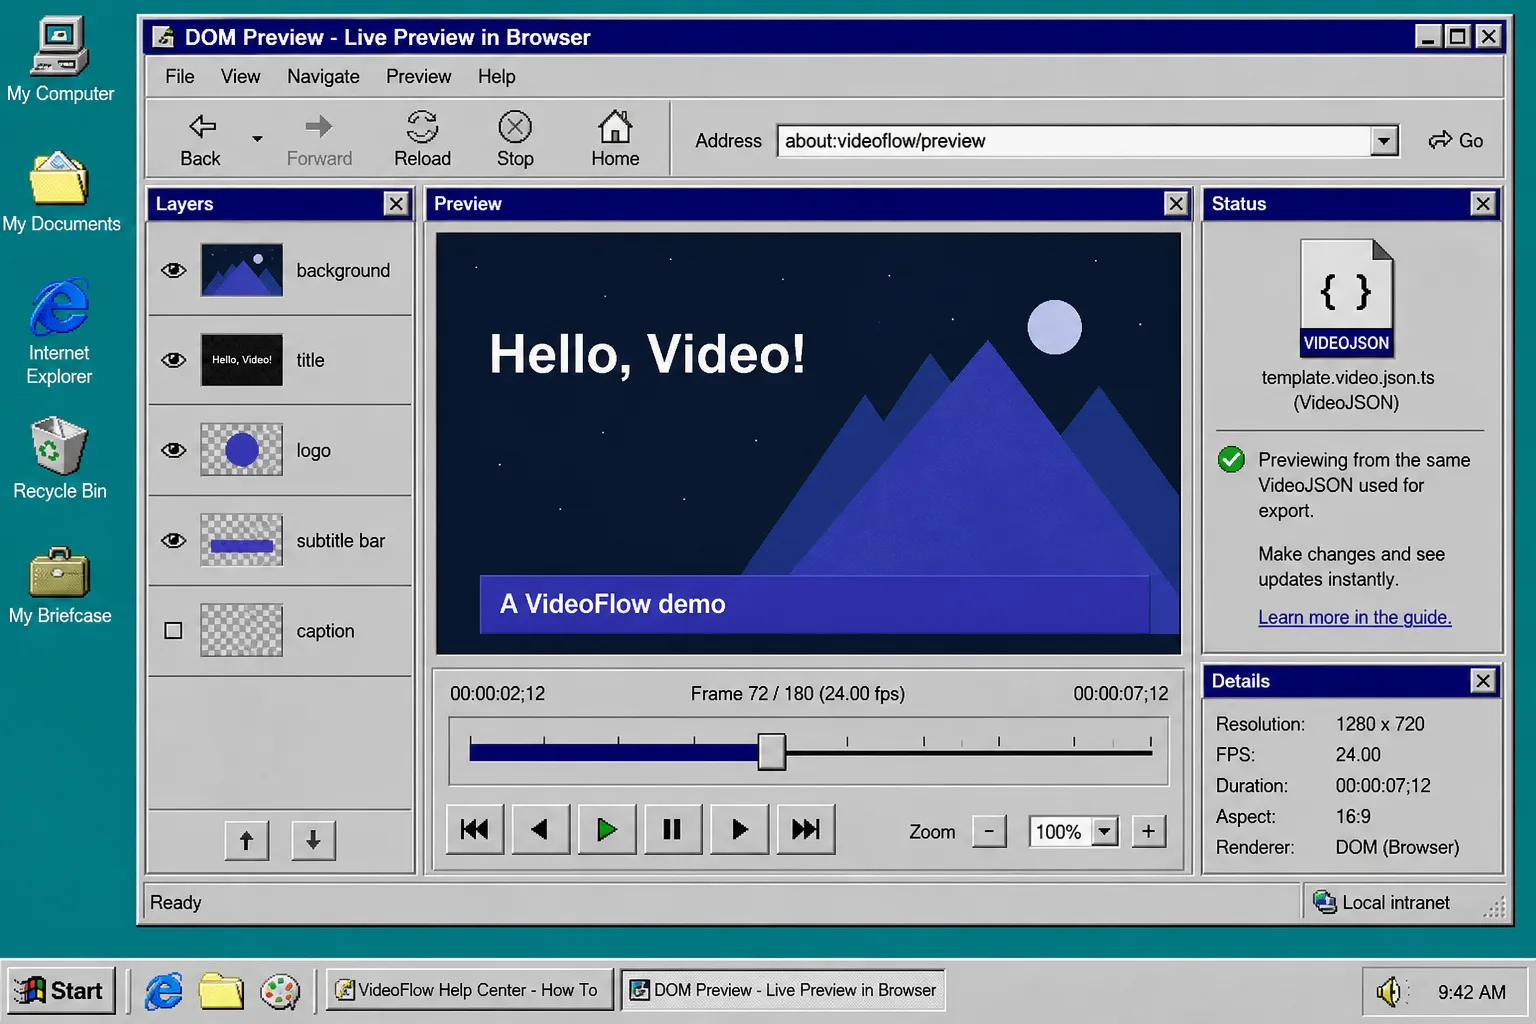
Once the scene compiles, send that same VideoJSON into the DOM renderer so you can inspect the layout without waiting on a final MP4. This is the part that keeps the workflow reviewable. The browser preview should show the same scene structure the export path will use later.
VideoFlow’s DOM renderer is useful here because it gives you live preview, scrubbing, frame-accurate seeking, audio sync, and Shadow DOM style isolation. That matters when a teammate wants to comment on timing or spacing and you need to answer with something visible instead of a guess.
If you are comparing this with a larger review process, How to Build a Reviewable JSON-to-Video Pipeline With VideoFlow and How I Build a Reviewable Video Pipeline Around VideoJSON are the right companion reads.
What you want to see here is a preview pane that matches the scene, not a separate interpretation of it. If the preview is wrong, fix the scene before you export anything.
3. Pick the export path that matches the job
After preview looks right, choose the renderer that fits the workload.
- Use the browser renderer when the export button lives inside the product and you want to avoid a server round trip.
- Use the server renderer when the job belongs in a queue, a batch process, or a scheduled render.
- Use the same VideoJSON for both so the preview and the final file stay aligned.
That choice is the part most teams get wrong. They pick a render path first and a workflow second. VideoFlow works better when the workflow comes first.
If you want the short decision guide, How to Choose the Right VideoFlow Renderer for a Project lays out the tradeoffs, and How to Build a Browser-Based MP4 Export Workflow With VideoFlow shows the browser-only path in more detail.
The output you want at the end of this step is boring: one reviewable JSON source and one renderer chosen for the actual workload.
4. Add a React editor when a human needs to revise the draft
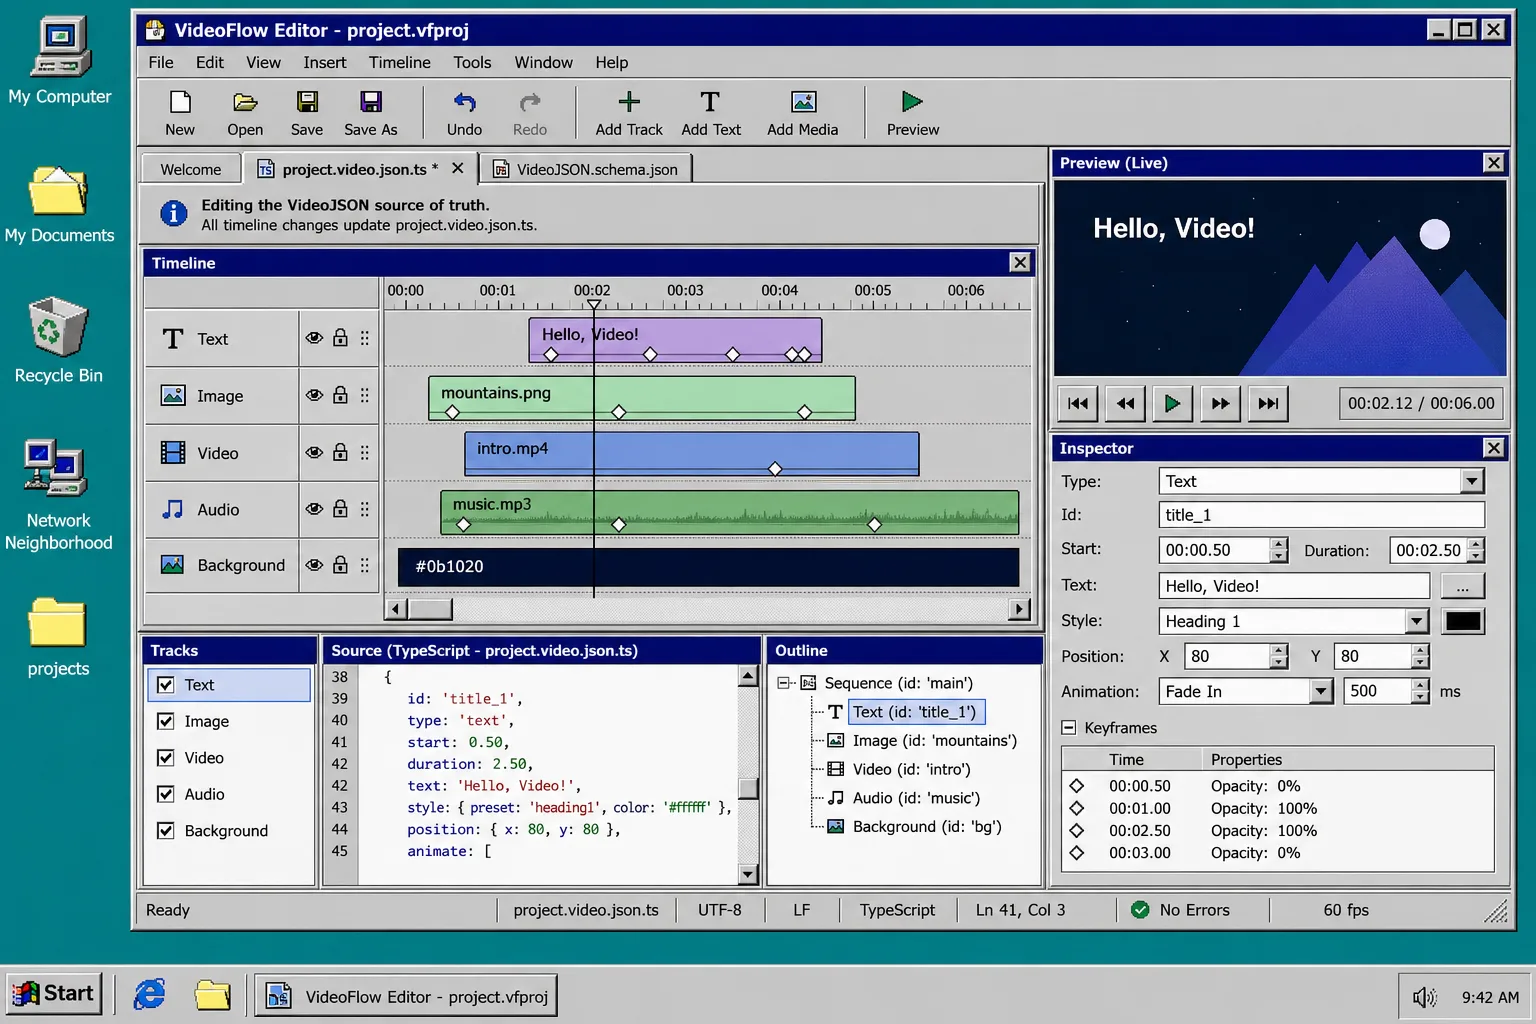
If the workflow needs an editor for a teammate, layer on the React video editor rather than rebuilding the whole stack. The editor is meant to sit on top of the same VideoJSON source, not replace it. That means you get a multi-track timeline, keyframes, undo and redo, upload hooks, and theme options while still keeping the project data portable.
import { VideoEditor } from "@videoflow/react-video-editor";
import "@videoflow/react-video-editor/style.css";

export default function App() {
  return (
    <VideoEditor
      video={videoJSON}
      onChange={(next) => saveToServer(next)}
      onSave={async (next) => await persist(next)}
      onUpload={async (file) => await upload(file)}
      theme="dark"
    />
  );
}
The editor makes the review step feel practical instead of ceremonial. A person can trim, drag, inspect, and save changes while the underlying structure stays the same. If you are building this into a product, How to Add a Multi-Track React Video Editor to Your SaaS App is the more direct implementation article.
5. Keep the template reviewable in Git
The easiest way to keep a video workflow sane is to make small changes easy to diff. One scene file, one clear naming scheme, and one review path beats a pile of hand-edited exports every time.
VideoFlow helps here because the core is open source under Apache-2.0, and the VideoJSON layer gives you something you can version, inspect, and hand between tools without losing the structure of the draft. That is why the same project can support both the renderer choice and the editor choice without forking into separate systems.
If you want the template-maintenance angle, How to Build a Video Workflow Around a Single JSON Contract and How to Build a Portable VideoJSON Workflow for Browser, Server, and Editor are the best follow-ups.
At this point, you should have one project format, one review path, and one export path. That is the whole goal.
Troubleshooting
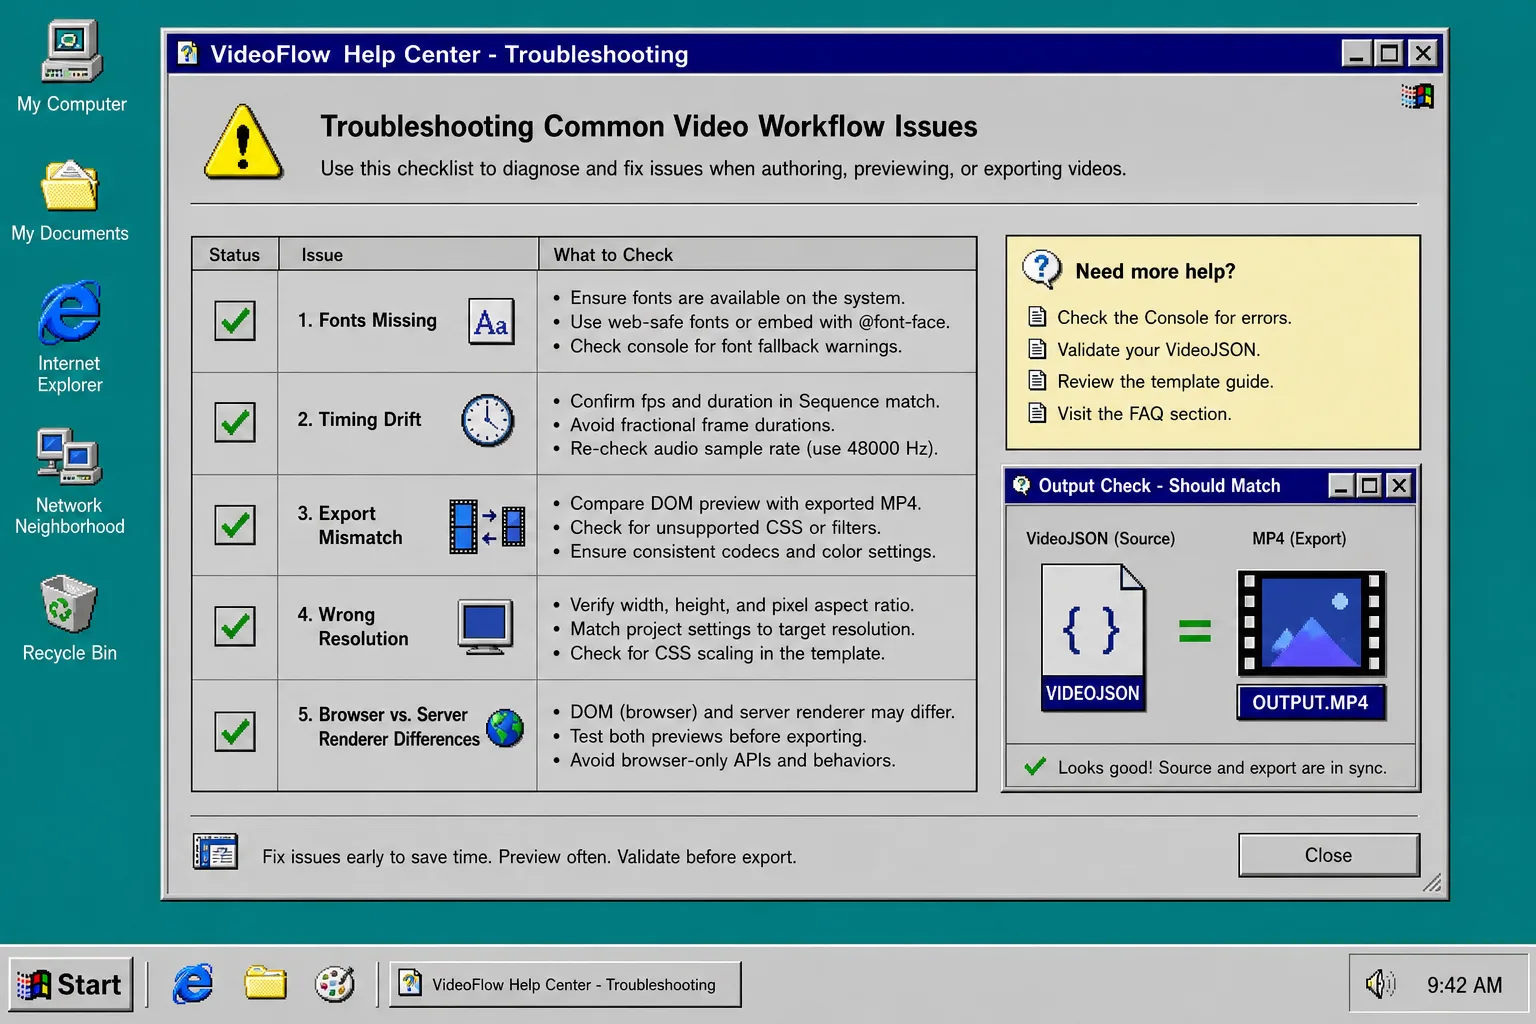
When a reviewable workflow breaks, it usually breaks for a small reason. Check these first:
- Fonts missing: load the font before preview and export, or use a system font until the pipeline is stable.
- Timing drift: make sure your fps, duration, and frame math agree before you blame the renderer.
- Export mismatch: compare the DOM preview with the MP4 output and look for browser-only CSS or unsupported assumptions.
- Wrong resolution: confirm the project width and height match the target output before you ask the editor to help.
- Browser and server differences: test both renderers if the draft uses features that might behave differently across environments.
If the preview and export disagree, do not ship the file and hope it fixes itself later. Fix the source scene instead.
Recap
The shortest version of the workflow is this:
- Write the scene in TypeScript.
- Compile it to VideoJSON.
- Preview it in the DOM.
- Export it with the renderer that fits the job.
- Add the editor only when a human really needs it.
If you want to try the same approach, start with the VideoFlow docs and the playground. The product home at videoflow.dev is the cleanest place to begin.